Registering stations
[System setting – Registering stations]
Register all the stations connected in the system, and set the area, station no. and station name to them.
1 Click Registering stations in the table of contents.
2 Set the area, station no. and station name to the target stations.
*Setting the station no. is required to register the station to the system.
*For a cell with the ![]() mark, select the target one from the
mark, select the target one from the
*Do not set stations with the same number in an area.
NOTE:
The name of a master station displayed on its monitor in standby mode is up to 16 alphanumeric characters.
Other buttons
•Connection check
Click to confirm the connected units.
Connected: yellowish green
Not connected: gray
Station type error: pink
•[Collective setting]:
The following buttons are used to make the settings to all the checked stations at one time.
*Pressing each button opens another window.
NOTE:
Be sure to check all the target stations before using these buttons.
•Area
Click to set the same area number to all the checked stations.
•Station number
Click to assign sequential numbers to all the checked stations from top to bottom. The number you enter will be set as the first number and will be assigned to the top station of the ones checked. Other checked stations will be numbered sequentially.
•Station name
Click to assign the same station name and sequential numbers to all the checked stations from the top down. Enter a name only.
•Station type
(Not available in a network direct system.)
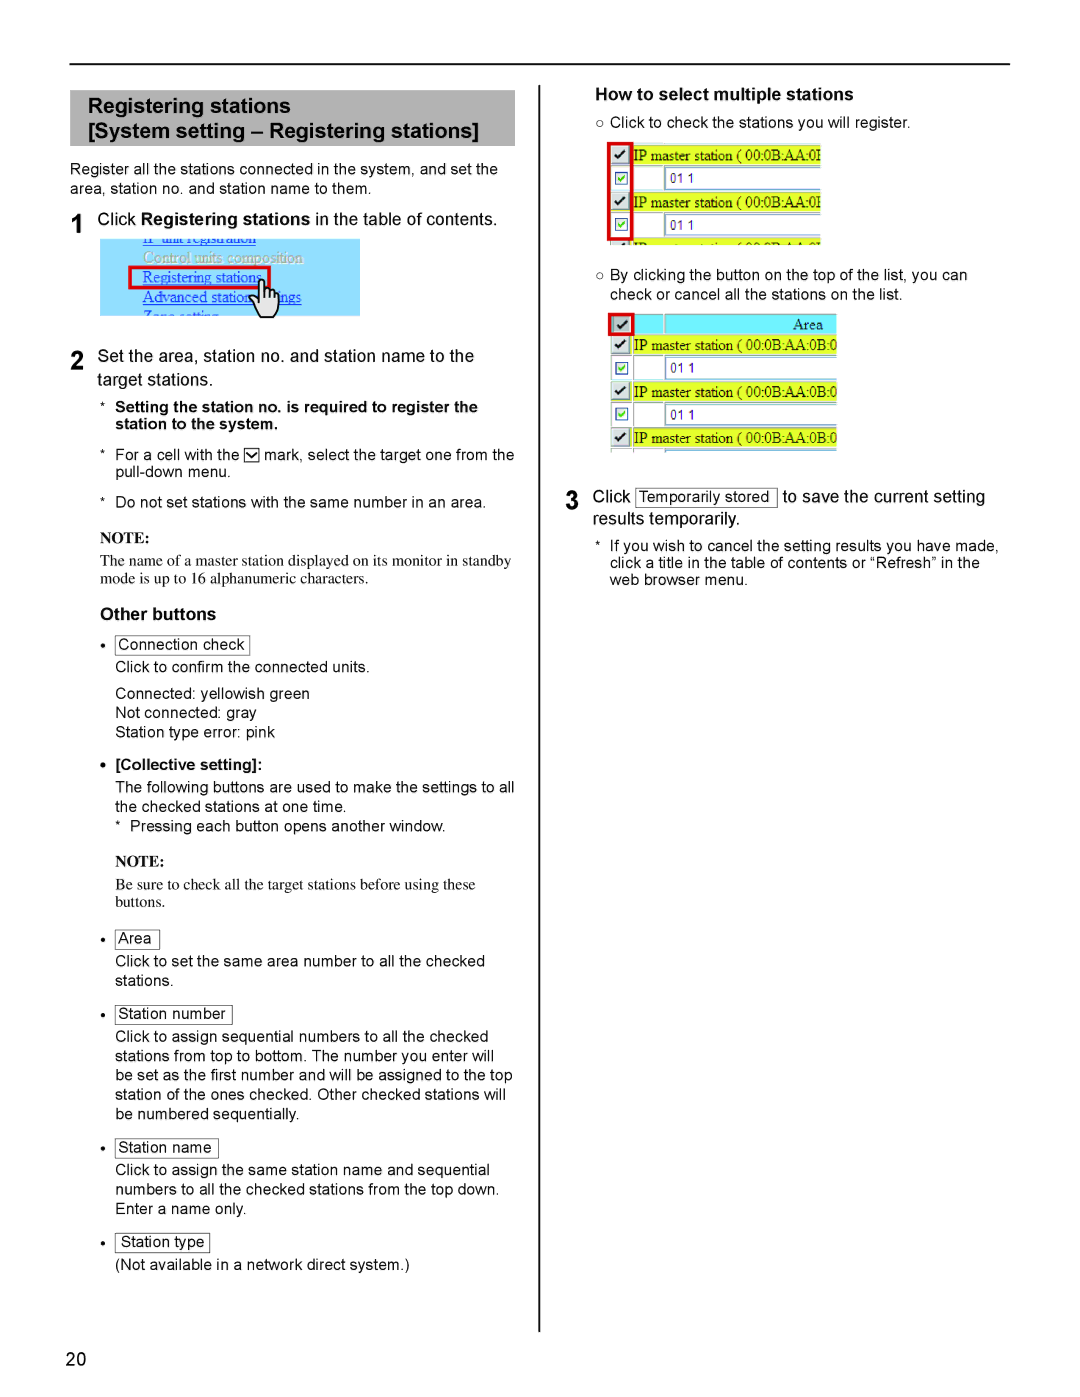
How to select multiple stations
○Click to check the stations you will register.
○By clicking the button on the top of the list, you can check or cancel all the stations on the list.
3 Click Temporarily stored to save the current setting results temporarily.
*If you wish to cancel the setting results you have made, click a title in the table of contents or “Refresh” in the web browser menu.
20
