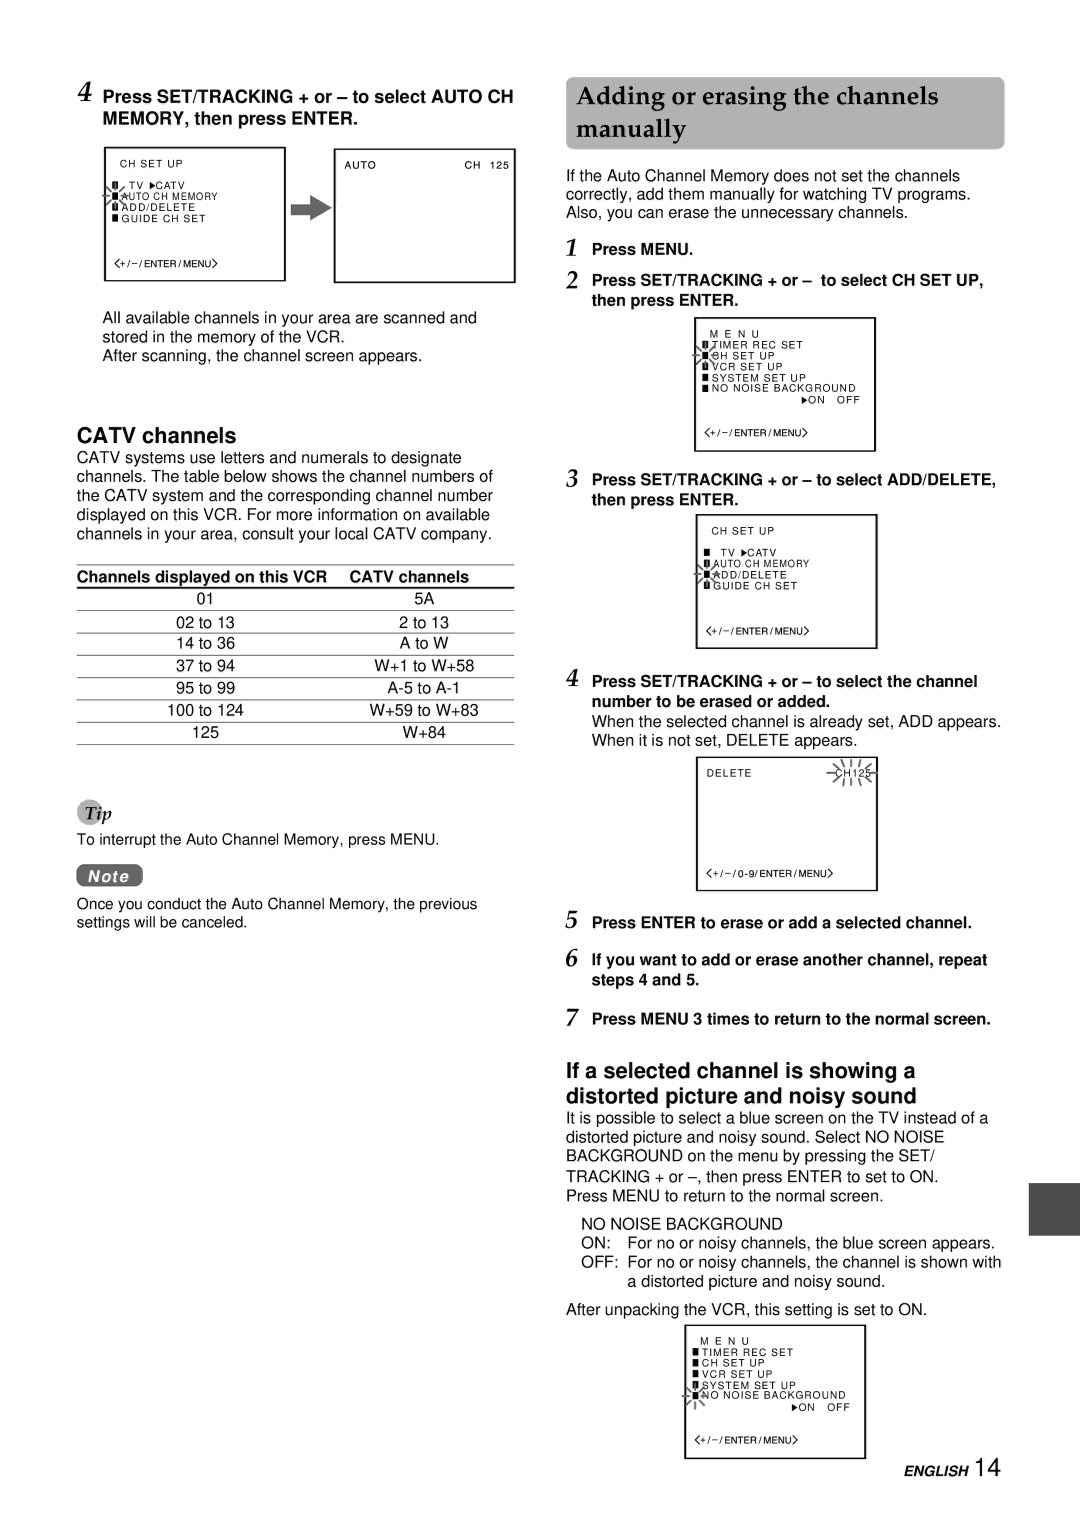
4 Press SET/TRACKING + or – to select AUTO CH MEMORY, then press ENTER.
CH SET UP
TV ![]() CATV
CATV
![]() AUTO CH MEMORY
AUTO CH MEMORY
![]() ADD/DELETE
ADD/DELETE
![]() GUIDE CH SET
GUIDE CH SET
All available channels in your area are scanned and stored in the memory of the VCR.
After scanning, the channel screen appears.
CATV channels
CATV systems use letters and numerals to designate channels. The table below shows the channel numbers of the CATV system and the corresponding channel number displayed on this VCR. For more information on available channels in your area, consult your local CATV company.
Channels displayed on this VCR | CATV channels | |
01 |
| 5A |
|
|
|
02 to | 13 | 2 to 13 |
14 to | 36 | A to W |
|
|
|
37 to | 94 | W+1 to W+58 |
|
|
|
95 to | 99 | |
|
|
|
100 to | 124 | W+59 to W+83 |
|
| |
125 | W+84 | |
|
|
|
Tip
To interrupt the Auto Channel Memory, press MENU.
Note
Once you conduct the Auto Channel Memory, the previous settings will be canceled.
Adding or erasing the channels manually
If the Auto Channel Memory does not set the channels correctly, add them manually for watching TV programs. Also, you can erase the unnecessary channels.
1 Press MENU.
2 Press SET/TRACKING + or – to select CH SET UP, then press ENTER.
M E N U
![]() TIMER REC SET
TIMER REC SET
![]() CH SET UP
CH SET UP
![]() VCR SET UP
VCR SET UP
![]() SYSTEM SET UP
SYSTEM SET UP
![]() NO NOISE BACKGROUND
NO NOISE BACKGROUND
![]() ON OFF
ON OFF
3 Press SET/TRACKING + or – to select ADD/DELETE, then press ENTER.
CH SET UP
TV ![]() CATV
CATV
![]() AUTO CH MEMORY
AUTO CH MEMORY
![]() ADD/DELETE
ADD/DELETE
![]() GUIDE CH SET
GUIDE CH SET
4 Press SET/TRACKING + or – to select the channel number to be erased or added.
When the selected channel is already set, ADD appears. When it is not set, DELETE appears.
D E L E T EC H 1 2 5
5 Press ENTER to erase or add a selected channel.
6 If you want to add or erase another channel, repeat steps 4 and 5.
7 Press MENU 3 times to return to the normal screen.
If a selected channel is showing a distorted picture and noisy sound
It is possible to select a blue screen on the TV instead of a distorted picture and noisy sound. Select NO NOISE BACKGROUND on the menu by pressing the SET/ TRACKING + or
NO NOISE BACKGROUND
ON: For no or noisy channels, the blue screen appears.
OFF: For no or noisy channels, the channel is shown with a distorted picture and noisy sound.
After unpacking the VCR, this setting is set to ON.
M E N U
![]() TIMER REC SET
TIMER REC SET
![]() CH SET UP
CH SET UP
![]() VCR SET UP
VCR SET UP
![]() SYSTEM SET UP
SYSTEM SET UP
![]() NO NOISE BACKGROUND
NO NOISE BACKGROUND
![]() ON OFF
ON OFF
ENGLISH 14