Using the Avaya Remote Supervisor Adapter
ASM control
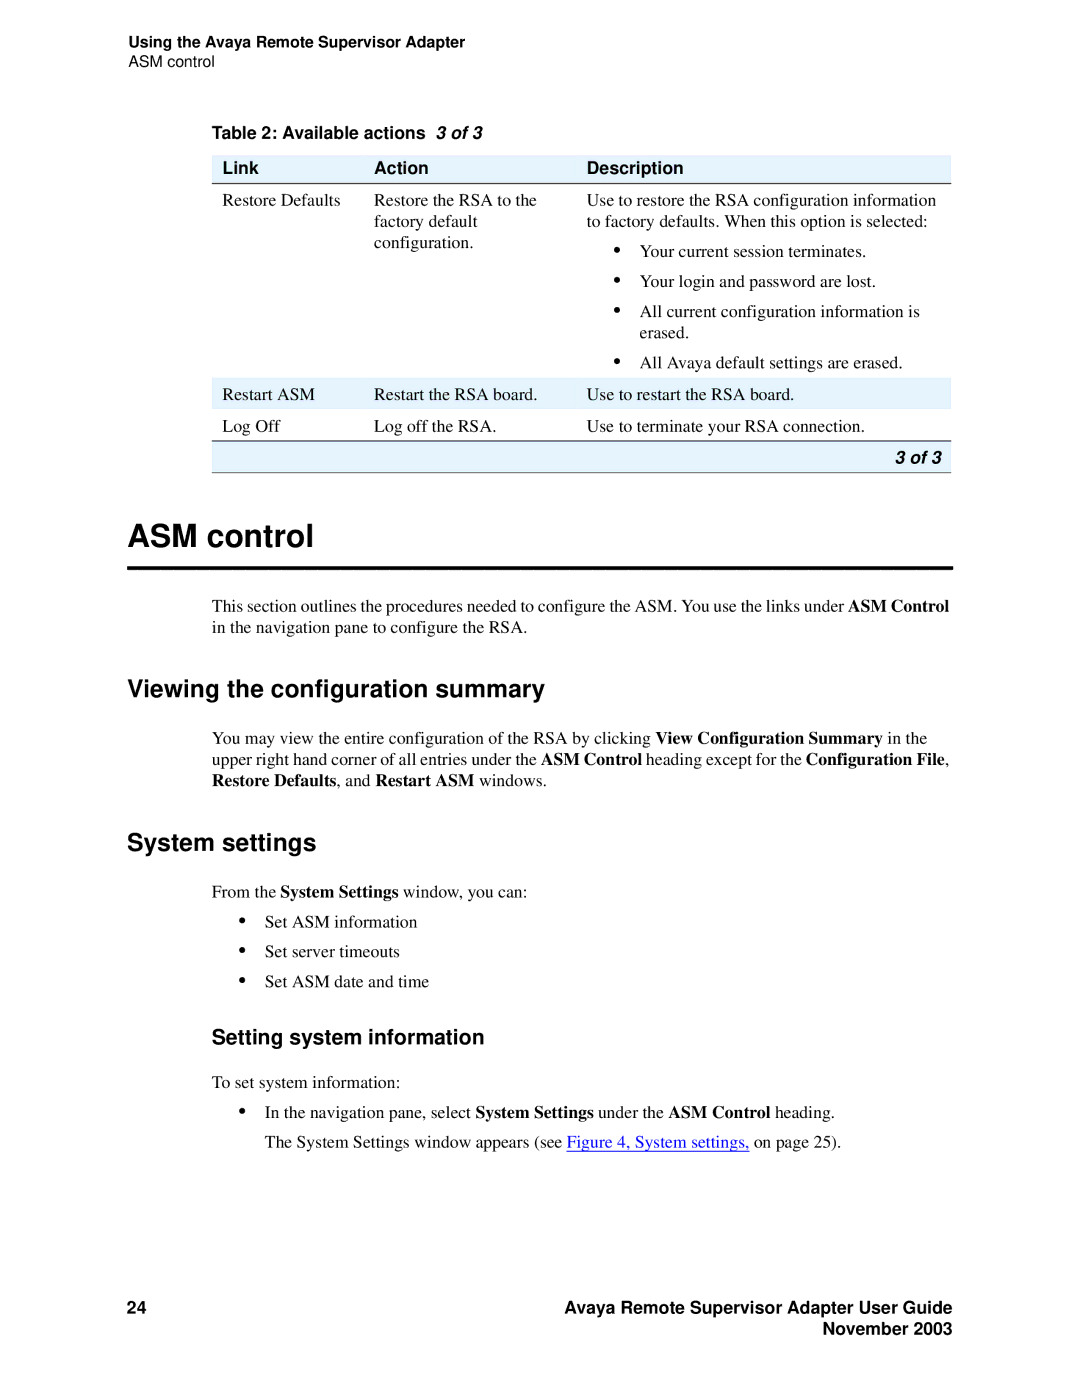
Table 2: Available actions 3 of 3
Link | Action | Description |
|
|
|
Restore Defaults | Restore the RSA to the |
| factory default |
| configuration. |
Use to restore the RSA configuration information to factory defaults. When this option is selected:
•Your current session terminates.
•Your login and password are lost.
•All current configuration information is erased.
|
| • All Avaya default settings are erased. |
Restart ASM | Restart the RSA board. | Use to restart the RSA board. |
|
|
|
Log Off | Log off the RSA. | Use to terminate your RSA connection. |
|
|
|
|
| 3 of 3 |
|
|
|
ASM control
This section outlines the procedures needed to configure the ASM. You use the links under ASM Control in the navigation pane to configure the RSA.
Viewing the configuration summary
You may view the entire configuration of the RSA by clicking View Configuration Summary in the upper right hand corner of all entries under the ASM Control heading except for the Configuration File, Restore Defaults, and Restart ASM windows.
System settings
From the System Settings window, you can:
•Set ASM information
•Set server timeouts
•Set ASM date and time
Setting system information
To set system information:
•In the navigation pane, select System Settings under the ASM Control heading. The System Settings window appears (see Figure 4, System settings, on page 25).
24 | Avaya Remote Supervisor Adapter User Guide |
| November 2003 |