Using the Avaya Remote Supervisor Adapter
Login profiles
2Click not used associated with an unused login profile link.
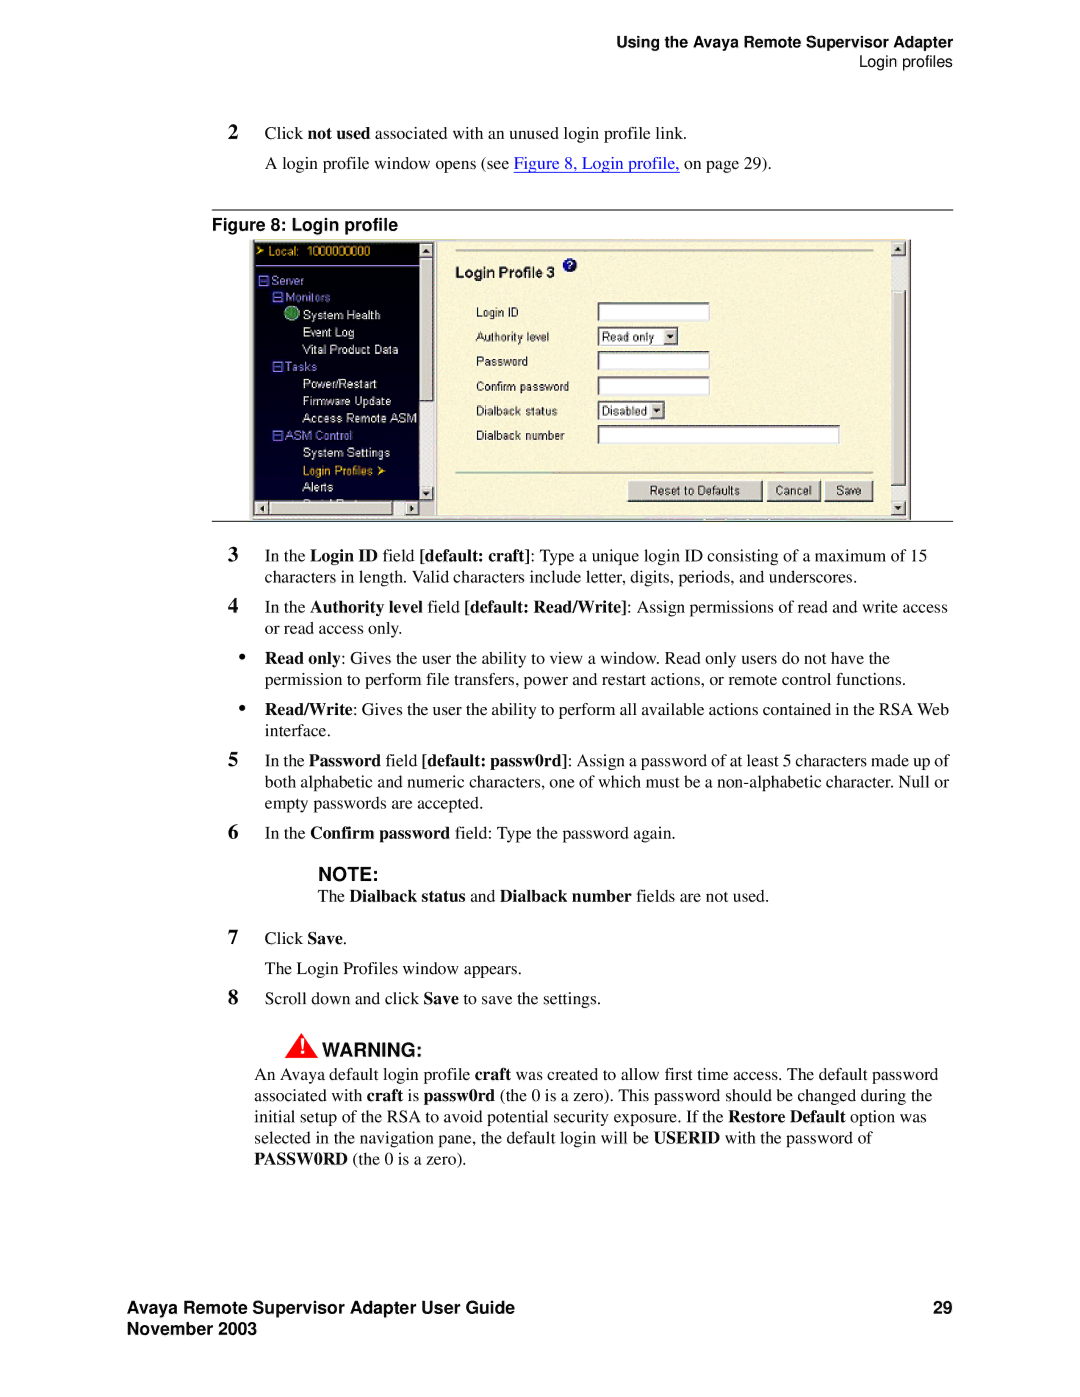
A login profile window opens (see Figure 8, Login profile, on page 29).
Figure 8: Login profile
3In the Login ID field [default: craft]: Type a unique login ID consisting of a maximum of 15 characters in length. Valid characters include letter, digits, periods, and underscores.
4In the Authority level field [default: Read/Write]: Assign permissions of read and write access or read access only.
•Read only: Gives the user the ability to view a window. Read only users do not have the permission to perform file transfers, power and restart actions, or remote control functions.
•Read/Write: Gives the user the ability to perform all available actions contained in the RSA Web interface.
5In the Password field [default: passw0rd]: Assign a password of at least 5 characters made up of both alphabetic and numeric characters, one of which must be a
6In the Confirm password field: Type the password again.
NOTE:
The Dialback status and Dialback number fields are not used.
7Click Save.
The Login Profiles window appears.
8Scroll down and click Save to save the settings.
![]() ! WARNING:
! WARNING:
An Avaya default login profile craft was created to allow first time access. The default password associated with craft is passw0rd (the 0 is a zero). This password should be changed during the initial setup of the RSA to avoid potential security exposure. If the Restore Default option was selected in the navigation pane, the default login will be USERID with the password of PASSW0RD (the 0 is a zero).
Avaya Remote Supervisor Adapter User Guide | 29 |
November 2003 |
|
