Using the Avaya Remote Supervisor Adapter
Alerts
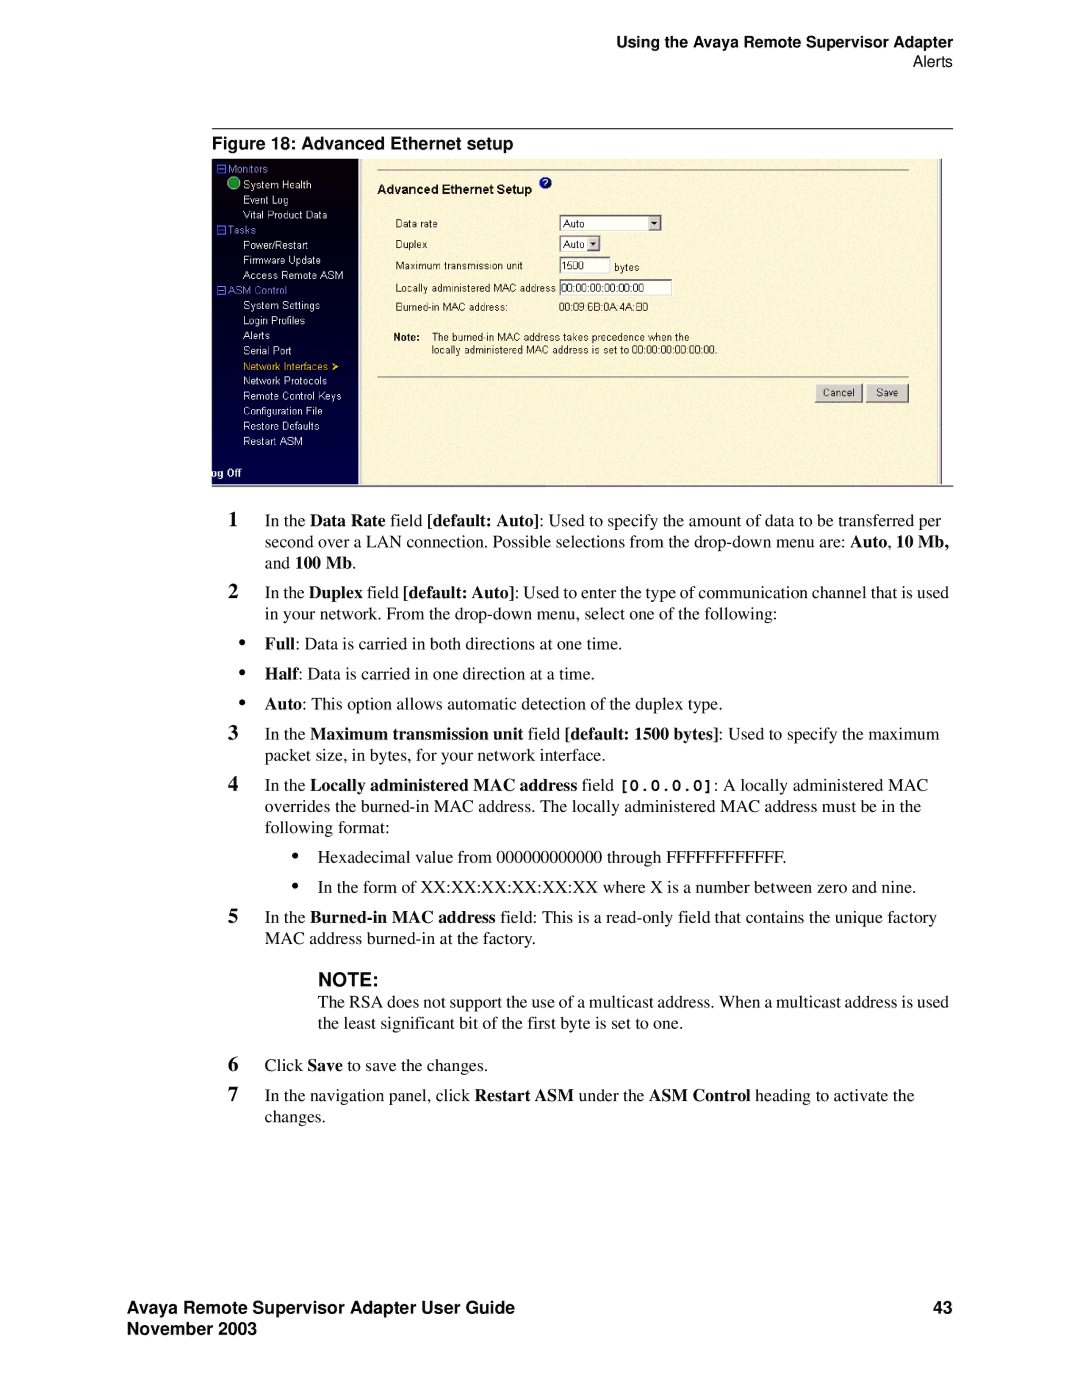
Figure 18: Advanced Ethernet setup
1In the Data Rate field [default: Auto]: Used to specify the amount of data to be transferred per
second over a LAN connection. Possible selections from the
2In the Duplex field [default: Auto]: Used to enter the type of communication channel that is used in your network. From the
•Full: Data is carried in both directions at one time.
•Half: Data is carried in one direction at a time.
•Auto: This option allows automatic detection of the duplex type.
3In the Maximum transmission unit field [default: 1500 bytes]: Used to specify the maximum packet size, in bytes, for your network interface.
4In the Locally administered MAC address field [0.0.0.0]: A locally administered MAC overrides the
•Hexadecimal value from 000000000000 through FFFFFFFFFFFF.
•In the form of XX:XX:XX:XX:XX:XX where X is a number between zero and nine.
5In the
address field: This is a
NOTE:
The RSA does not support the use of a multicast address. When a multicast address is used the least significant bit of the first byte is set to one.
6Click Save to save the changes.
7In the navigation panel, click Restart ASM under the ASM Control heading to activate the changes.
Avaya Remote Supervisor Adapter User Guide | 43 |
November 2003 |
|