Using the Avaya Remote Supervisor Adapter
Login profiles
3Date: Type the current month, day, and year.
4Time: Type the current hour (hh), minutes (mm), and seconds (ss). The hour must be a value from 00 to 23. The minutes and seconds must be a value from 00 to 59.
5GMT offset [default: +0:00]: Type the number of the offset in hours that corresponds to the time zone where the server is located.
6Automatically adjust for daylight saving changes (DST) [default: not checked/Disabled]: Check if the location where the server resides uses DST.
7Scroll to the bottom of the page and click Save.
8The main System Settings window opens. Scroll to the bottom of the screen and click Save.
Login profiles
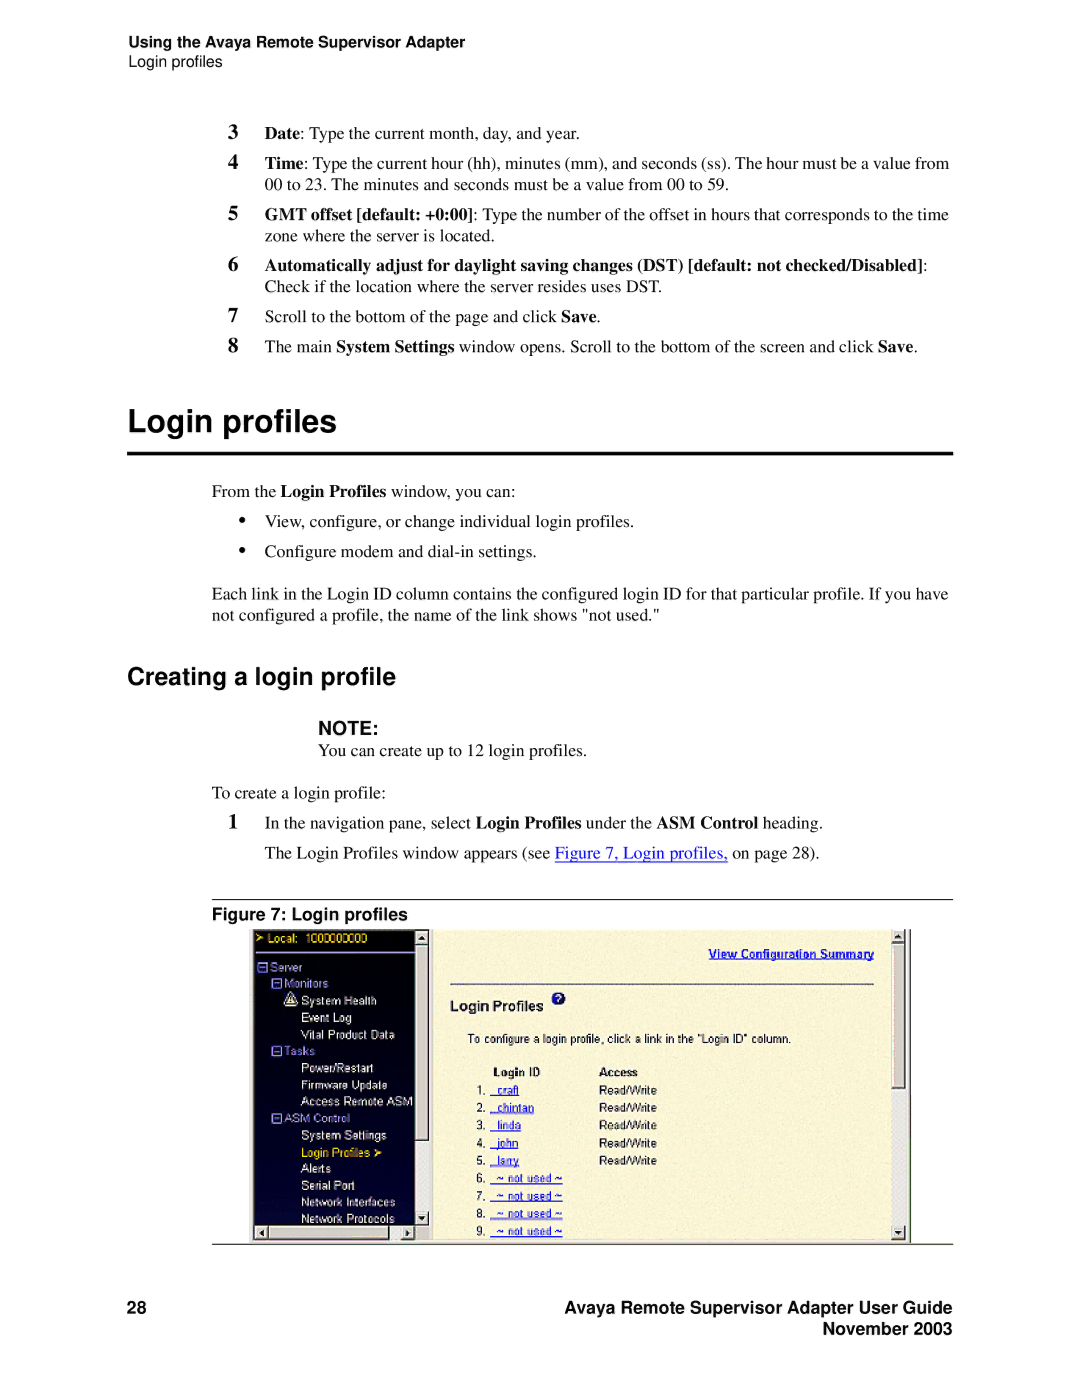
From the Login Profiles window, you can:
•View, configure, or change individual login profiles.
•Configure modem and
Each link in the Login ID column contains the configured login ID for that particular profile. If you have not configured a profile, the name of the link shows "not used."
Creating a login profile
NOTE:
You can create up to 12 login profiles.
To create a login profile:
1In the navigation pane, select Login Profiles under the ASM Control heading. The Login Profiles window appears (see Figure 7, Login profiles, on page 28).
Figure 7: Login profiles
28 | Avaya Remote Supervisor Adapter User Guide |
| November 2003 |