|
|
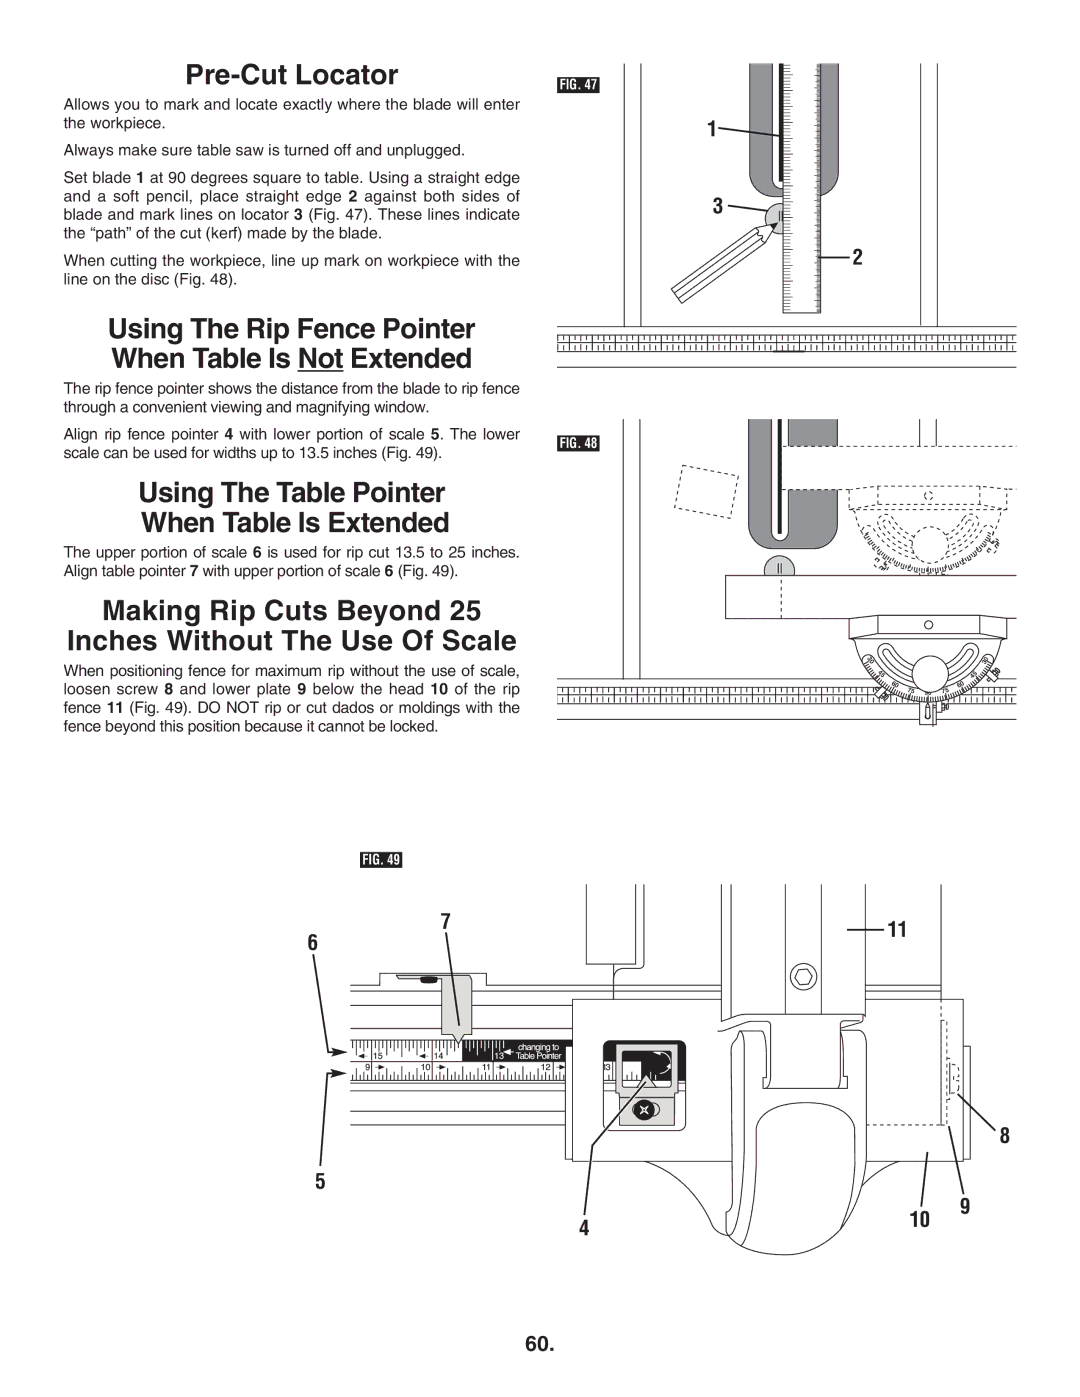
FIG. 47 |
Allows you to mark and locate exactly where the blade will enter the workpiece.
Always make sure table saw is turned off and unplugged.
Set blade 1 at 90 degrees square to table. Using a straight edge and a soft pencil, place straight edge 2 against both sides of blade and mark lines on locator 3 (Fig. 47). These lines indicate the “path” of the cut (kerf) made by the blade.
When cutting the workpiece, line up mark on workpiece with the line on the disc (Fig. 48).
Using The Rip Fence Pointer
When Table Is Not Extended
The rip fence pointer shows the distance from the blade to rip fence through a convenient viewing and magnifying window.
Align rip fence pointer 4 with lower portion of scale 5. The lower
1![]()
![]()
3 ![]()
![]()
2
scale can be used for widths up to 13.5 inches (Fig. 49).
FIG. 48
Using The Table Pointer
When Table Is Extended
The upper portion of scale 6 is used for rip cut 13.5 to 25 inches. Align table pointer 7 with upper portion of scale 6 (Fig. 49).
Making Rip Cuts Beyond 25
Inches Without The Use Of Scale
When positioning fence for maximum rip without the use of scale, loosen screw 8 and lower plate 9 below the head 10 of the rip fence 11 (Fig. 49). DO NOT rip or cut dados or moldings with the fence beyond this position because it cannot be locked.
FIG. 49
30 | 30 |
45 |
|
| 45 |
60 |
|
| |
75 |
| 60 | |
| 90 | 75 |
7
6
5
4
11
10
8
9
60.