Assembly
Changing The Blade
! | WARNING | To prevent personal injury, always disconnect | |
plug from power source before changing blades. | |||
|
|
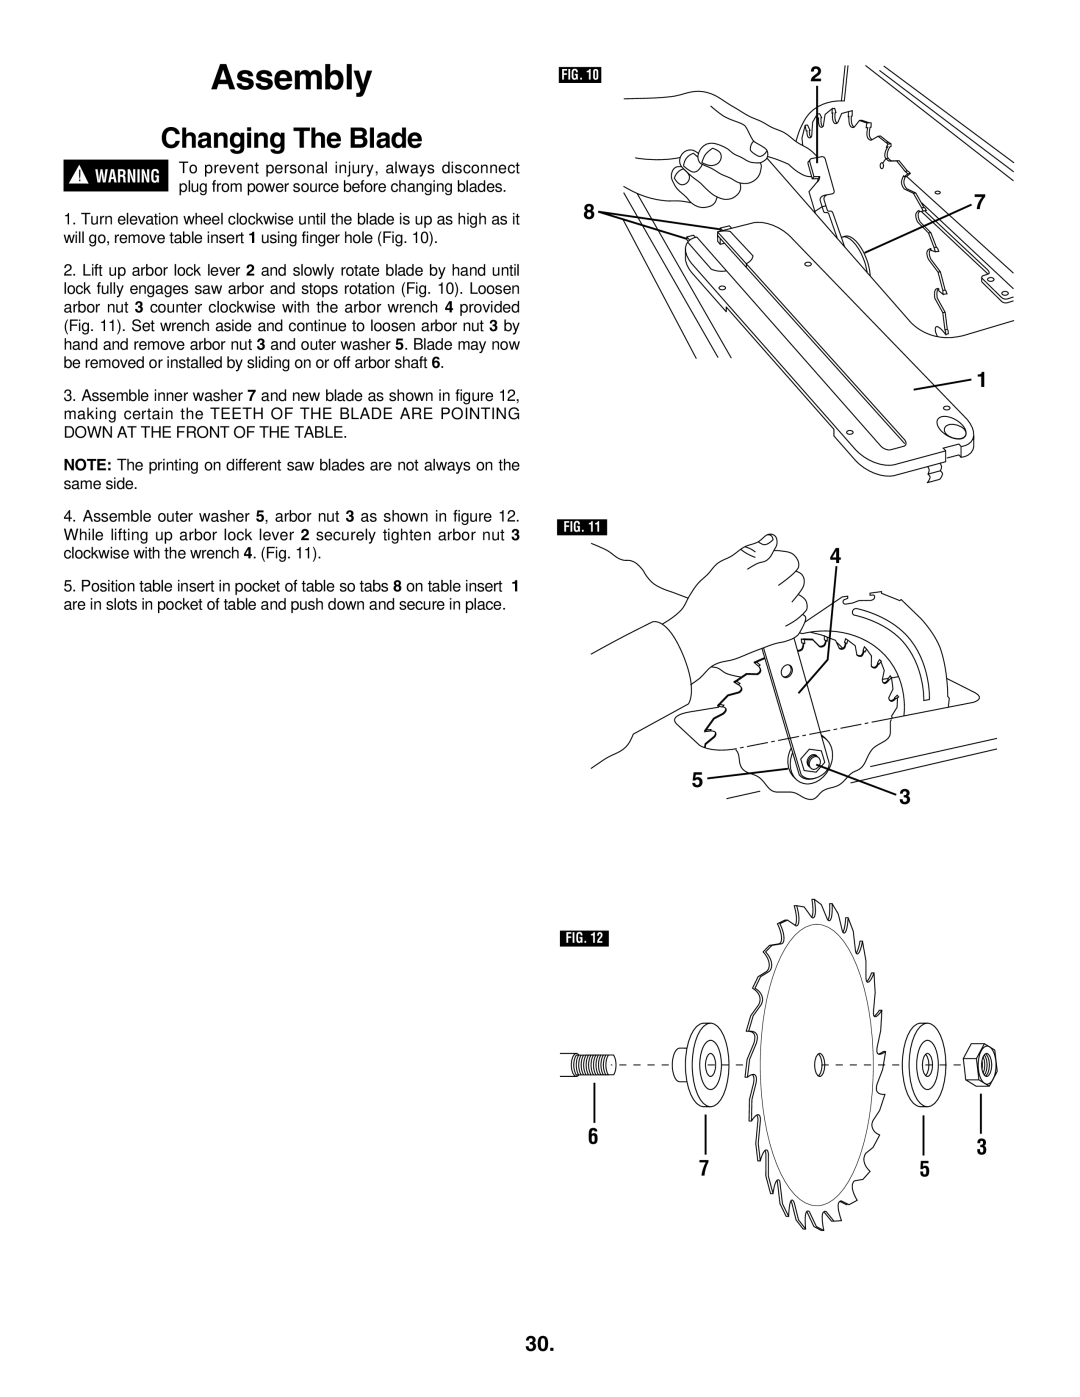
1.Turn elevation wheel clockwise until the blade is up as high as it will go, remove table insert 1 using finger hole (Fig. 10).
2.Lift up arbor lock lever 2 and slowly rotate blade by hand until lock fully engages saw arbor and stops rotation (Fig. 10). Loosen arbor nut 3 counter clockwise with the arbor wrench 4 provided (Fig. 11). Set wrench aside and continue to loosen arbor nut 3 by hand and remove arbor nut 3 and outer washer 5. Blade may now be removed or installed by sliding on or off arbor shaft 6.
3.Assemble inner washer 7 and new blade as shown in figure 12, making certain the TEETH OF THE BLADE ARE POINTING DOWN AT THE FRONT OF THE TABLE.
NOTE: The printing on different saw blades are not always on the same side.
4.Assemble outer washer 5, arbor nut 3 as shown in figure 12. While lifting up arbor lock lever 2 securely tighten arbor nut 3 clockwise with the wrench 4. (Fig. 11).
5.Position table insert in pocket of table so tabs 8 on table insert 1 are in slots in pocket of table and push down and secure in place.
| 2 |
FIG. 10 |
8 | 7 |
|
![]() 1
1
FIG. 11
4
5 ![]()
![]()
3
FIG. 12
6 | 3 |
|
7 | 5 |
30.
