![]() BM 2610027879
BM 2610027879
Assembly
Assembling Dust Collection System
!WARNING To avoid possible injury, disconnect plug from power
source before performing any assembly, adjustments or repairs.
The dust collection system used on this tool is unique because it is not attached to the upper guard. This placement provides superior dust collection for the majority of cuts. When adjusting or removing any dust collection components, be sure the saw is unplugged.
Elbow
The elbow is attached to the top of the dust chute. NOTE: It is recommended that the elbow is always in place before operating the tool – it is required to direct dust and debris away from the operator. The elbow can be rotated in place. The elbow supports the dust bag or can be connected to a vacuum cleaner.
Removing Elbow – For cleaning, the elbow may be removed by pulling up and twisting until it is free of the dust chute. Reattach the elbow by pressing and twisting until it snaps over the chute’s
Attaching and Adjusting the Dust Bag
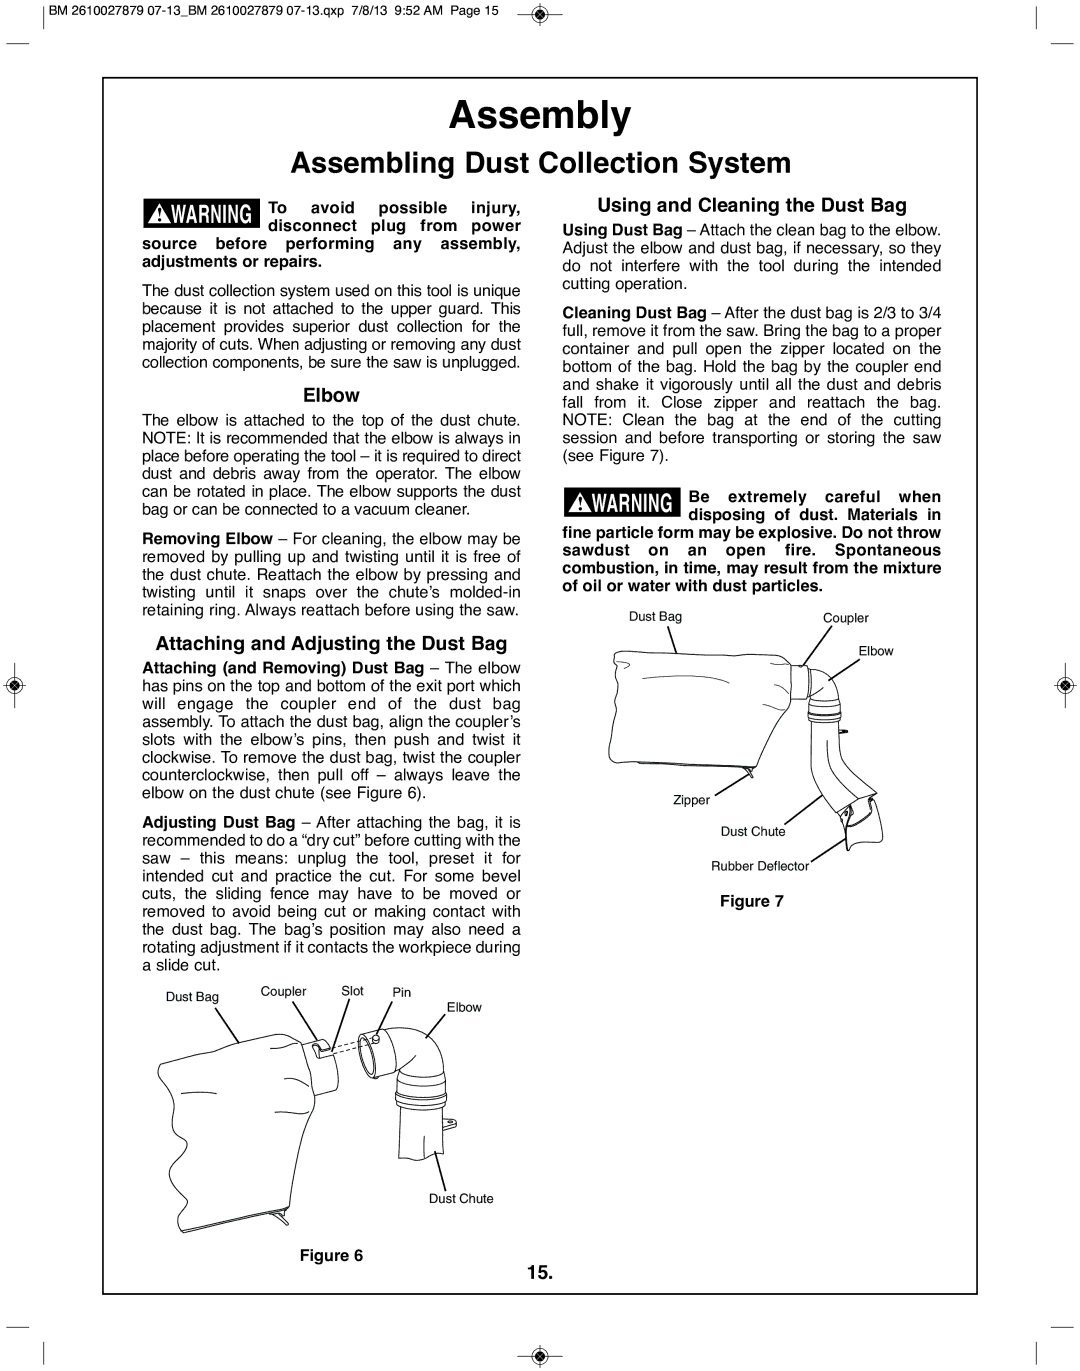
Attaching (and Removing) Dust Bag – The elbow has pins on the top and bottom of the exit port which will engage the coupler end of the dust bag assembly. To attach the dust bag, align the coupler’s slots with the elbow’s pins, then push and twist it clockwise. To remove the dust bag, twist the coupler counterclockwise, then pull off – always leave the elbow on the dust chute (see Figure 6).
Adjusting Dust Bag – After attaching the bag, it is recommended to do a “dry cut” before cutting with the saw – this means: unplug the tool, preset it for intended cut and practice the cut. For some bevel cuts, the sliding fence may have to be moved or removed to avoid being cut or making contact with the dust bag. The bag’s position may also need a rotating adjustment if it contacts the workpiece during a slide cut.
Dust Bag | Coupler | Slot | Pin |
Elbow
Using and Cleaning the Dust Bag
Using Dust Bag – Attach the clean bag to the elbow. Adjust the elbow and dust bag, if necessary, so they do not interfere with the tool during the intended cutting operation.
Cleaning Dust Bag – After the dust bag is 2/3 to 3/4 full, remove it from the saw. Bring the bag to a proper container and pull open the zipper located on the bottom of the bag. Hold the bag by the coupler end and shake it vigorously until all the dust and debris fall from it. Close zipper and reattach the bag. NOTE: Clean the bag at the end of the cutting session and before transporting or storing the saw (see Figure 7).
!WARNING Be extremely careful when disposing of dust. Materials in
fine particle form may be explosive. Do not throw sawdust on an open fire. Spontaneous combustion, in time, may result from the mixture of oil or water with dust particles.
Dust Bag | Coupler |
Elbow
Zipper
Dust Chute
Rubber Deflector
figure 7
Dust Chute
figure 6
15.