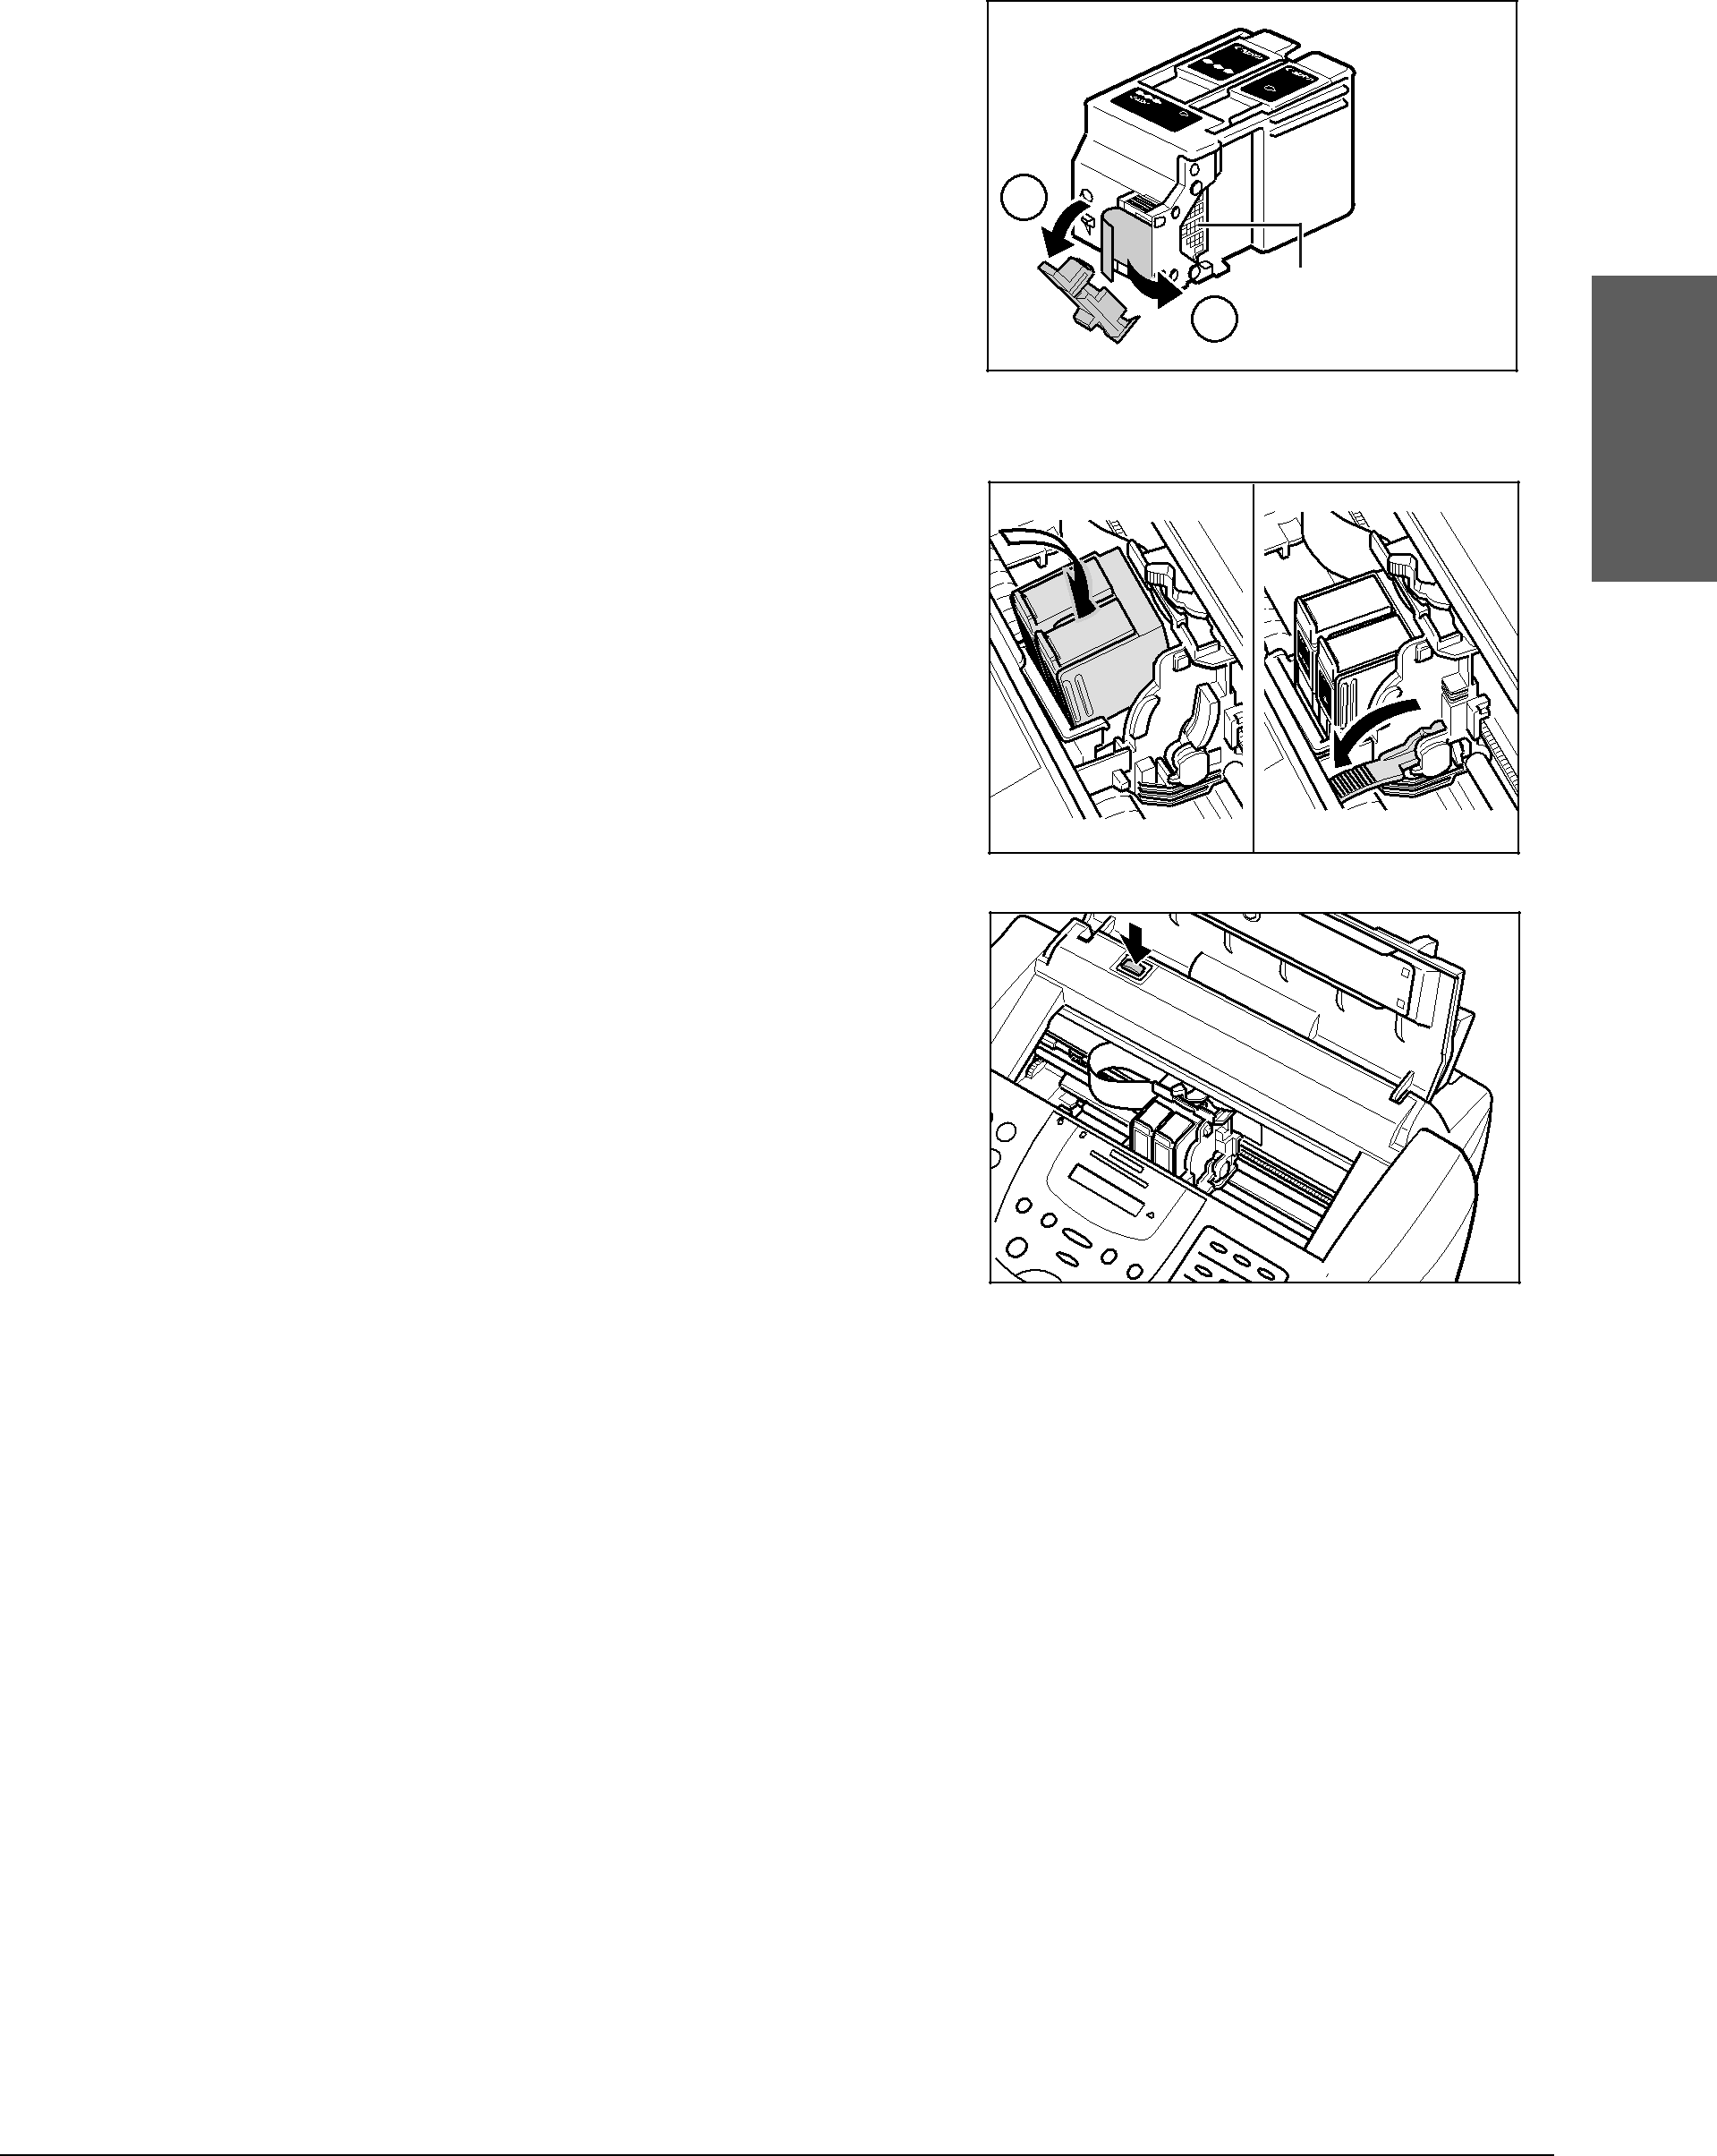
5Remove the BJ cartridge from
its package, then remove the orange | JMaapdaen in | lor21 | C | I | |
|
| C In |
|
|
|
| BC artridk |
|
| ||
| Co | l- | ge |
|
|
|
|
|
| B artrindk | |
protective cap q and tape w. |
|
|
| B | ge |
BC- |
| JMad | lack | 1 | |
| apaen | in |
| ||
| 21e |
|
|
|
|
• Discard the cap and tape. Never attempt |
|
to reattach them to the BJ cartridge print | 1 |
head. |
|
•Install the BJ cartridge immediately after removing the cap and tape.
•Spilled ink can stain any surface; protect yourself and your work area.
DO NOT TOUCH
2 THESE PRECISION COMPONENTS.
Setting Up
6With the label facing outwards, insert the BJ cartridge into the cartridge holder. Lower the blue cartridge lock lever until it locks into position.
7Press C.
•The cartridge holder moves to its home position on the right side of the unit and begins cleaning the BJ cartridge print head. This process takes about 55 seconds.
cDo not try to manually move or stop the cartridge holder since this may damage the unit.
C aIn Brk tr Cid
ar Jd ae p ai n n
C I an Brtk r Ci Bld
8Close the printer cover.
9Close the document tray.*
nIf you need to unplug the unit, wait until it is in standby mode (time and receive mode displayed in the LCD). Otherwise the cartridge holder may not be in its home position causing the BJ cartridge to remain uncapped and dry out.
* Hong Kong, Singapore, and Malaysia only.
Chapter 2 | Setting Up |