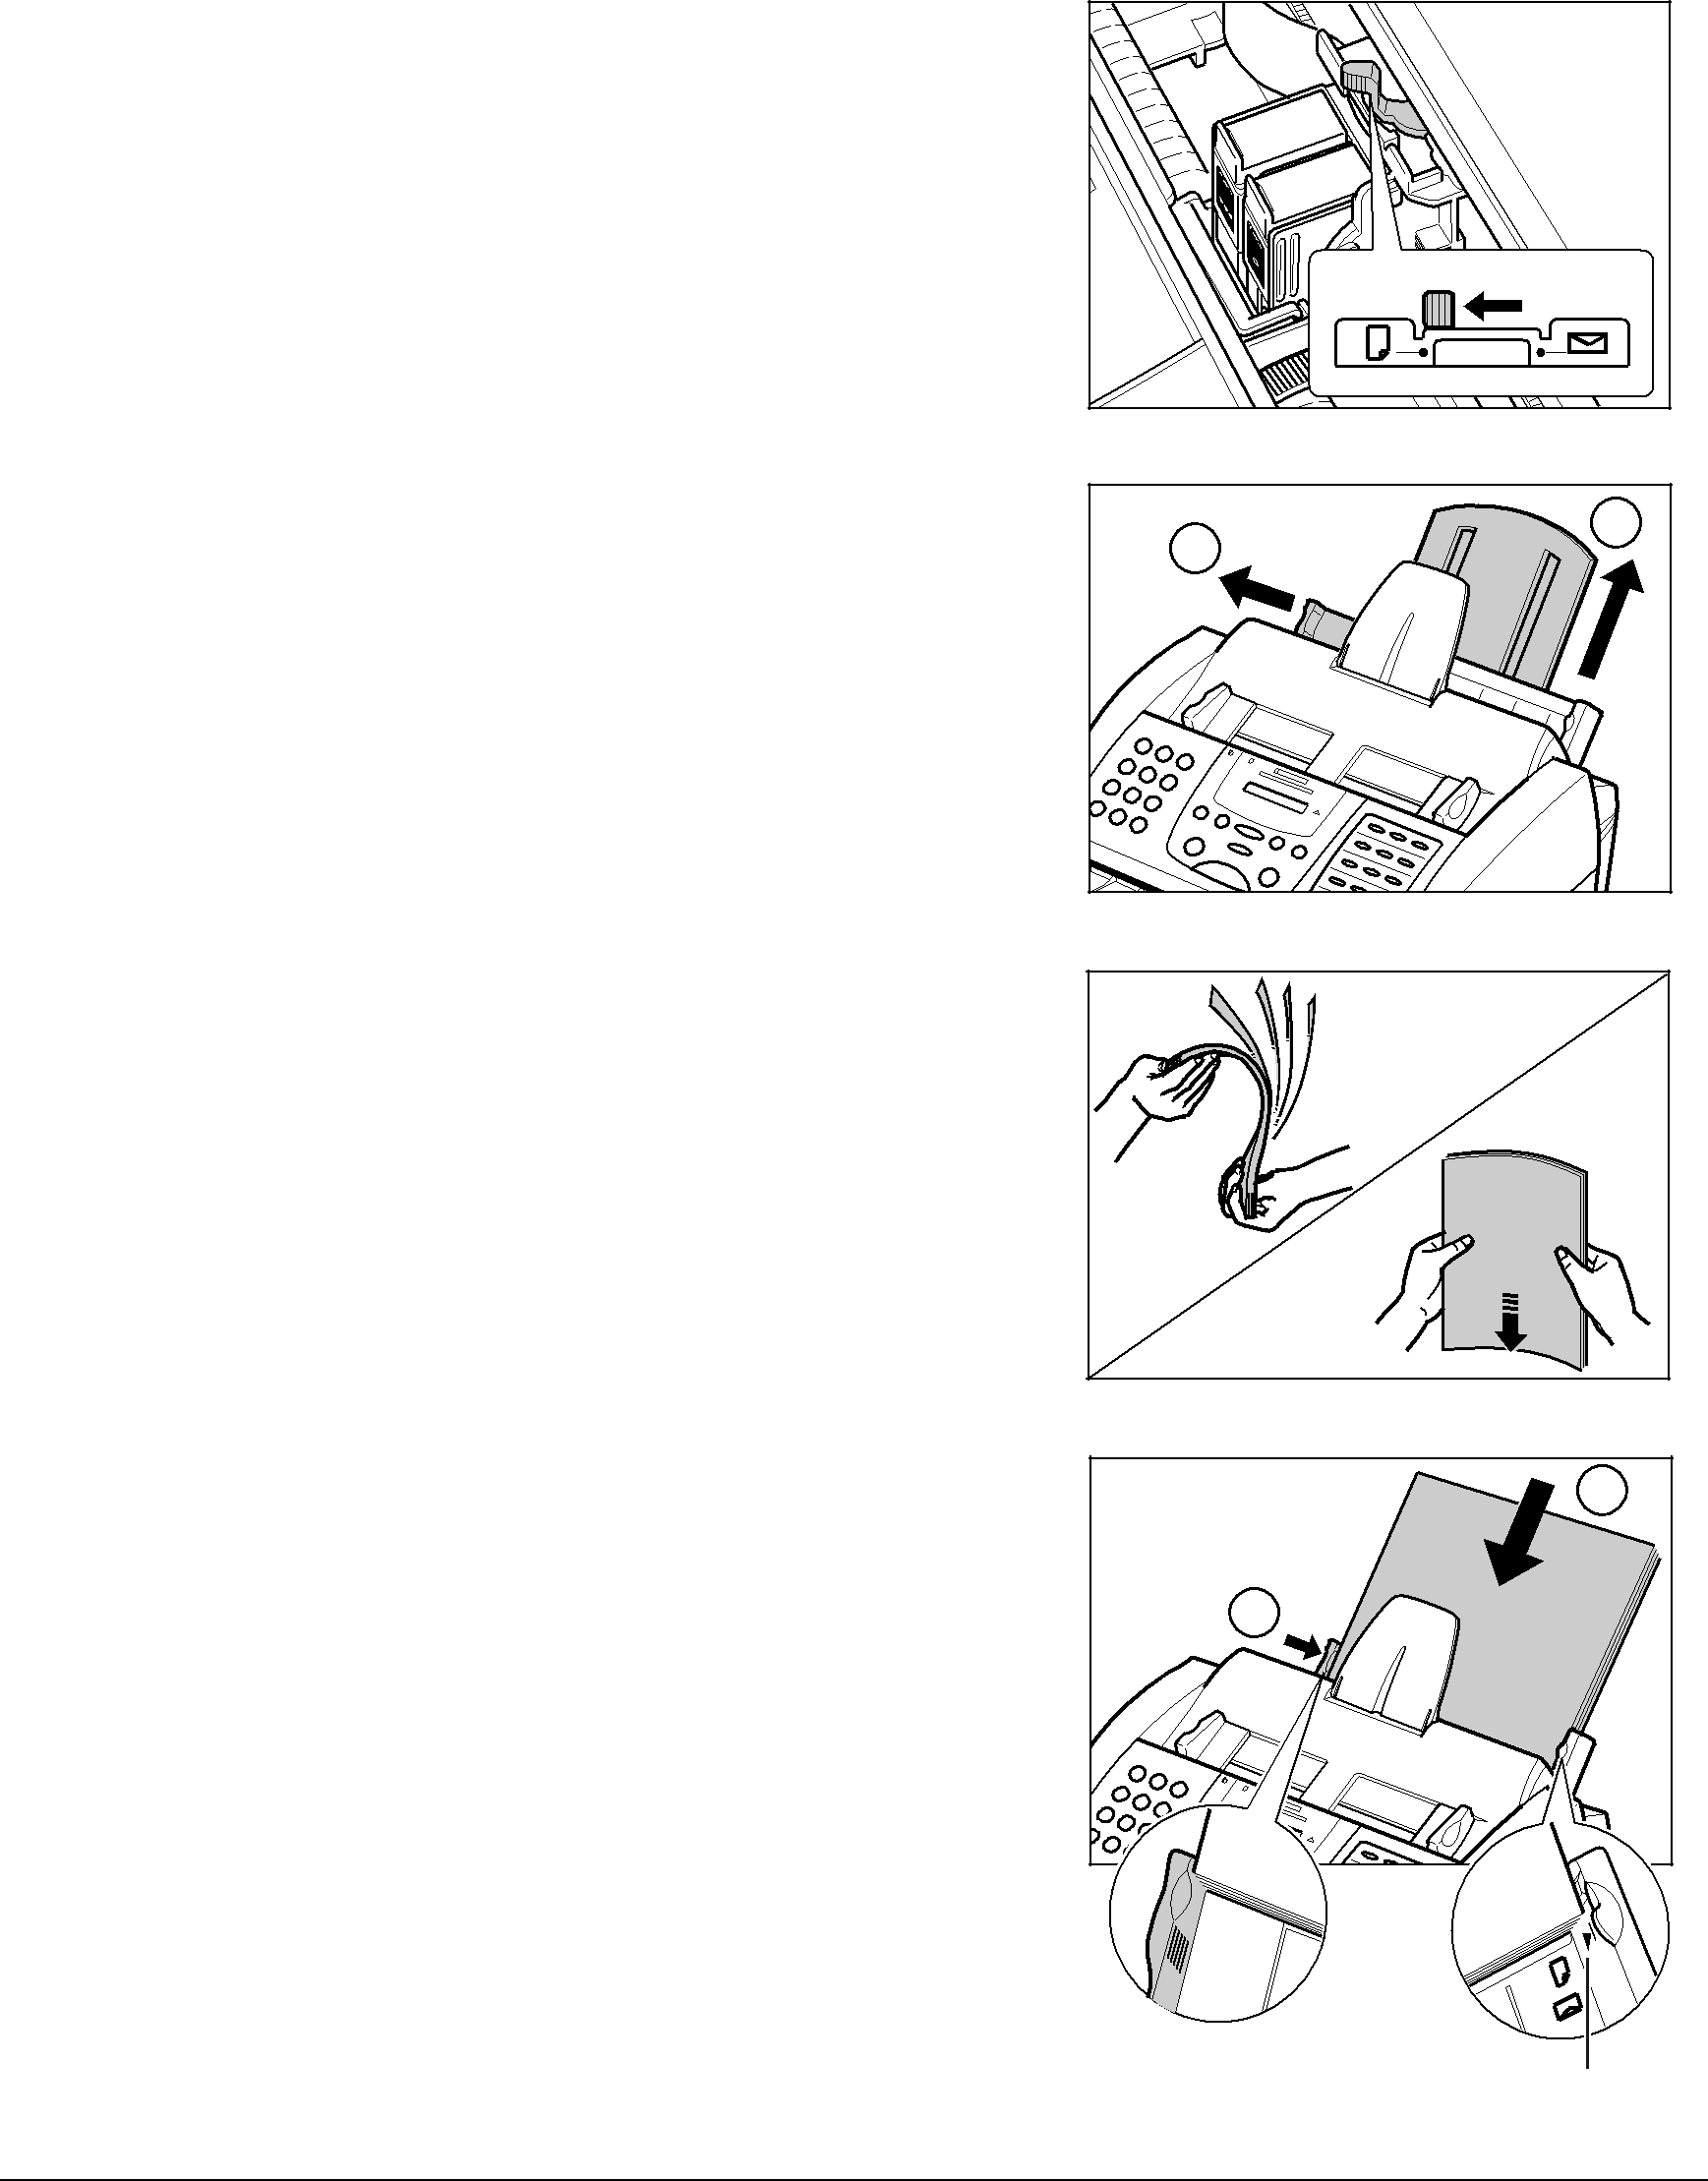
Follow this procedure to load paper in the
1 Make sure the paper thickness lever is set to p (left).
• For details, 1 p. |
|
Do not set the paper thickness lever | Brtk |
cwhile the unit is printing since this | CI |
an | |
r | |
Ci | |
Cld | |
oe | |
2 | |
CI | |
| l1 |
| Mao |
| Jdr |
| ae |
| p |
| ani |
will cause problems. | an |
Brtk | |
r | |
C | |
nn | |
| id |
| Blg |
| |
| Ma2 |
| ac1 |
| Jdk |
| ae |
| pai |
2 Raise the paper rest until it stops q, |
| 1 | |
then move the paper guide to the left to | 2 | ||
| |||
match the size of your paper w. |
|
|
3Prepare a stack of paper by fanning the edge that will feed into the unit first, and then by tapping the stack on a flat surface to even its edges.
4 Insert the stack into the | 1 | |
tray q, and align the right edge of the | ||
| ||
stack with the right side of the multi- | 2 | |
purpose tray. Slide the paper guide | ||
snugly against the left edge of the stack |
| |
w. |
|
•The
•Make sure the stack does not exceed the paper limit mark (P).
The unit is now ready to print. | PAPER LIMIT MARK |
Setting Up | Chapter 2 |