Third Fixed Knife
As an optional extra, the granulator can be equipped with a third fixed knife to increase the efficiency of the granulator.
Open the hopper to install/remove the third fixed knife.
CHS
Removal
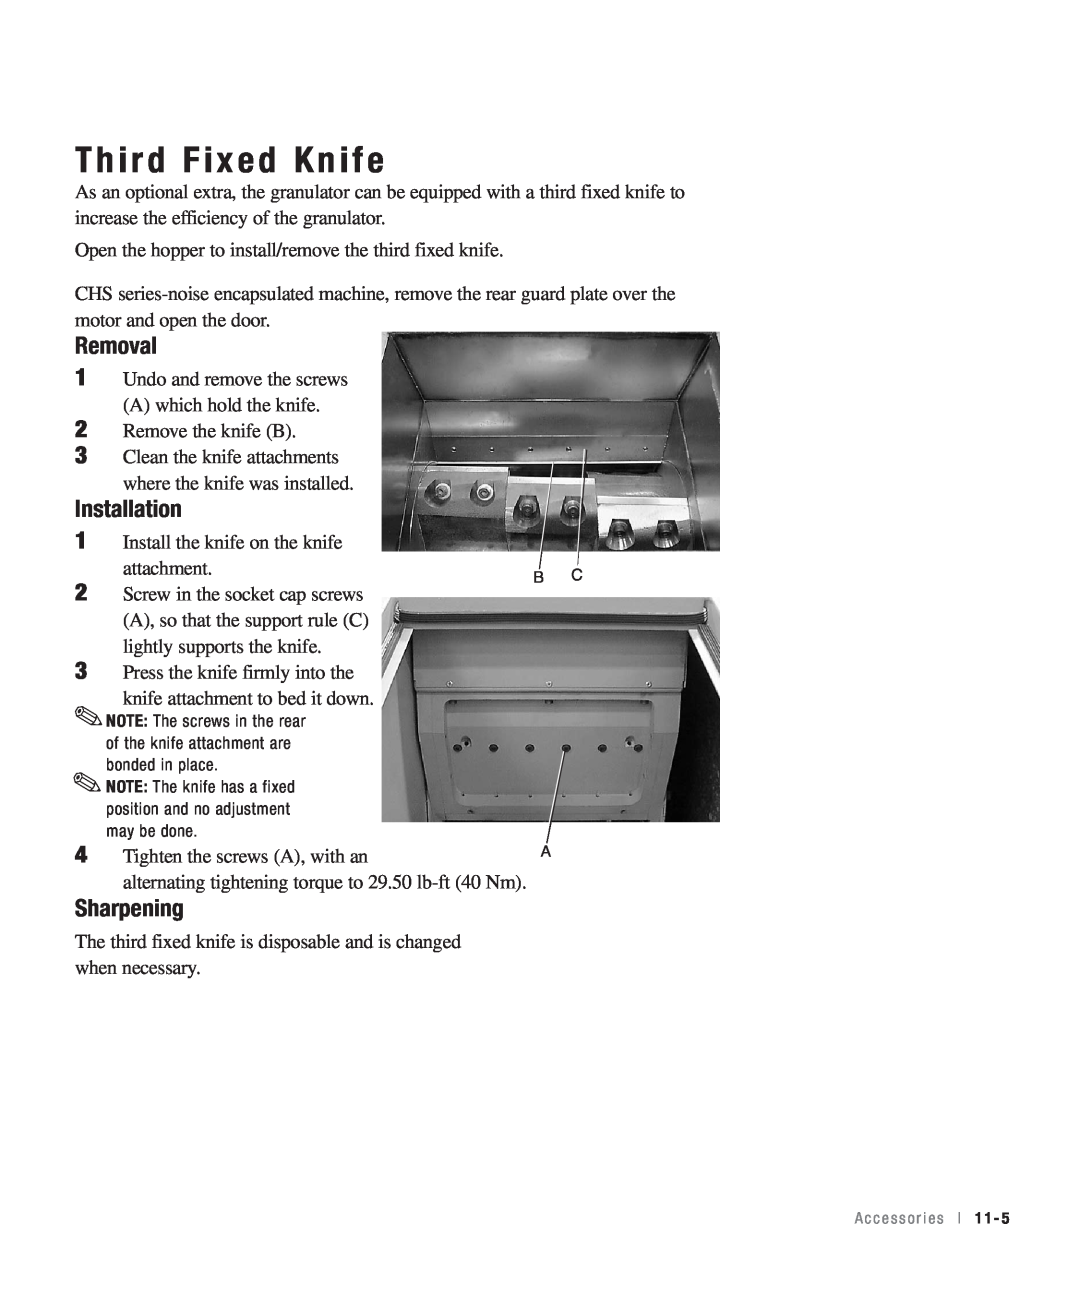
1Undo and remove the screws
(A) which hold the knife.
2Remove the knife (B).
3Clean the knife attachments where the knife was installed.
Installation
1Install the knife on the knife attachment.
2Screw in the socket cap screws (A), so that the support rule (C) lightly supports the knife.
3Press the knife firmly into the
knife attachment to bed it down. ✐NOTE: The screws in the rear
of the knife attachment are bonded in place.
✐NOTE: The knife has a fixed position and no adjustment may be done.
4Tighten the screws (A), with an
alternating tightening torque to 29.50
BC
A
Sharpening
The third fixed knife is disposable and is changed when necessary.
A c c e s s o r i e s l 1 1 - 5