Cutter Pulley/Motor Pulley
The upper panel on the
This makes the cutter and motor pulleys accessible.
Removal
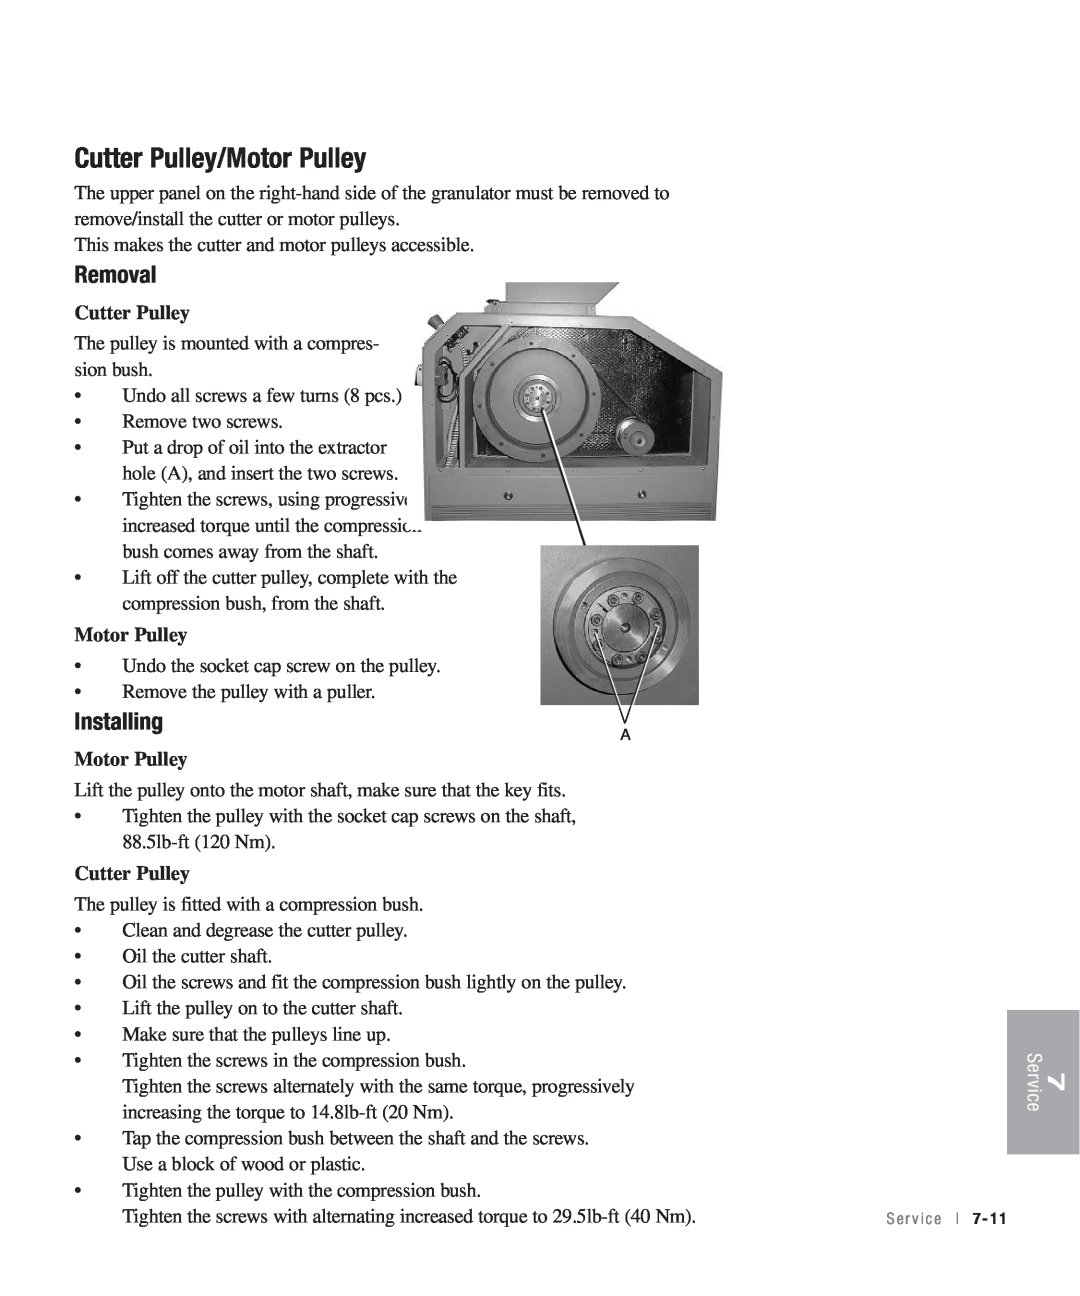
Cutter Pulley
The pulley is mounted with a compres- sion bush.
•Undo all screws a few turns (8 pcs.)
•Remove two screws.
•Put a drop of oil into the extractor hole (A), and insert the two screws.
•Tighten the screws, using progressively increased torque until the compression bush comes away from the shaft.
•Lift off the cutter pulley, complete with the compression bush, from the shaft.
Motor Pulley
•Undo the socket cap screw on the pulley.
•Remove the pulley with a puller.
Installing
A
Motor Pulley
Lift the pulley onto the motor shaft, make sure that the key fits.
•Tighten the pulley with the socket cap screws on the shaft,
Cutter Pulley
The pulley is fitted with a compression bush.
•Clean and degrease the cutter pulley.
•Oil the cutter shaft.
•Oil the screws and fit the compression bush lightly on the pulley.
•Lift the pulley on to the cutter shaft.
•Make sure that the pulleys line up.
•Tighten the screws in the compression bush.
Tighten the screws alternately with the same torque, progressively increasing the torque to
•Tap the compression bush between the shaft and the screws. Use a block of wood or plastic.
•Tighten the pulley with the compression bush.
Tighten the screws with alternating increased torque to
7 Service
S e r v i c e l 7 - 1 1