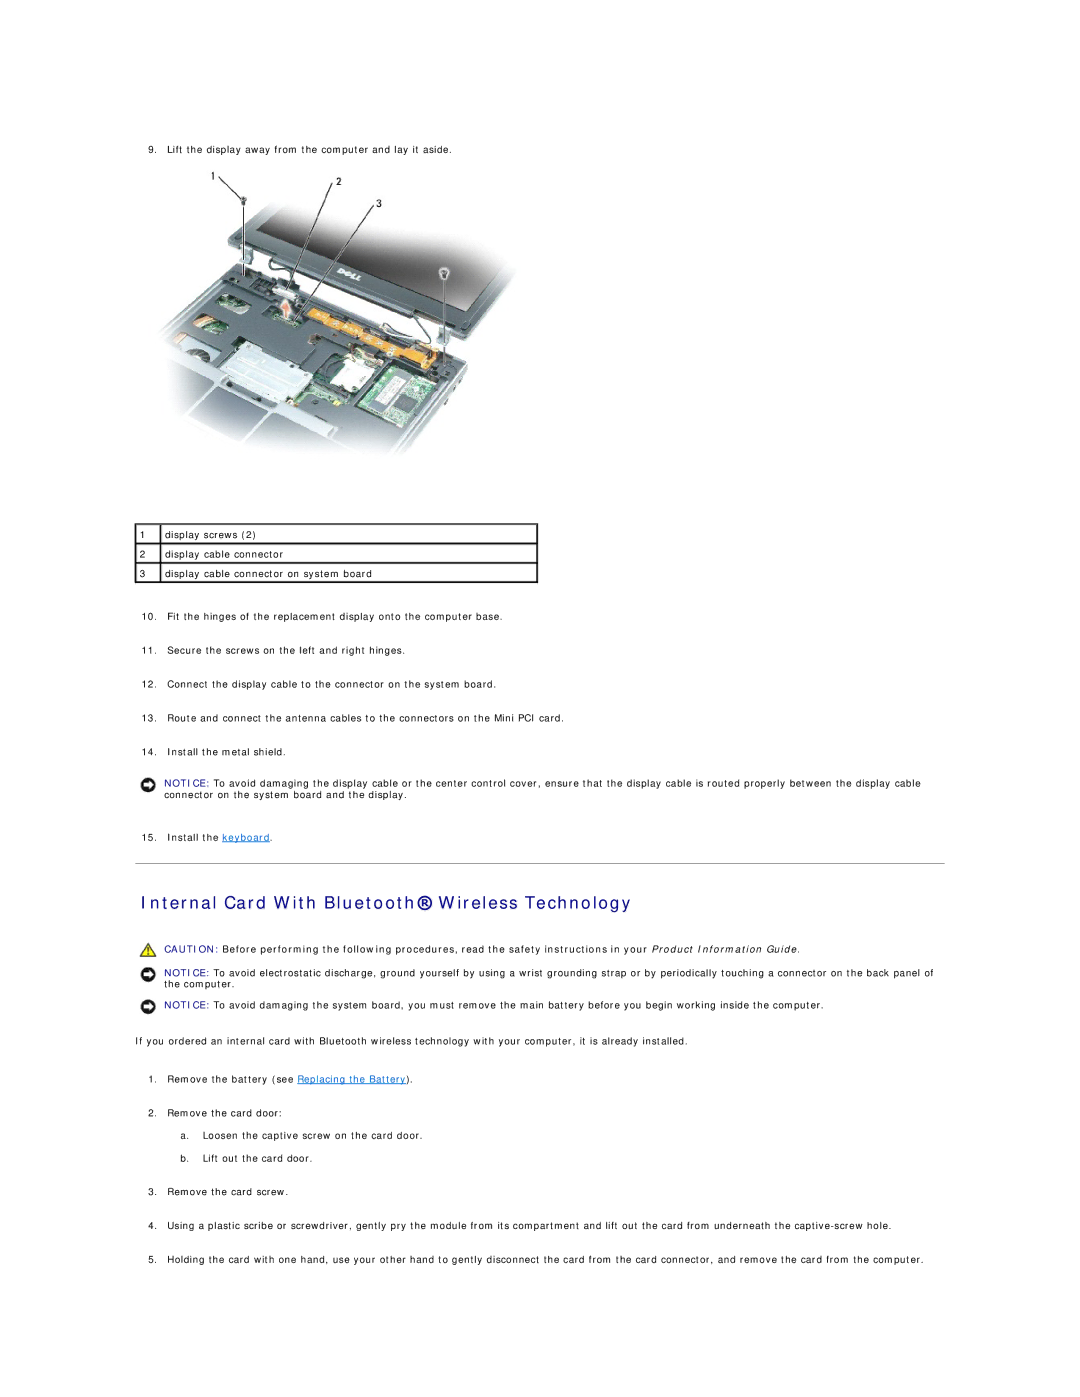
9. Lift the display away from the computer and lay it aside.
1display screws (2)
2display cable connector
3display cable connector on system board
10.Fit the hinges of the replacement display onto the computer base.
11.Secure the screws on the left and right hinges.
12.Connect the display cable to the connector on the system board.
13.Route and connect the antenna cables to the connectors on the Mini PCI card.
14.Install the metal shield.
NOTICE: To avoid damaging the display cable or the center control cover, ensure that the display cable is routed properly between the display cable connector on the system board and the display.
15. Install the keyboard.
Internal Card With Bluetooth® Wireless Technology
CAUTION: Before performing the following procedures, read the safety instructions in your Product Information Guide.
NOTICE: To avoid electrostatic discharge, ground yourself by using a wrist grounding strap or by periodically touching a connector on the back panel of the computer.
NOTICE: To avoid damaging the system board, you must remove the main battery before you begin working inside the computer.
If you ordered an internal card with Bluetooth wireless technology with your computer, it is already installed.
1.Remove the battery (see Replacing the Battery).
2.Remove the card door:
a.Loosen the captive screw on the card door.
b.Lift out the card door.
3.Remove the card screw.
4.Using a plastic scribe or screwdriver, gently pry the module from its compartment and lift out the card from underneath the
5.Holding the card with one hand, use your other hand to gently disconnect the card from the card connector, and remove the card from the computer.