CAUTION: If you remove the hard drive from the computer when the drive is hot, do not touch the metal housing of the hard drive.
CAUTION: Before working inside your computer, follow the safety instructions located in the Product Information Guide.
NOTICE: To prevent data loss, turn off your computer before removing the hard drive. Do not remove the hard drive while the computer is on, in standby mode, or in hibernate mode.
NOTICE: Hard drives are extremely fragile; even a slight bump can damage the drive.
NOTE: Dell does not guarantee compatibility or provide support for hard drives from sources other than Dell.
To replace the hard drive in the hard drive bay:
1.Follow the procedures in "Before You Begin."
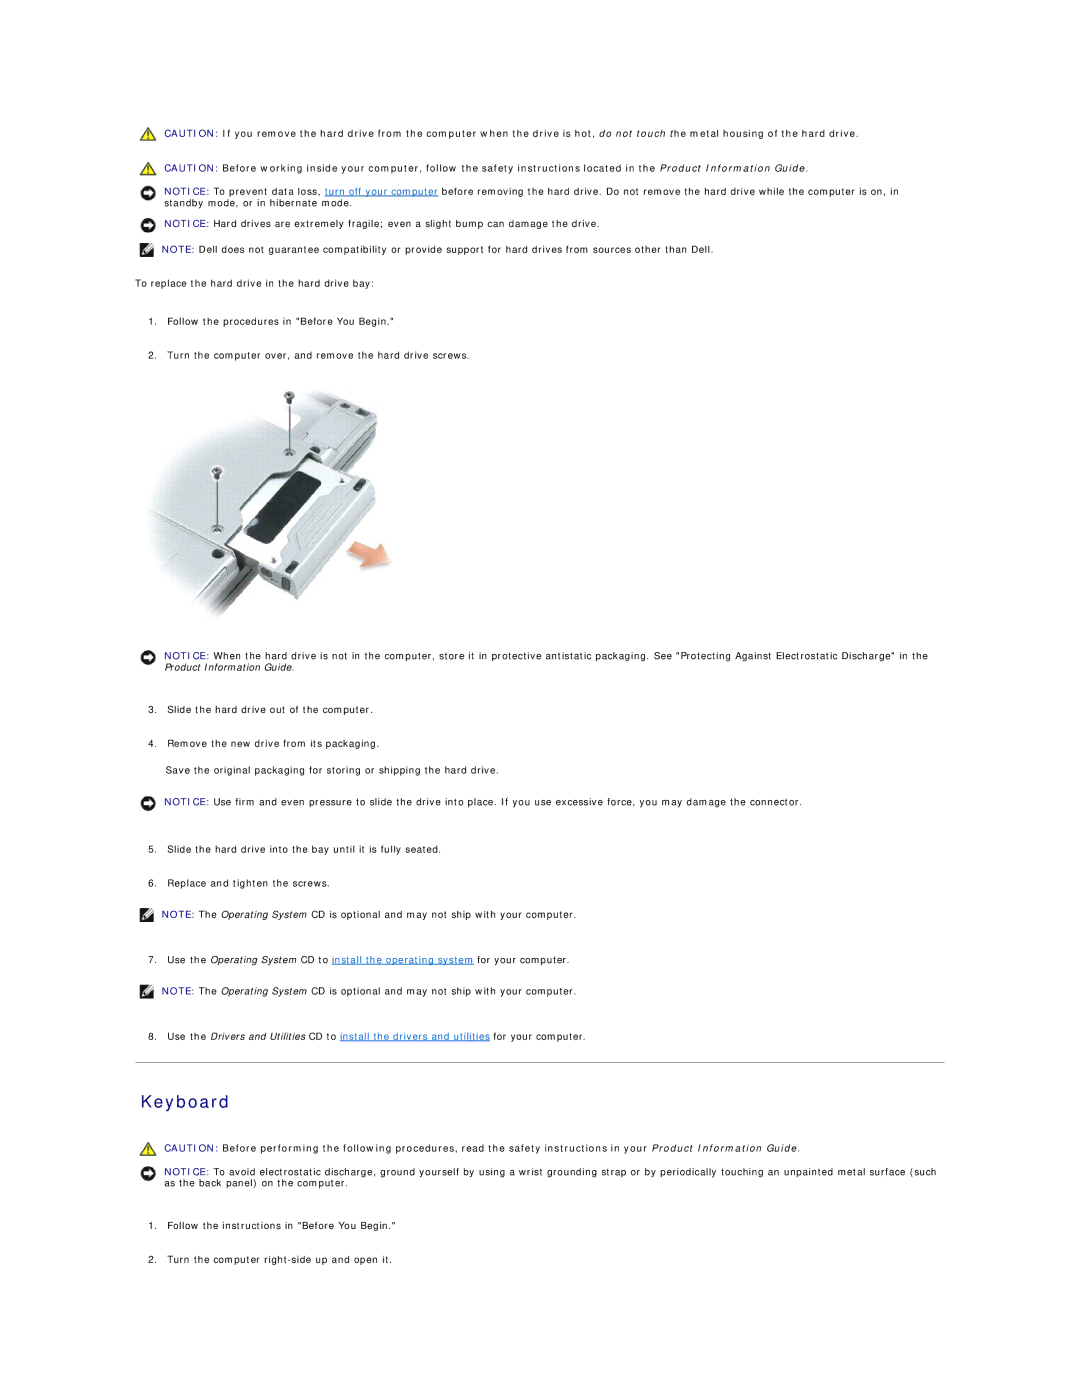
2.Turn the computer over, and remove the hard drive screws.
NOTICE: When the hard drive is not in the computer, store it in protective antistatic packaging. See "Protecting Against Electrostatic Discharge" in the Product Information Guide.
3.Slide the hard drive out of the computer.
4.Remove the new drive from its packaging.
Save the original packaging for storing or shipping the hard drive.
NOTICE: Use firm and even pressure to slide the drive into place. If you use excessive force, you may damage the connector.
5.Slide the hard drive into the bay until it is fully seated.
6.Replace and tighten the screws.
NOTE: The Operating System CD is optional and may not ship with your computer.
7. Use the Operating System CD to install the operating system for your computer.
NOTE: The Operating System CD is optional and may not ship with your computer.
8.Use the Drivers and Utilities CD to install the drivers and utilities for your computer.
Keyboard
CAUTION: Before performing the following procedures, read the safety instructions in your Product Information Guide.
NOTICE: To avoid electrostatic discharge, ground yourself by using a wrist grounding strap or by periodically touching an unpainted metal surface (such as the back panel) on the computer.
1.Follow the instructions in "Before You Begin."
2.Turn the computer