uiop ENTER | RETURN |
ENTER |
| |
uio p | ENTER | |
RETURN | ||
uio p | ||
| ||
| RETURN |
(Main remote control unit) | (Sub remote control unit) |
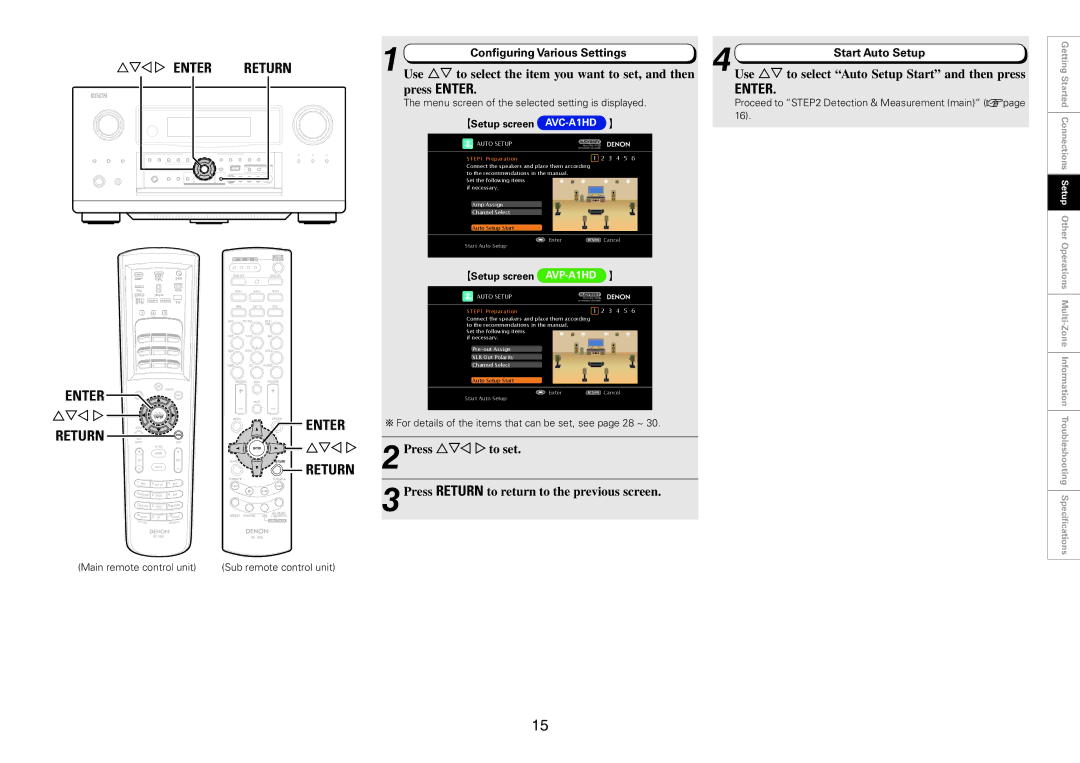
1 Configuring Various Settings
Use ui to select the item you want to set, and then press ENTER.
The menu screen of the selected setting is displayed.
GSetup screen AVC-A1HD H
AUTO SETUP |
STEP1 Preparation | 1 2 3 4 5 6 |
Connect the speakers and place them according | |
to the recommendations in the manual. |
|
Set the following items |
|
if necessary. |
|
Amp Assign |
|
Channel Select |
|
Auto Setup Start |
|
Enter | RETURN Cancel |
Start Auto Setup |
|
GSetup screen AVP-A1HD H
AUTO SETUP |
STEP1 Preparation | 1 2 3 4 5 6 |
Connect the speakers and place them according | |
to the recommendations in the manual. |
|
Set the following items |
|
if necessary. |
|
| |
XLR Out Polarity |
|
Channel Select |
|
Auto Setup Start |
|
Enter | RETURN Cancel |
Start Auto Setup |
|
b For details of the items that can be set, see page 28 ~ 30.
2Press uio p to set.
3Press RETURN to return to the previous screen.
4 Start Auto Setup
Use ui to select “Auto Setup Start” and then press
ENTER.
Proceed to “STEP2 Detection & Measurement (main)” (vpage 16).
Getting Started Connections Setup Other Operations
15