Installing the TX 4000 board | TX 4000 PCI SS7 Network Interface Board Installation Manual |
Installation summary
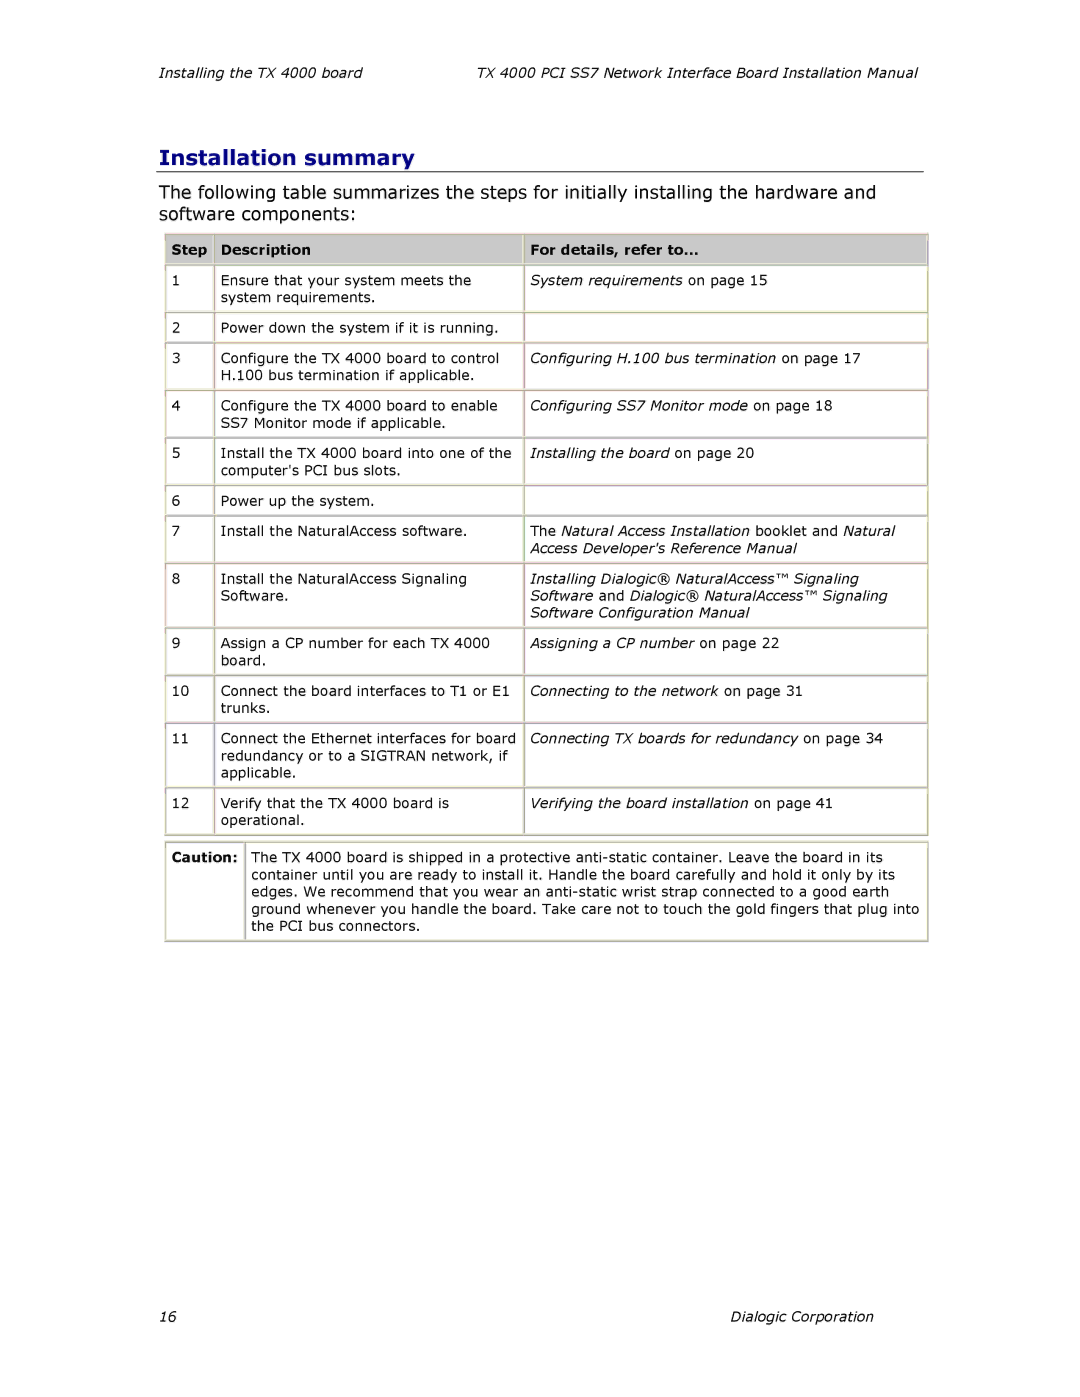
The following table summarizes the steps for initially installing the hardware and software components:
Step | Description | For details, refer to... |
|
|
|
1 | Ensure that your system meets the | System requirements on page 15 |
| system requirements. |
|
|
|
|
2 | Power down the system if it is running. |
|
|
|
|
3 | Configure the TX 4000 board to control | Configuring H.100 bus termination on page 17 |
| H.100 bus termination if applicable. |
|
|
|
|
4 | Configure the TX 4000 board to enable | Configuring SS7 Monitor mode on page 18 |
| SS7 Monitor mode if applicable. |
|
|
|
|
5 | Install the TX 4000 board into one of the | Installing the board on page 20 |
| computer's PCI bus slots. |
|
|
|
|
6 | Power up the system. |
|
|
|
|
7 | Install the NaturalAccess software. | The Natural Access Installation booklet and Natural |
|
| Access Developer's Reference Manual |
|
|
|
8 | Install the NaturalAccess Signaling | Installing Dialogic® NaturalAccess™ Signaling |
| Software. | Software and Dialogic® NaturalAccess™ Signaling |
|
| Software Configuration Manual |
|
|
|
9 | Assign a CP number for each TX 4000 | Assigning a CP number on page 22 |
| board. |
|
|
|
|
10 | Connect the board interfaces to T1 or E1 | Connecting to the network on page 31 |
| trunks. |
|
|
|
|
11 | Connect the Ethernet interfaces for board | Connecting TX boards for redundancy on page 34 |
| redundancy or to a SIGTRAN network, if |
|
| applicable. |
|
|
|
|
12 | Verify that the TX 4000 board is | Verifying the board installation on page 41 |
| operational. |
|
|
|
|
Caution:
The TX 4000 board is shipped in a protective
16 | Dialogic Corporation |