Instruction Manual
Hazardous Area Oxymitter DR
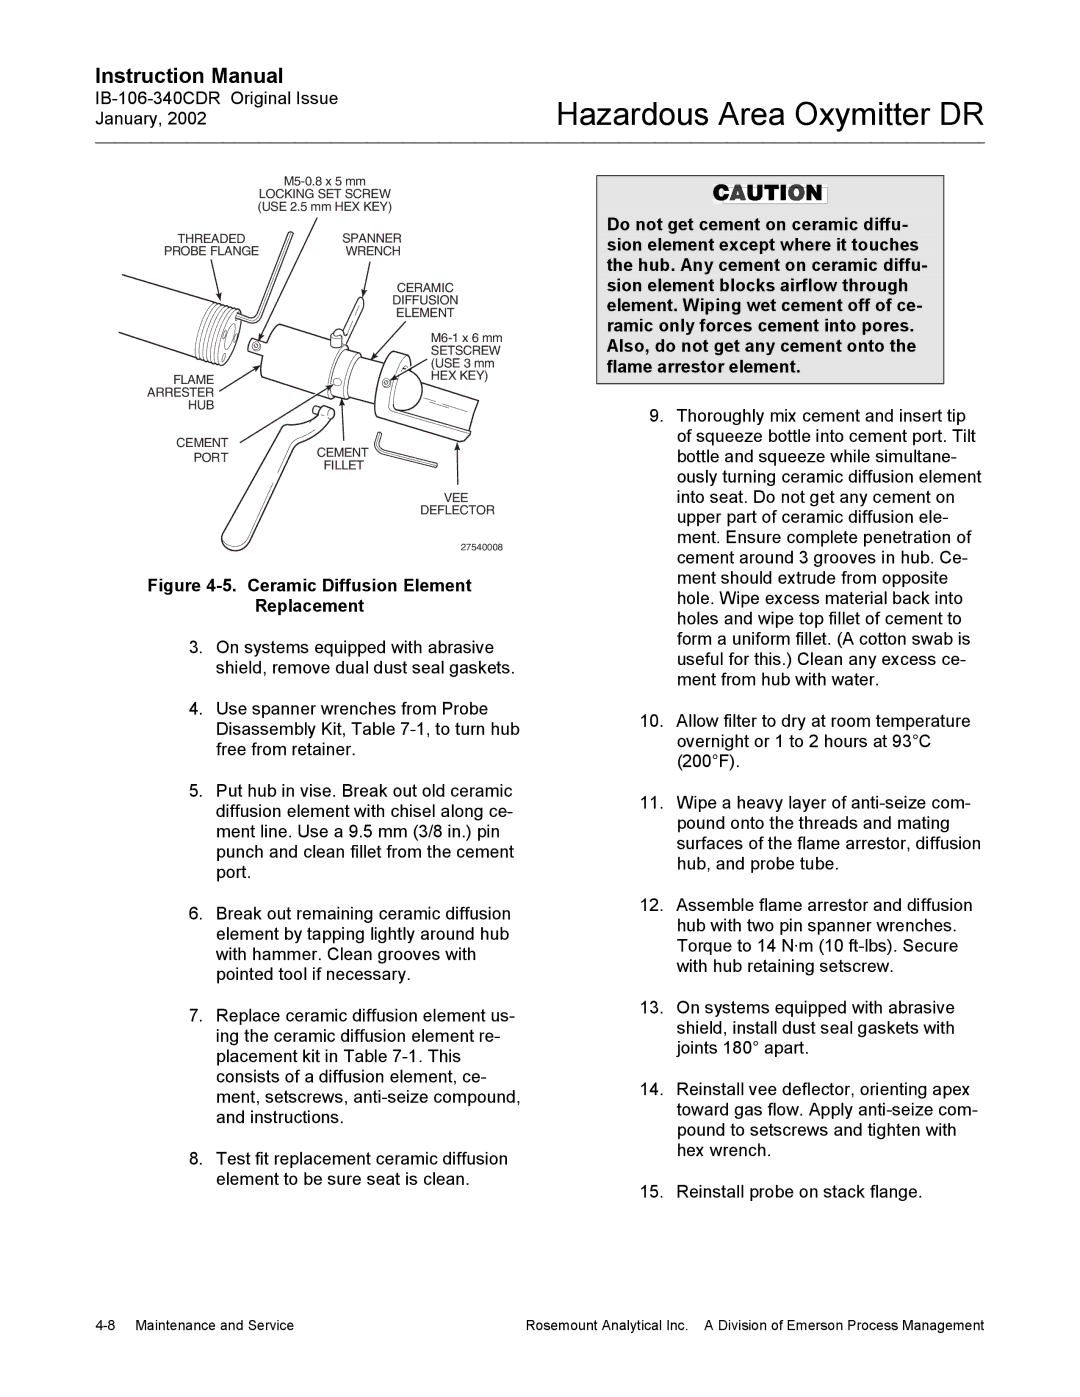
LOCKING SET SCREW (USE 2.5 mm HEX KEY)
THREADED | SPANNER |
PROBE FLANGE | WRENCH |
CERAMIC
DIFFUSION
ELEMENT
Do not get cement on ceramic diffu- sion element except where it touches the hub. Any cement on ceramic diffu- sion element blocks airflow through element. Wiping wet cement off of ce- ramic only forces cement into pores.
FLAME ARRESTER HUB
SETSCREW (USE 3 mm
HEX KEY)
Also, do not get any cement onto the flame arrestor element.
9. Thoroughly mix cement and insert tip |
of squeeze bottle into cement port. Tilt |
CEMENT
PORTCEMENT
FILLET
VEE
DEFLECTOR
27540008
Figure 4-5. Ceramic Diffusion Element
Replacement
3.On systems equipped with abrasive shield, remove dual dust seal gaskets.
4.Use spanner wrenches from Probe Disassembly Kit, Table
5.Put hub in vise. Break out old ceramic diffusion element with chisel along ce- ment line. Use a 9.5 mm (3/8 in.) pin punch and clean fillet from the cement port.
6.Break out remaining ceramic diffusion element by tapping lightly around hub with hammer. Clean grooves with pointed tool if necessary.
7.Replace ceramic diffusion element us- ing the ceramic diffusion element re- placement kit in Table
8.Test fit replacement ceramic diffusion element to be sure seat is clean.
bottle and squeeze while simultane- |
ously turning ceramic diffusion element |
into seat. Do not get any cement on |
upper part of ceramic diffusion ele- |
ment. Ensure complete penetration of |
cement around 3 grooves in hub. Ce- |
ment should extrude from opposite |
hole. Wipe excess material back into |
holes and wipe top fillet of cement to |
form a uniform fillet. (A cotton swab is |
useful for this.) Clean any excess ce- |
ment from hub with water. |
10. Allow filter to dry at room temperature |
overnight or 1 to 2 hours at 93°C |
(200°F). |
11. Wipe a heavy layer of |
pound onto the threads and mating |
surfaces of the flame arrestor, diffusion |
hub, and probe tube. |
12. Assemble flame arrestor and diffusion |
hub with two pin spanner wrenches. |
Torque to 14 N·m (10 |
with hub retaining setscrew. |
13. On systems equipped with abrasive |
shield, install dust seal gaskets with |
joints 180° apart. |
14. Reinstall vee deflector, orienting apex |
toward gas flow. Apply |
pound to setscrews and tighten with |
hex wrench. |
15. Reinstall probe on stack flange. |
Rosemount Analytical Inc. A Division of Emerson Process Management |