4.— Cut the Ceiling Tile
a. Mark the location of the PCM 340 on the |
location when the tile is replaced. |
TIP: Mark the screen direction on back |
of the tile (for example with an arrow or |
“to front”) to help orientation of tile when |
replacing it after cutting |
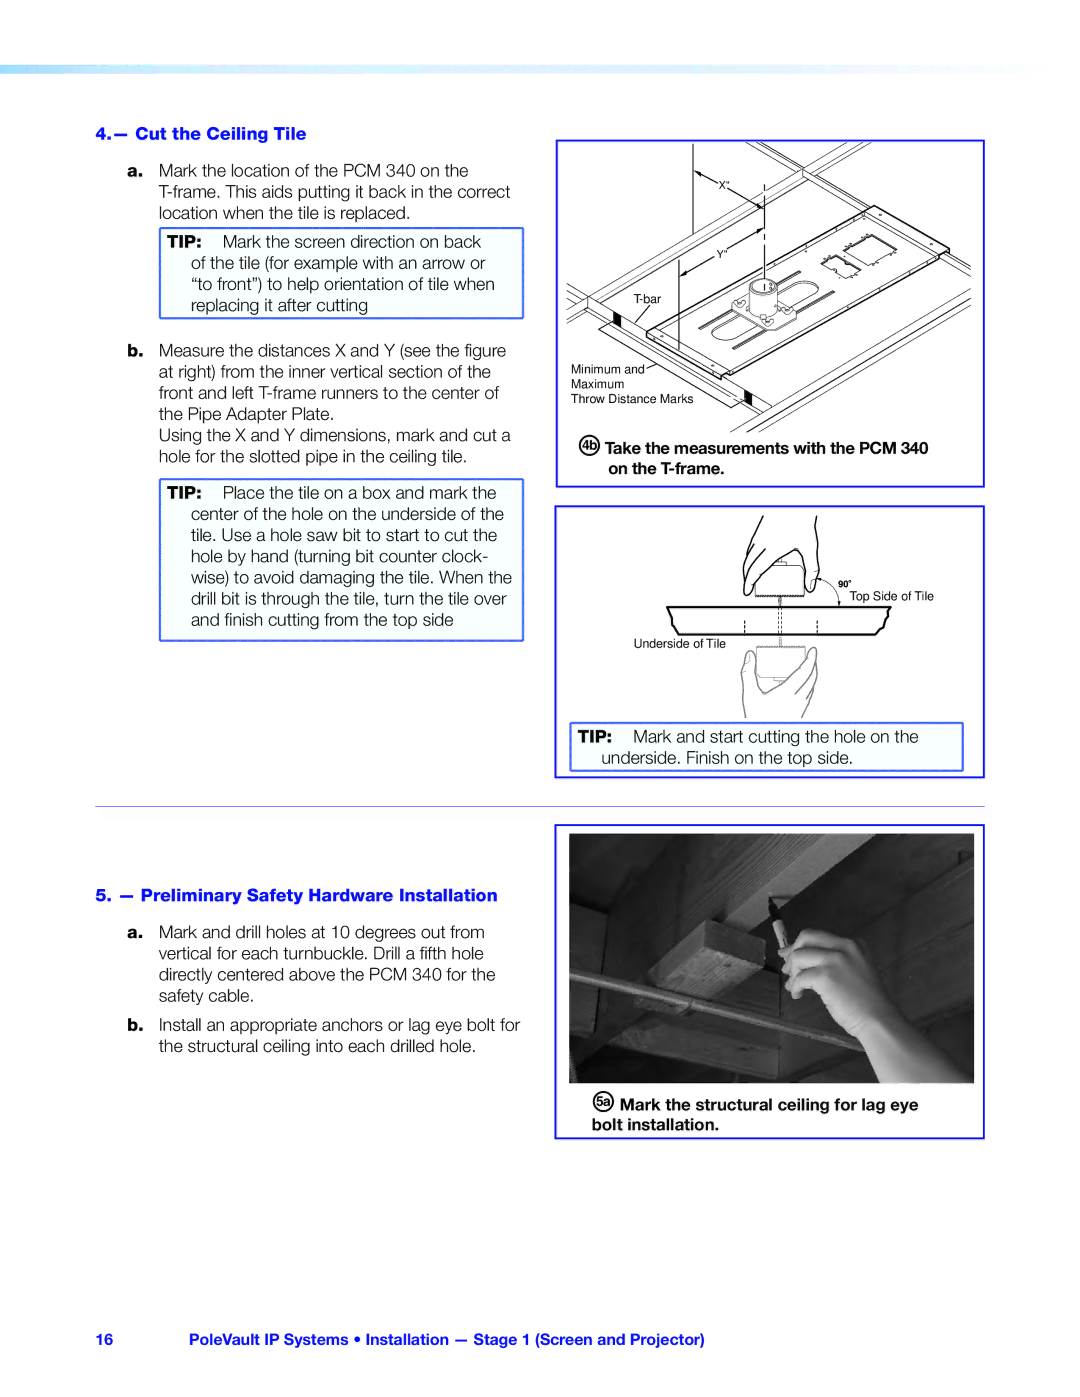
b. Measure the distances X and Y (see the figure |
at right) from the inner vertical section of the |
front and left |
the Pipe Adapter Plate. |
Using the X and Y dimensions, mark and cut a |
hole for the slotted pipe in the ceiling tile. |
TIP: Place the tile on a box and mark the |
center of the hole on the underside of the |
tile. Use a hole saw bit to start to cut the |
hole by hand (turning bit counter clock- |
wise) to avoid damaging the tile. When the |
drill bit is through the tile, turn the tile over |
and finish cutting from the top side |
X"
Y"
Minimum and
Maximum
Throw Distance Marks
ÁTake the measurements with the PCM 340 on the T-frame.
Top Side of Tile |
Underside of Tile |
TIP: Mark and start cutting the hole on the |
underside. Finish on the top side. |
5.— Preliminary Safety Hardware Installation
a.Mark and drill holes at 10 degrees out from vertical for each turnbuckle. Drill a fifth hole directly centered above the PCM 340 for the safety cable.
b.Install an appropriate anchors or lag eye bolt for the structural ceiling into each drilled hole.
À Mark the structural ceiling for lag eye bolt installation.
16PoleVault IP Systems • Installation — Stage 1 (Screen and Projector)