Electrical Safety Analyzer
Cleaning the Analyzer
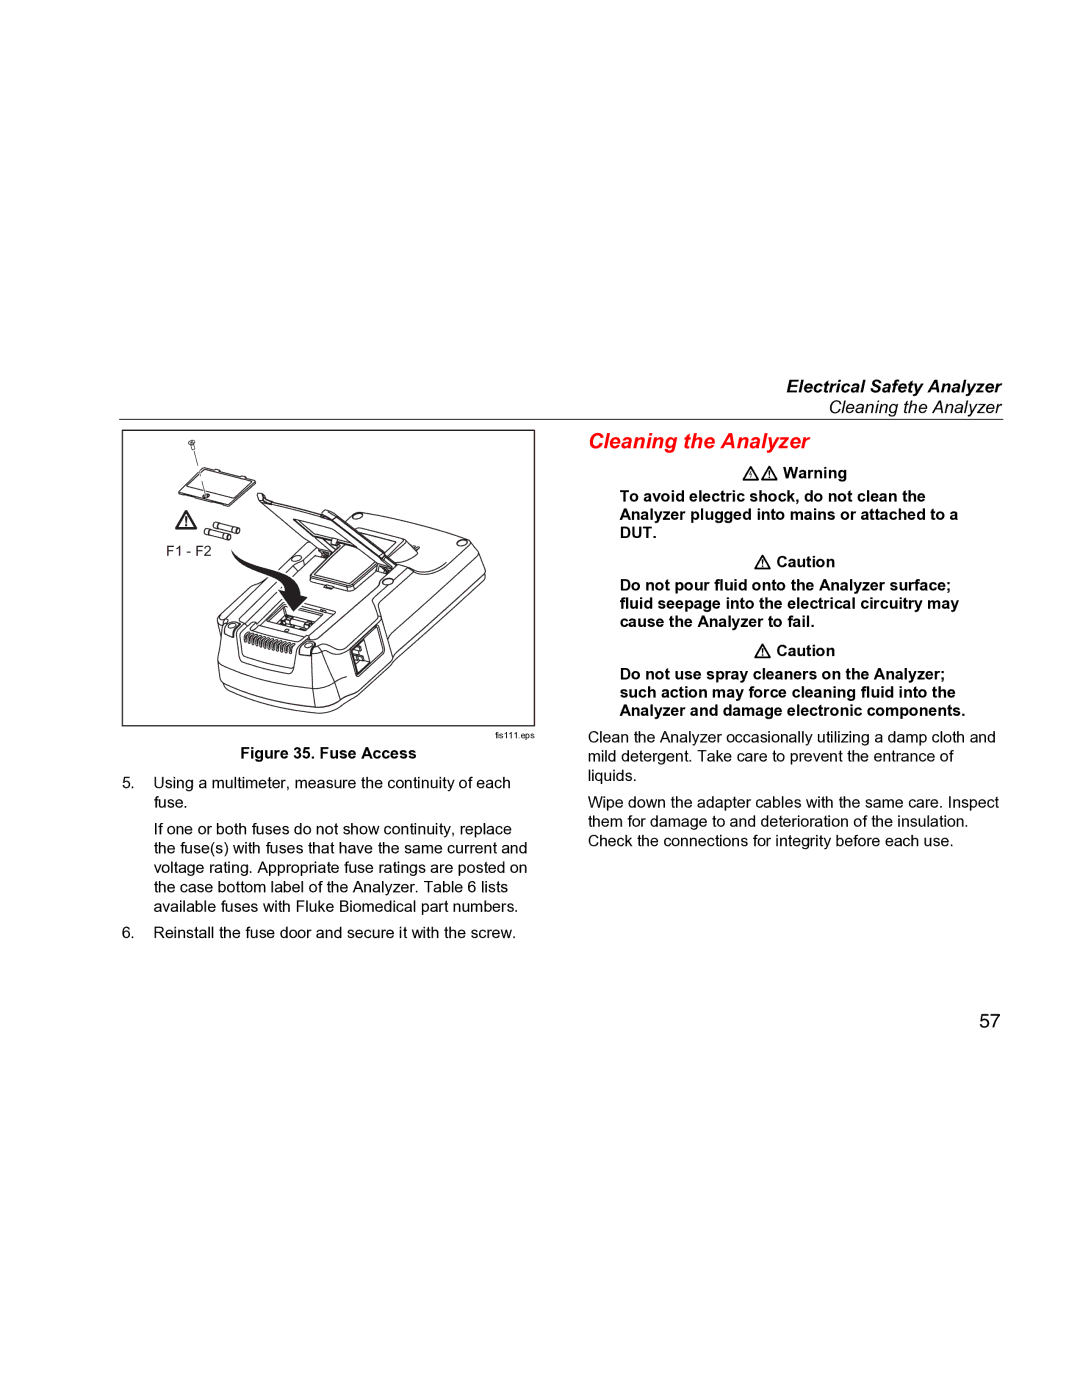
F1 - F2
fis111.eps
Figure 35. Fuse Access
5.Using a multimeter, measure the continuity of each fuse.
If one or both fuses do not show continuity, replace the fuse(s) with fuses that have the same current and voltage rating. Appropriate fuse ratings are posted on the case bottom label of the Analyzer. Table 6 lists available fuses with Fluke Biomedical part numbers.
6.Reinstall the fuse door and secure it with the screw.
Cleaning the Analyzer
XW Warning
To avoid electric shock, do not clean the Analyzer plugged into mains or attached to a DUT.
WCaution
Do not pour fluid onto the Analyzer surface; fluid seepage into the electrical circuitry may cause the Analyzer to fail.
WCaution
Do not use spray cleaners on the Analyzer; such action may force cleaning fluid into the Analyzer and damage electronic components.
Clean the Analyzer occasionally utilizing a damp cloth and mild detergent. Take care to prevent the entrance of liquids.
Wipe down the adapter cables with the same care. Inspect them for damage to and deterioration of the insulation. Check the connections for integrity before each use.
57
