DECATHLON SERIES GAS FRYERS
CHAPTER 1: SERVICE PROCEDURES
1.7.8 Replacing the Frypot (cont.)
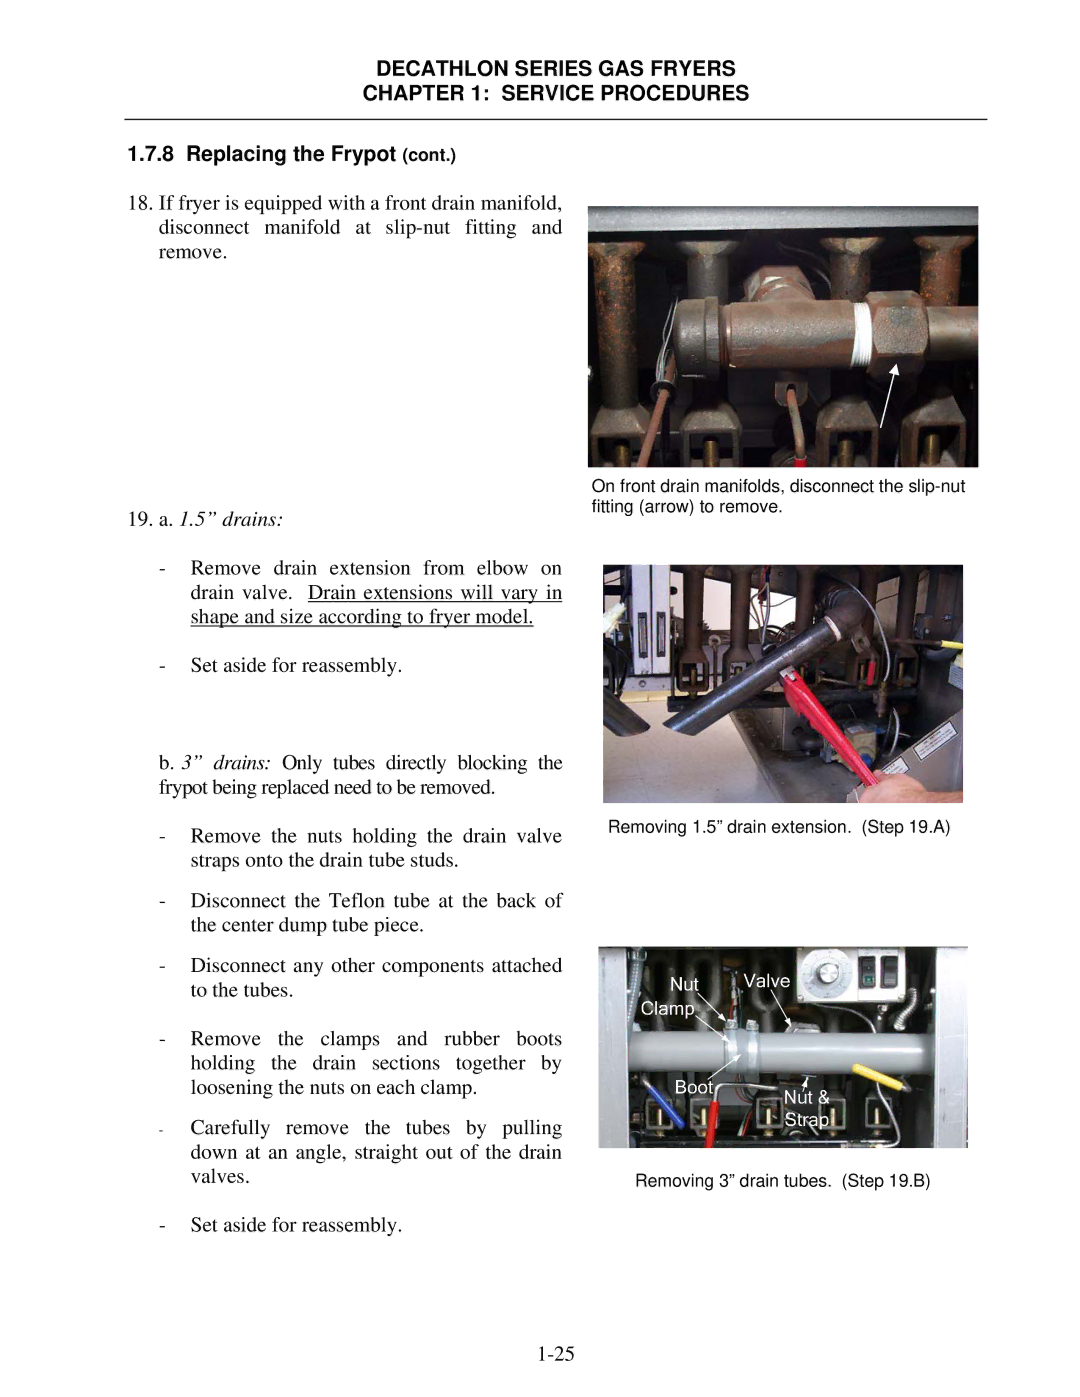
18.If fryer is equipped with a front drain manifold, disconnect manifold at
| On front drain manifolds, disconnect the |
19. a. 1.5” drains: | fitting (arrow) to remove. |
|
-Remove drain extension from elbow on drain valve. Drain extensions will vary in shape and size according to fryer model.
-Set aside for reassembly.
b. 3” drains: Only tubes directly blocking the frypot being replaced need to be removed.
-Remove the nuts holding the drain valve straps onto the drain tube studs.
-Disconnect the Teflon tube at the back of the center dump tube piece.
-Disconnect any other components attached to the tubes.
-Remove the clamps and rubber boots holding the drain sections together by loosening the nuts on each clamp.
-Carefully remove the tubes by pulling down at an angle, straight out of the drain valves.
-Set aside for reassembly.
Removing 1.5” drain extension. (Step 19.A)
Removing 3” drain tubes. (Step 19.B)
