Installation |
| |||||
8QSDFNLQJ |
|
|
| |||
|
|
| 2. There are two hold down bridges that are con- | |||
☞ NOTE | nected to sides 4 and 5. Remove the hold down | |||||
bridges and then remove sides 4 and 5. | ||||||
ALL SHIPMENTS ARE EX- WORKS. At our dock title | ||||||
|
|
| ||||
passes to the buyer. Please review your insurance cov- |
|
|
| |||
|
|
| ||||
erage prior to shipment, as you are responsible for all |
|
| CAUTION | |||
subsequent freight charges and risks. Before signing |
|
| ||||
|
| |||||
the Bill of Lading you should be sure to inspect the | Do not allow the top to fall into the crate. It can | |||||
crate and/or pallet for signs of damage or missing | ||||||
damage the laminator. | ||||||
items; if applicable, make a note of this on the Bill of | ||||||
Do not put packing screws on the floor. They can | ||||||
Lading. | ||||||
The | cause problems when trying to roll the machine | |||||
| into position. | |||||
skid. |
| |||||
A second person must support the side | ||||||
|
|
| ||||
|
|
| labeled (5) in Figure | |||
|
|
| ||||
|
| WARNING |
| the laminator. | ||
|
|
|
|
| ||
|
|
|
|
| ||
The unpacking process requires at least two people. You can be severely injured or crushed.
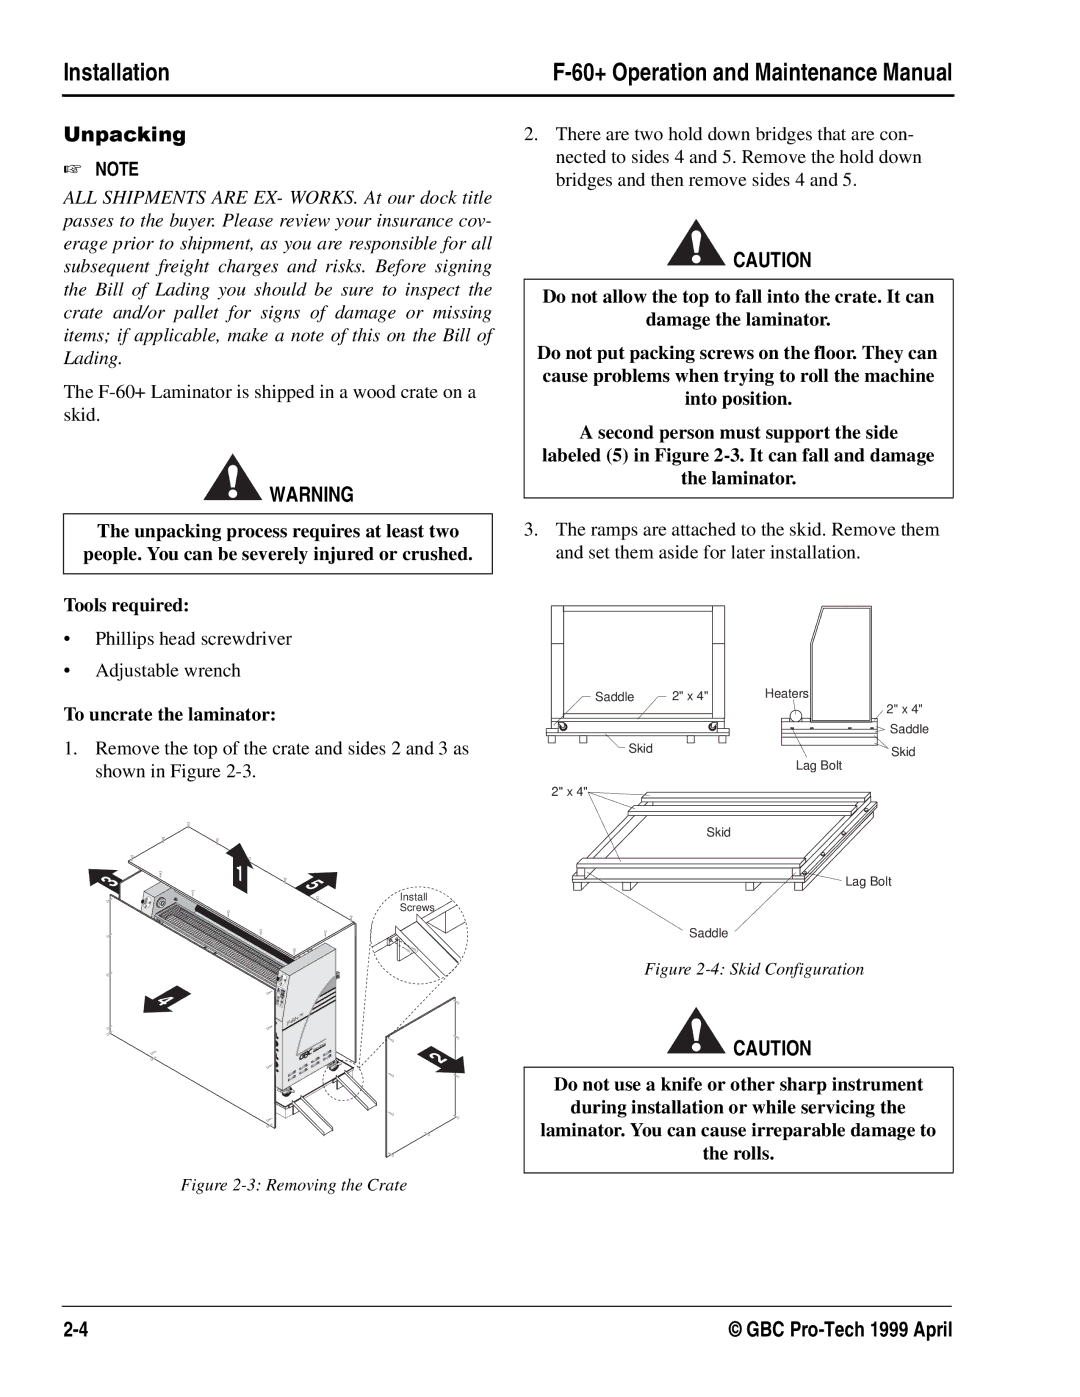
3.The ramps are attached to the skid. Remove them and set them aside for later installation.
Tools required:
•Phillips head screwdriver
•Adjustable wrench
To uncrate the laminator:
1.Remove the top of the crate and sides 2 and 3 as shown in Figure
3 | 1 | 5 |
|
Install
Screws
![]()
![]() 4
4
F- | 60 | +™ |
| ||
|
|
| H |
PR | |
| 2 |
Figure 2-3: Removing the Crate
Saddle | 2" x 4" | Heaters |
|
| 2" x 4" |
|
| Saddle |
Skid |
| Skid |
|
| Lag Bolt |
2" x 4"
Skid
Lag Bolt
Saddle
Figure 2-4: Skid Configuration
![]() CAUTION
CAUTION
Do not use a knife or other sharp instrument
during installation or while servicing the
laminator. You can cause irreparable damage to
the rolls.
© GBC |