Installation Instructions
F Cooktop Burners
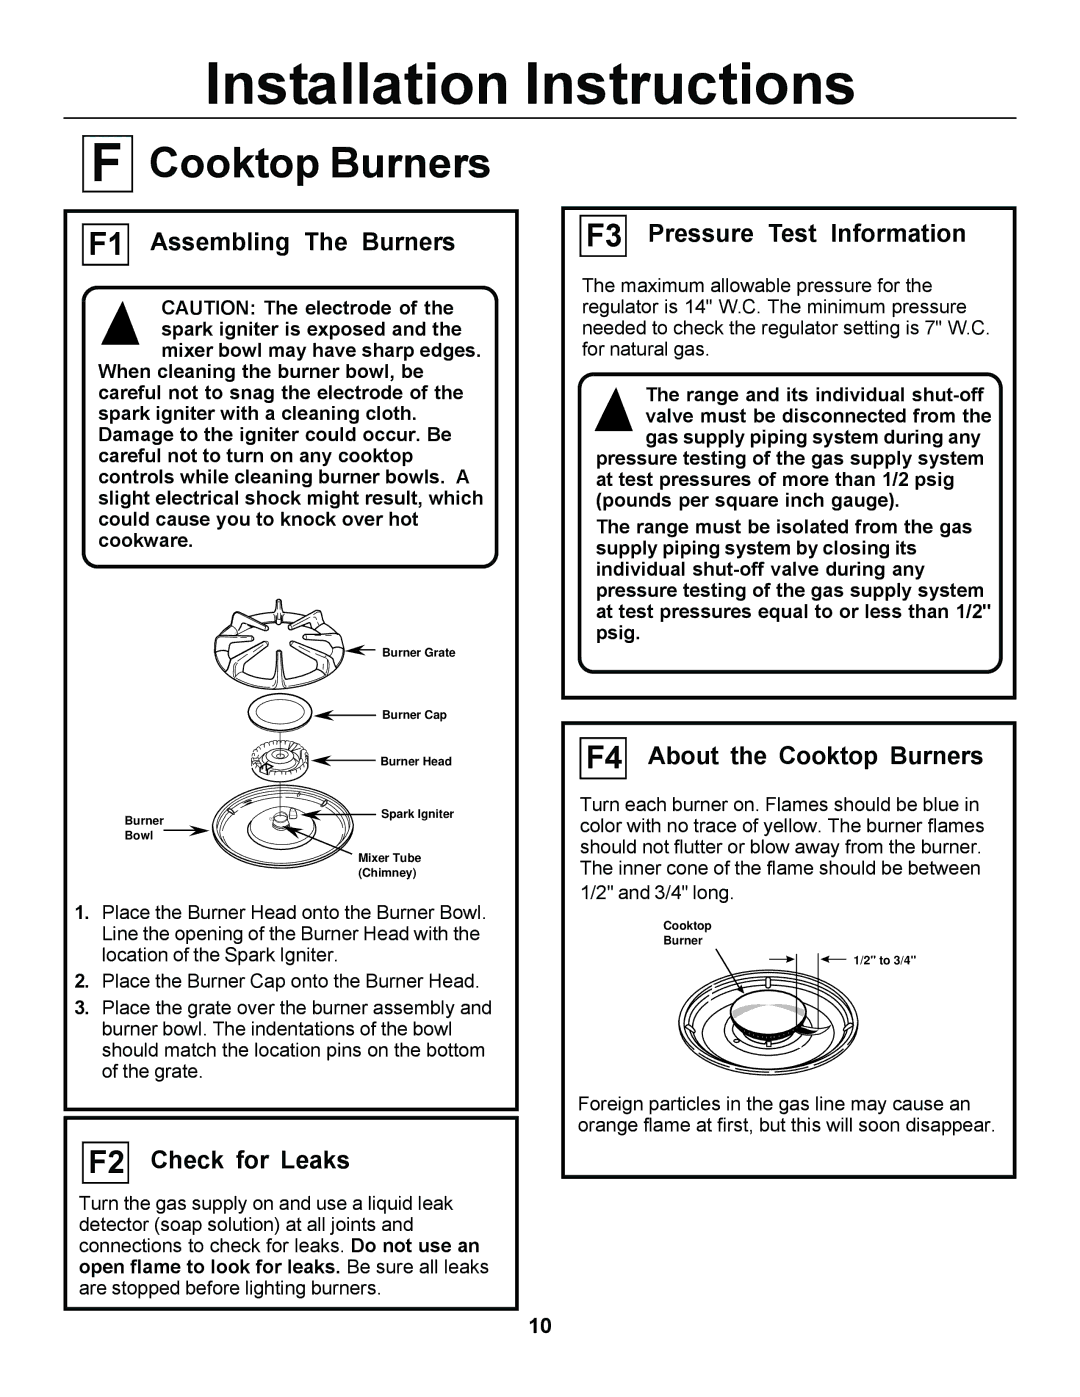
F1 Assembling The Burners
CAUTION: The electrode of the spark igniter is exposed and the mixer bowl may have sharp edges.
When cleaning the burner bowl, be careful not to snag the electrode of the spark igniter with a cleaning cloth. Damage to the igniter could occur. Be careful not to turn on any cooktop controls while cleaning burner bowls. A slight electrical shock might result, which could cause you to knock over hot cookware.
Burner Grate
Burner Cap
![]()
![]() Burner Head
Burner Head
F3 Pressure Test Information
The maximum allowable pressure for the regulator is 14" W.C. The minimum pressure needed to check the regulator setting is 7" W.C. for natural gas.
The range and its individual
pressure testing of the gas supply system at test pressures of more than 1/2 psig (pounds per square inch gauge).
The range must be isolated from the gas supply piping system by closing its individual
F4 About the Cooktop Burners
Burner
Bowl
Spark Igniter
Turn each burner on. Flames should be blue in color with no trace of yellow. The burner flames should not flutter or blow away from the burner.
Mixer Tube (Chimney)
1.Place the Burner Head onto the Burner Bowl. Line the opening of the Burner Head with the location of the Spark Igniter.
2.Place the Burner Cap onto the Burner Head.
3.Place the grate over the burner assembly and burner bowl. The indentations of the bowl should match the location pins on the bottom of the grate.
F2 Check for Leaks
Turn the gas supply on and use a liquid leak detector (soap solution) at all joints and connections to check for leaks. Do not use an open flame to look for leaks. Be sure all leaks are stopped before lighting burners.
The inner cone of the flame should be between 1/2" and 3/4" long.
Cooktop
Burner
1/2" to 3/4"
Foreign particles in the gas line may cause an orange flame at first, but this will soon disappear.
10