Installation Instructions
J
Making the L.P. Gas Conversion
J3 AdjustingBurners the Cooktop
J5 Installing the L.P. Orifices
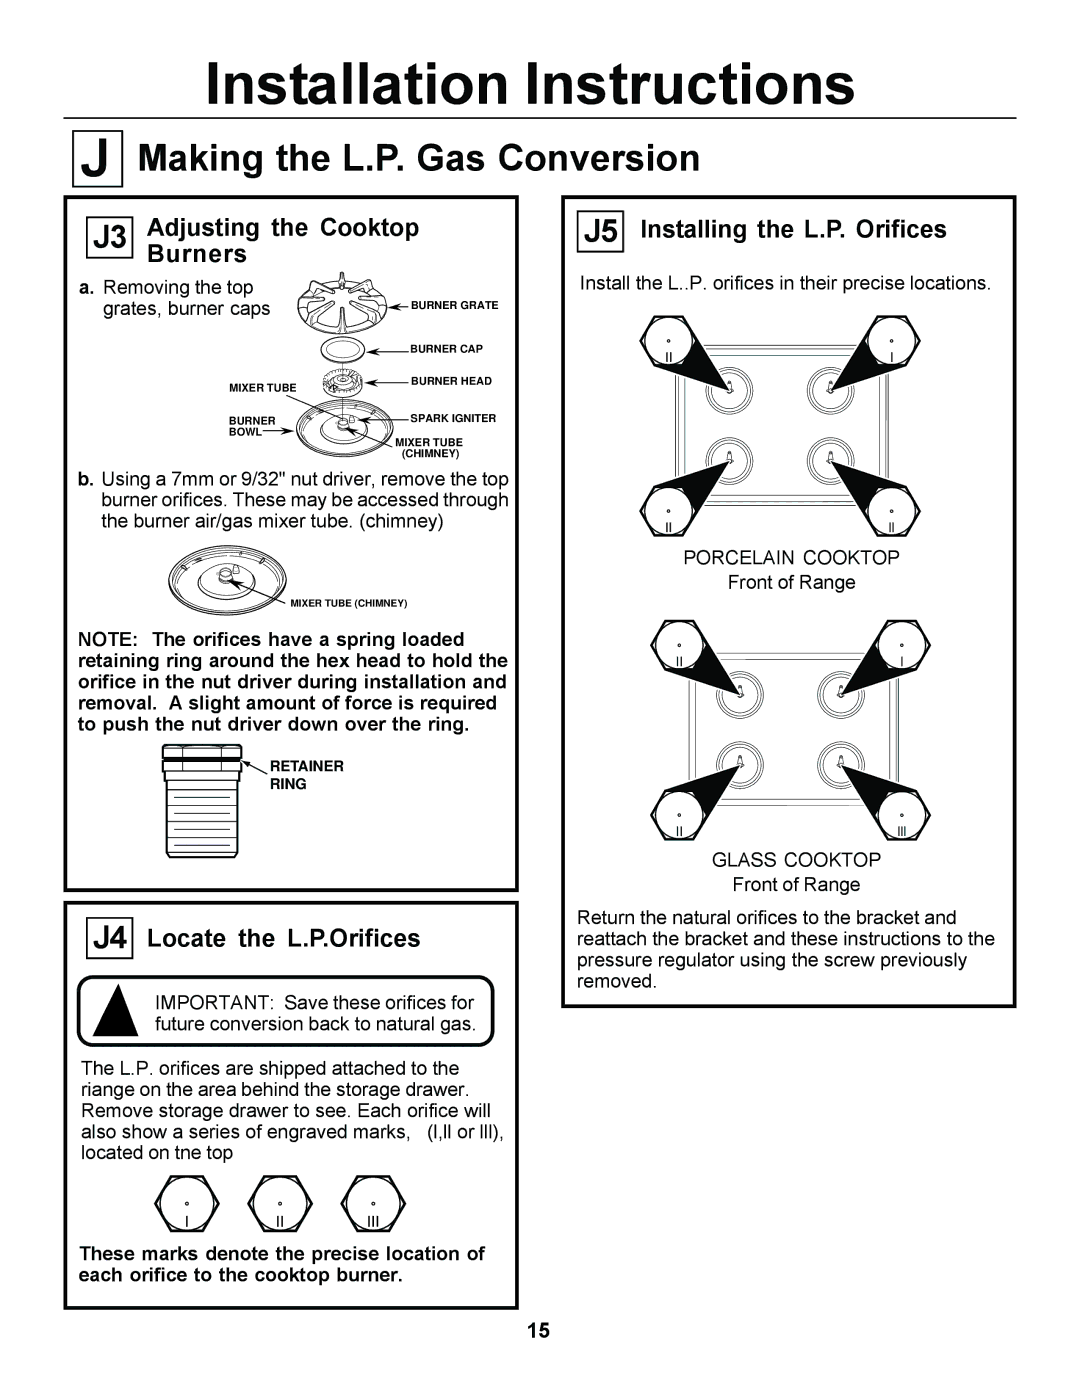
a. Removing the top grates, burner caps
MIXER TUBE
BURNER
BOWL
BURNER GRATE
BURNER CAP
![]()
![]() BURNER HEAD
BURNER HEAD
![]()
![]()
![]() SPARK IGNITER
SPARK IGNITER
MIXER TUBE (CHIMNEY)
Install the L..P. orifices in their precise locations.
II | I |
b.Using a 7mm or 9/32" nut driver, remove the top burner orifices. These may be accessed through the burner air/gas mixer tube. (chimney)
MIXER TUBE (CHIMNEY)
NOTE: The orifices have a spring loaded retaining ring around the hex head to hold the orifice in the nut driver during installation and removal. A slight amount of force is required to push the nut driver down over the ring.
![]()
![]() RETAINER
RETAINER
RING
J4 Locate the L.P.Orifices
IMPORTANT: Save these orifices for future conversion back to natural gas.
The L.P. orifices are shipped attached to the riange on the area behind the storage drawer. Remove storage drawer to see. Each orifice will also show a series of engraved marks, (l,ll or lll), located on tne top
I | II | III |
These marks denote the precise location of each orifice to the cooktop burner.
II | ll |
PORCELAIN COOKTOP
Front of Range
II | I |
II | lll |
GLASS COOKTOP
Front of Range
Return the natural orifices to the bracket and reattach the bracket and these instructions to the pressure regulator using the screw previously removed.
15