Installation Instructions
J
Making the L.P. Gas Conversion
J4
Adjusting the Cooktop Burners Low Flame Setting
Low setting adjustments must be made with two other burners in operation on a medium setting. This procedure prevents the low flame from being set too low resulting in the flame being extinguished when other burners are turned on.
a.Remove the valve control knobs.
b.Through the opening, insert small screwdriver through access hole in valve switch. Engage adjustment screw in valve. Screw down fully, in the clockwise rotation, the by pass screw.
HIGH OUTPUT
J5
Adjusting the Oven Burners
CAUTION: The following adjustments must be made before turning on the gas to the burner. Failure to do so could result in serious injury due to high flames and toxic fumes.
BAKE BURNER
2 Screws
1.Remove the oven bottom.
2.Remove the two screws securing burner baffle (flame spreader).
3.Remove the burner baffle (flame spreader).
4. Remove the orifice fitting cover.
![]() IMPORTANT: Do not overtighten or you may bend the orifice hood or needle.
IMPORTANT: Do not overtighten or you may bend the orifice hood or needle.
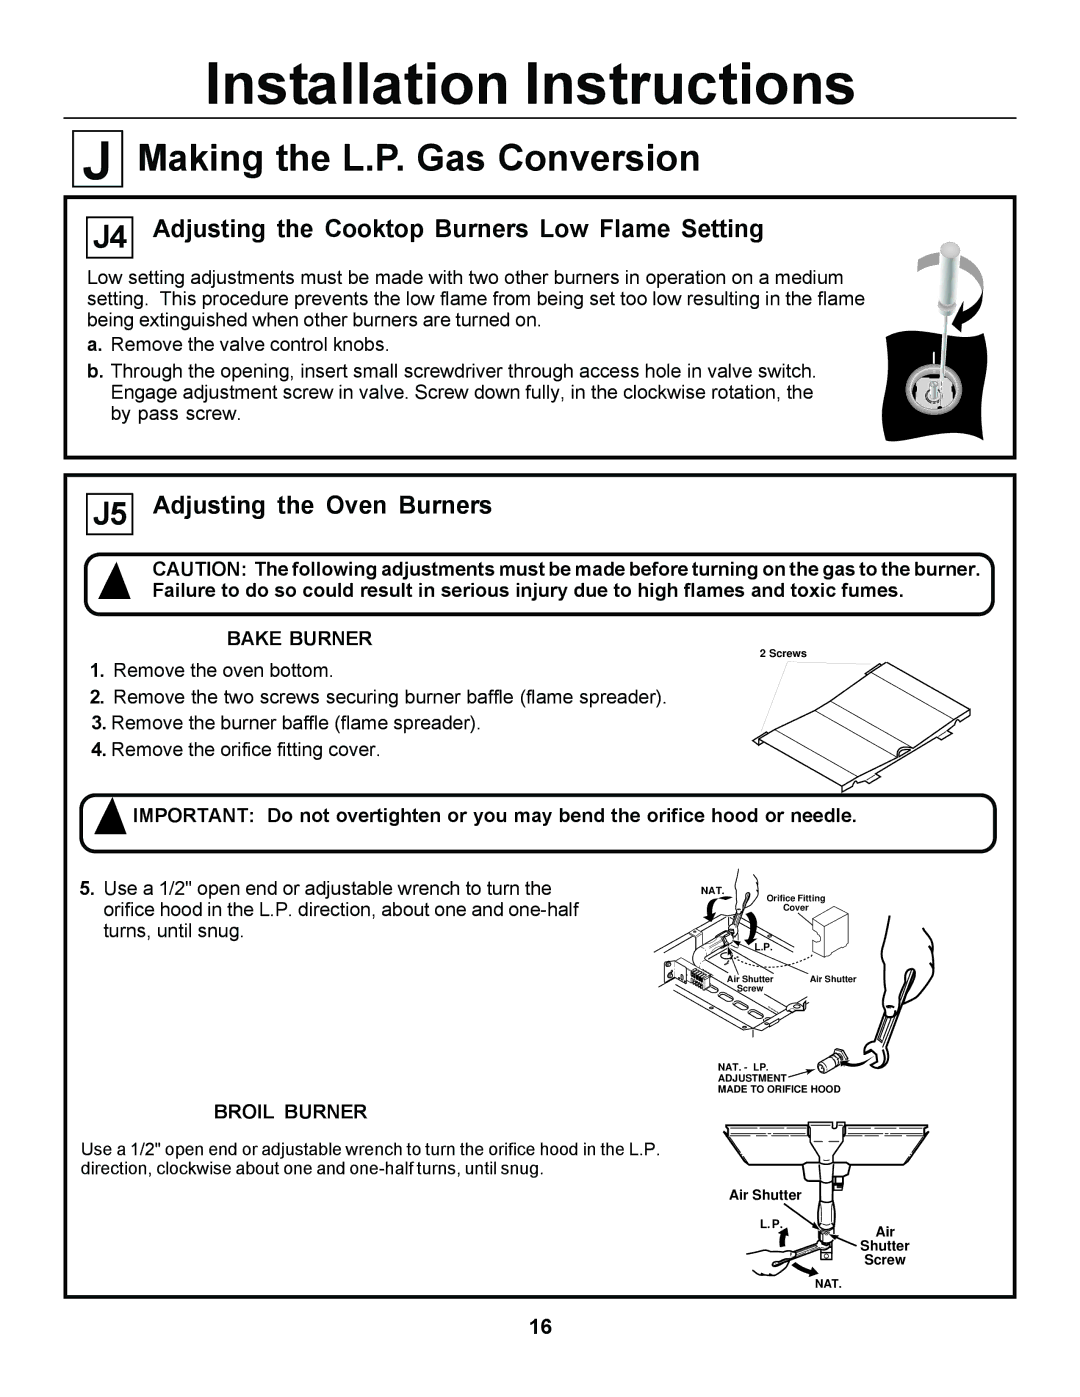
5.Use a 1/2" open end or adjustable wrench to turn the orifice hood in the L.P. direction, about one and
BROIL BURNER
NAT.
Orifice Fitting
Cover ![]()
L.P.
Air Shutter | Air Shutter |
Screw |
|
NAT. - LP.
ADJUSTMENT
MADE TO ORIFICE HOOD
Use a 1/2" open end or adjustable wrench to turn the orifice hood in the L.P. direction, clockwise about one and
Air Shutter |
|
L.P. | Air |
| |
| Shutter |
| Screw |
NAT.
16