Installation Instructions
B Preparing the Counter
B1 Filler Strips or Backguard
WARNING: The Filler Strip supplied or optional backguard must be used. With any installation do not let the
countertop or other combustible material fill the space between the back edge of the cooktop and back of the required cutout.
Your range is designed to be installed in a 30"
wide opening; the cutout depth will vary with the type countertop you have. There are three
basic recommended installations:
1.Standard 25" countertop without
2.Island.
3.Standard countertop with
After deciding the countertop type you have, choose the best installation to meet your needs.
With any installation, mark the cutout on the counter.
Dimensions given in the following references are measured from the front of the counter, not from the cabinet face. To minimize chipping, you may apply masking tape. For best appearance, it is important that the cut be smooth and straight.
B2 Side Trim Extention Kit
If there is a small gap between the sides of the range and the cabinets (up to 1/4" each side) you can order a side trim extension kit through any Service Center.
Order Pub. No.
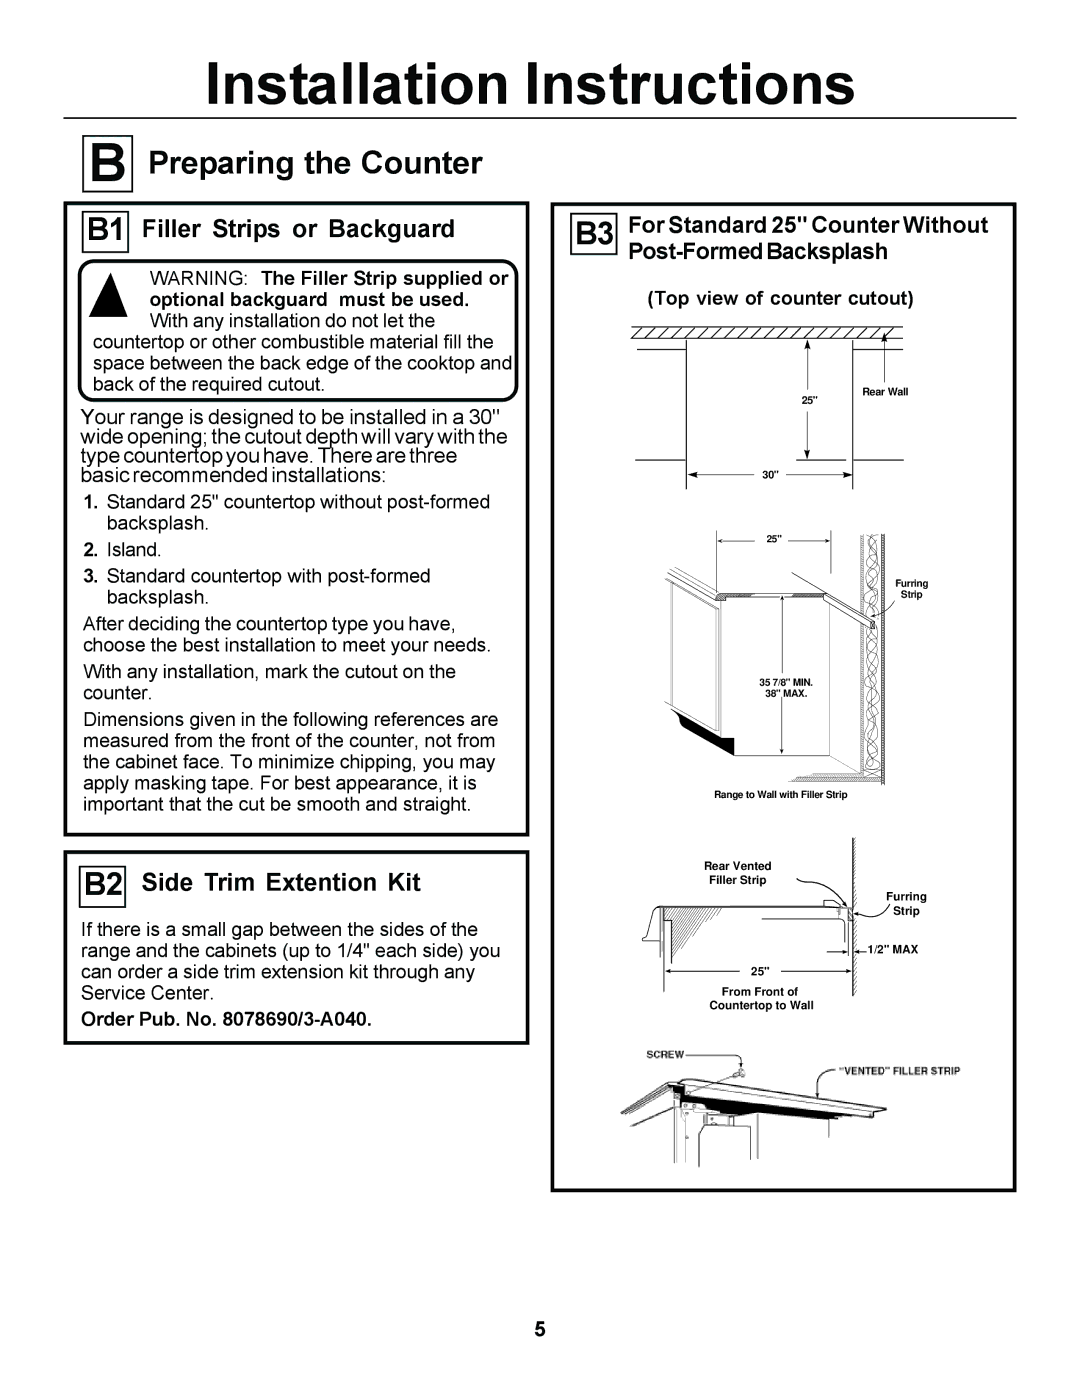
B3 For Standard 25" Counter Without Post-FormedBacksplash
(Top view of counter cutout)
Rear Wall |
25" |
30" |
25" |
Furring |
Strip |
35 7/8" MIN. |
38" MAX. |
Range to Wall with Filler Strip
Rear Vented
Filler Strip
Furring
![]()
![]()
![]() Strip
Strip
![]()
![]() 1/2" MAX
1/2" MAX
25"
From Front of
Countertop to Wall
5