Typically, most menus can be performed using either the right and left menu systems (consisting of keys, dial and display).
The menus and the different settings you can make are listed in “Menu reference” on page 17.
These menu controls are also used with the effects units, as explained here (“Effects” on page 23).
chart if you are not quite sure how things are being shown:
5 – Menus
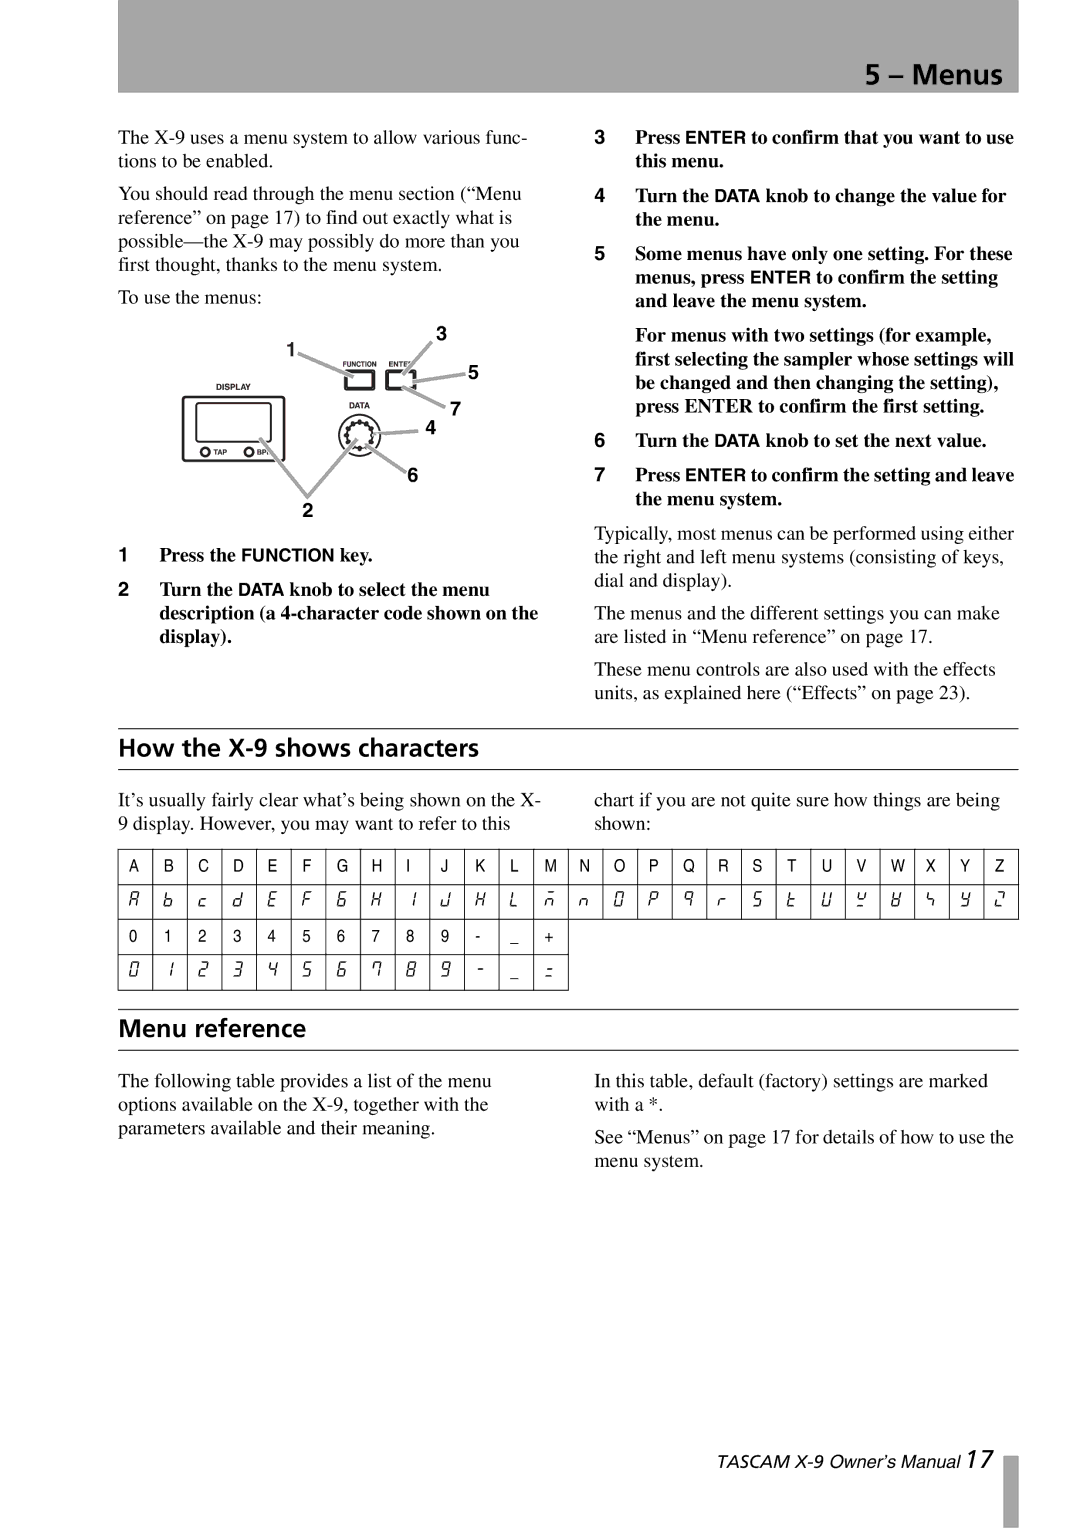
3 Press ENTER to confirm that you want to use this menu.
4 Turn the DATA knob to change the value for the menu.
5 Some menus have only one setting. For these menus, press ENTER to confirm the setting and leave the menu system.
For menus with two settings (for example, first selecting the sampler whose settings will be changed and then changing the setting), press ENTER to confirm the first setting.
The X-9 uses a menu system to allow various func- tions to be enabled.
You should read through the menu section (“Menu reference” on page 17) to find out exactly what is possible—the X-9 may possibly do more than you first thought, thanks to the menu system.
To use the menus:
3
1
 5
5
7 4
6 Turn the DATA knob to set the next value.
67 Press ENTER to confirm the setting and leave
1 Press the FUNCTION key.
2 Turn the DATA knob to select the menu description (a 4-character code shown on the display).
How the X-9 shows characters
It’s usually fairly clear what’s being shown on the X- 9 display. However, you may want to refer to this
A | B | C | D | E | F | G | H | I | J | K | L | M | N | O | P | Q | R | S | T | U | V | W | X | Y | Z |
| | | | | | | | | | | | | | | | | | | | | | | | | |
A | B | c | D | E | F | G | H | I | J | K | L | M | N | O | P | Q | R | S | T | U | V | W | X | Y | Z |
| | | | | | | | | | | | | | | | | | | | | | | | | |
0 | 1 | 2 | 3 | 4 | 5 | 6 | 7 | 8 | 9 | - | _ | + | | | | | | | | | | | | | |
| | | | | | | | | | | | | | | | | | | | | | | | | |
0 | 1 | 2 | 3 | 4 | 5 | 6 | 7 | 8 | 9 | - | _ | + | | | | | | | | | | | | | |
| | | | | | | | | | | | | | | | | | | | | | | | | |
| | | | | | | | | | | | | | | | | | | | | | | | | |
Menu reference
The following table provides a list of the menu options available on the X-9, together with the parameters available and their meaning.
In this table, default (factory) settings are marked with a *.
See “Menus” on page 17 for details of how to use the menu system.
TASCAM X-9Owner’s Manual 17