Getting Started |
|
Installation | Page Title |
The DVI KVM over IP Sender and Receiver units can either be connected over a Local Area Network (LAN) or they can be directly connected to one another.
Using a Direct Connection
By default, the DVI KVM over IP is shipped in Auto IP mode. In Auto IP mode, each Sender and Receiver unit assigns itself a unique IP address within the range of 169.254.x.x. Auto IP mode is only used when Sender and Receiver units are directly connected to one another. When connecting to a network, the DVI KVM over IP must be set to DHCP mode or Static IP mode. See Setting the IP Mode for more information.
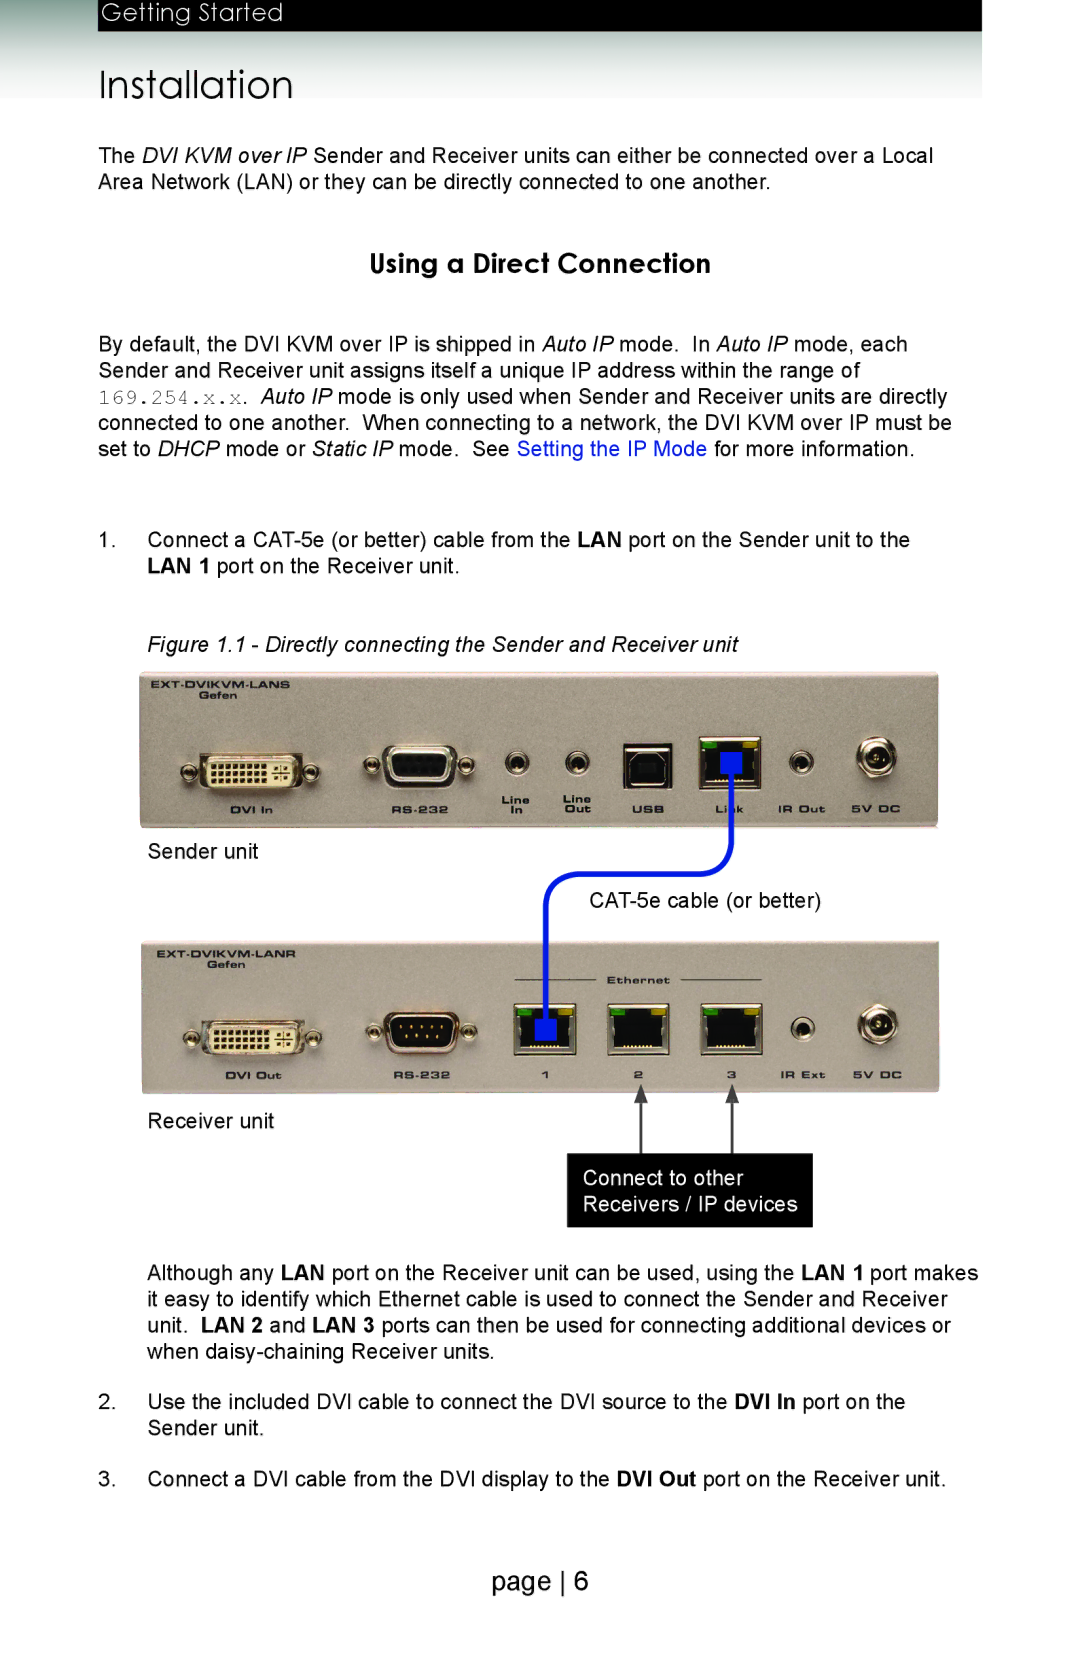
1.Connect a
LAN 1 port on the Receiver unit.
Figure 1.1 - Directly connecting the Sender and Receiver unit
Sender unit
Receiver unit
Connect to other
Receivers / IP devices
Although any LAN port on the Receiver unit can be used, using the LAN 1 port makes it easy to identify which Ethernet cable is used to connect the Sender and Receiver unit. LAN 2 and LAN 3 ports can then be used for connecting additional devices or when
2.Use the included DVI cable to connect the DVI source to the DVI In port on the
Sender unit.
3.Connect a DVI cable from the DVI display to the DVI Out port on the Receiver unit.
page 6
