Operating the DVI KVM over IP
Basic Operation
Setting the Video Channel
In order a Sender and Receiver unit to communicate with one another, they must both be set to the same channel. This is similar to changing the channel on a cable or satellite box in order to view a different program. By default, all Sender and Receiver units are set to channel 0.
NOTE: When connecting Sender and Receiver units, it is highly recommend that the video channel for each unit is set to a channel other than 0. This will allow for the addition of future Sender and/or Receiver units without causing video channel conflicts.
1.Access the Web interface by entering the IP address of the desired Sender or
Receiver unit. Refer to Displaying the IP Address if necessary.
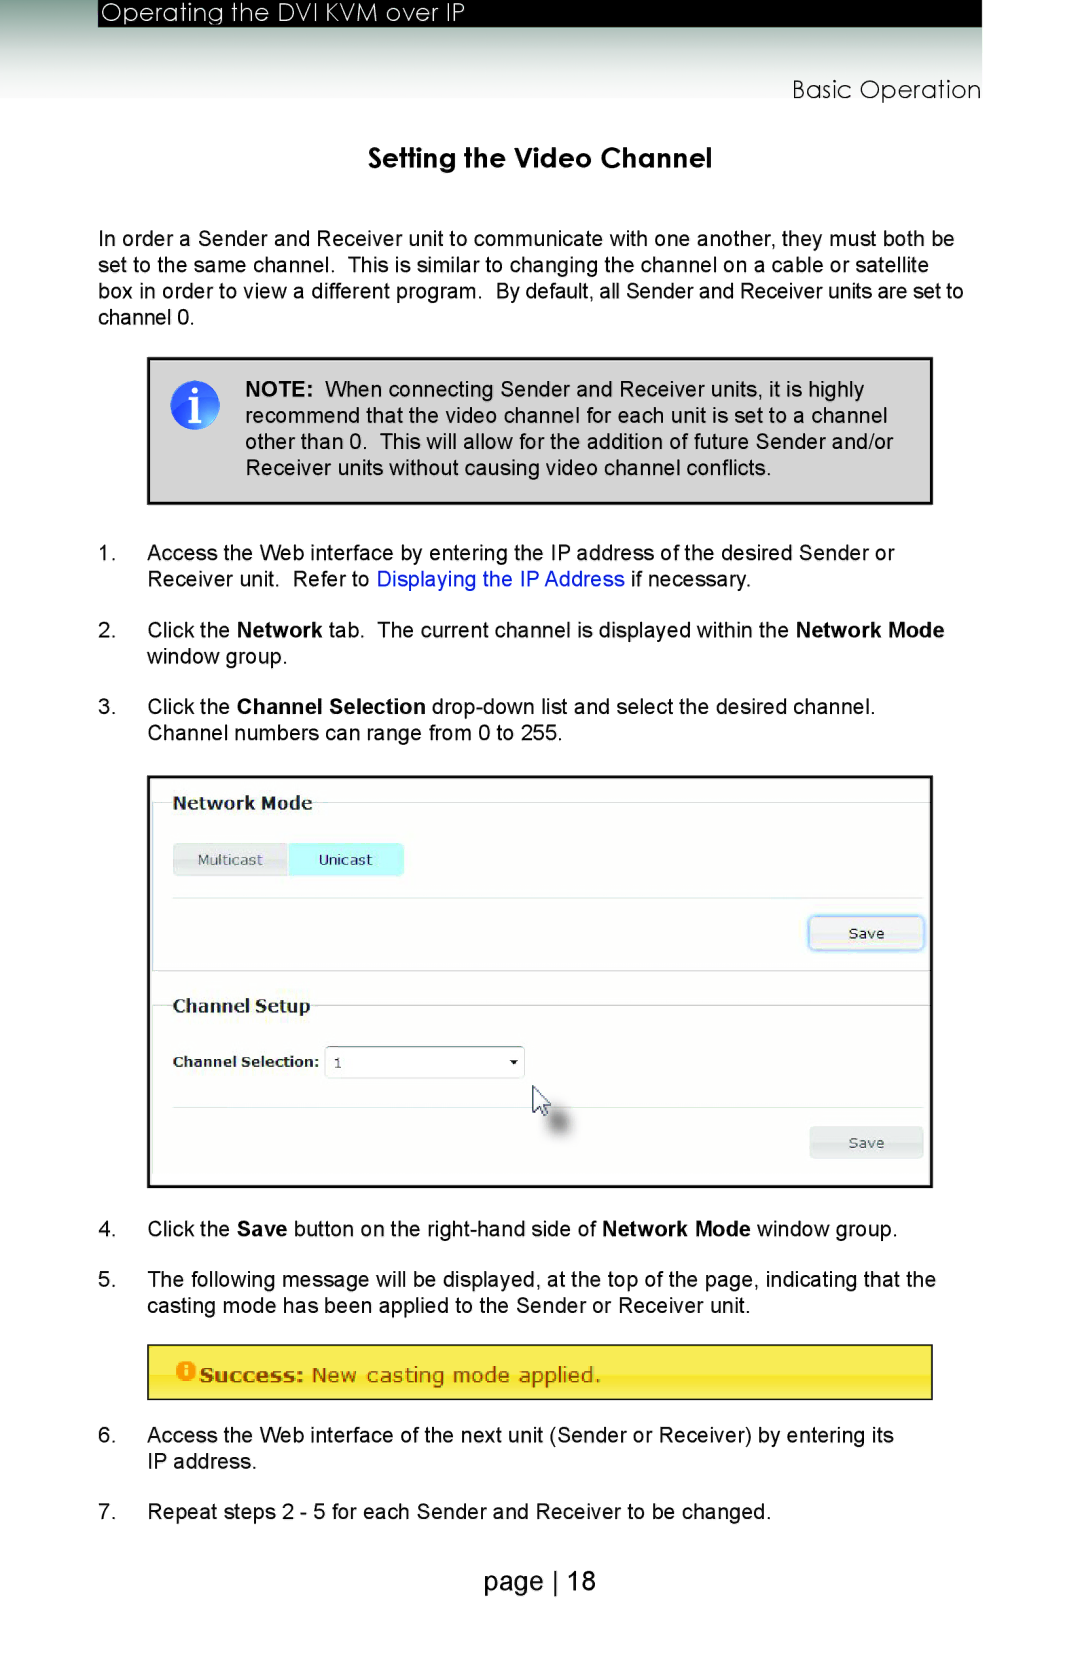
2.Click the Network tab. The current channel is displayed within the Network Mode window group.
3.Click the Channel Selection
4.Click the Save button on the
5.The following message will be displayed, at the top of the page, indicating that the casting mode has been applied to the Sender or Receiver unit.
6.Access the Web interface of the next unit (Sender or Receiver) by entering its
IP address.
7.Repeat steps 2 - 5 for each Sender and Receiver to be changed.
page 18