▲Before programming the timer, the clock must be set. If you try to
program the timer when the clock is not set, the Set Date and Time Menu will appear. See page 25. ▲
To program the timer, follow these simple instructions.
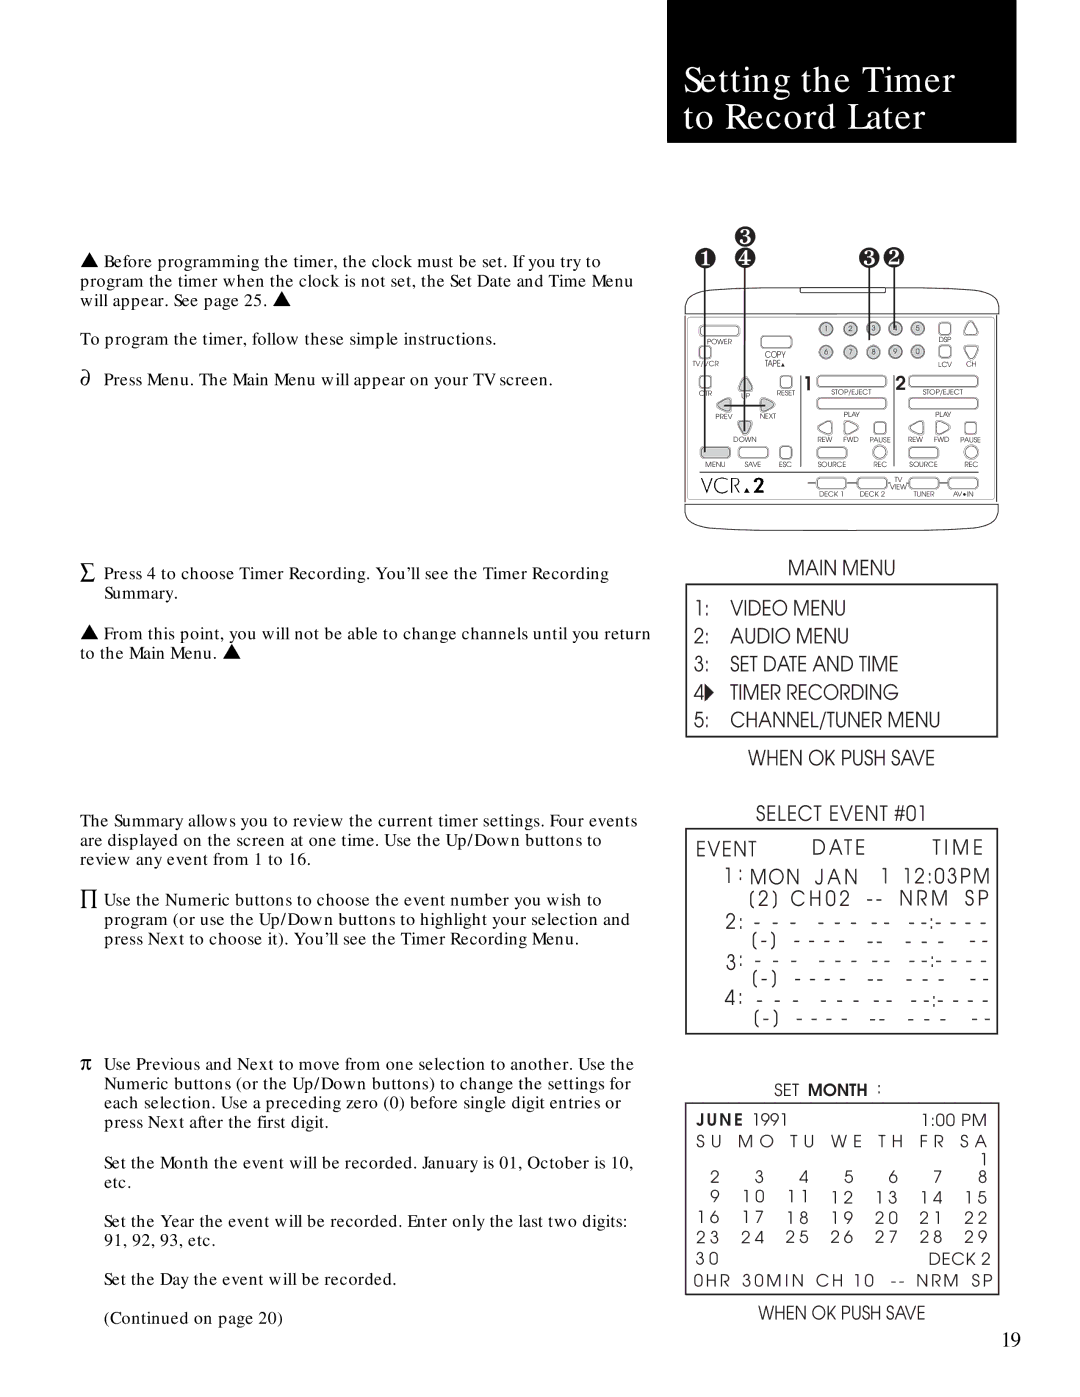
¶Press Menu. The Main Menu will appear on your TV screen.
Setting the Timer to Record Later
| ❸ |
|
|
| ❸❷ |
|
| ||
❶ ❹ |
|
|
|
|
| ||||
|
|
|
| 1 | 2 | 3 | 4 | 5 |
|
POWER |
|
|
|
|
|
|
| DSP |
|
|
|
|
|
|
|
|
|
| |
|
| COPY |
| 6 | 7 | 8 | 9 | 0 |
|
|
|
|
|
|
|
|
|
| |
TV/VCR |
| TAPE▲ |
|
|
|
|
| LCV | CH |
CTR | UP | RESET | 1 | STOP/EJECT | 2 | STOP/EJECT | |||
|
|
|
|
|
|
|
|
| |
PREV | NEXT |
|
| PLAY |
|
| PLAY |
| |
| DOWN |
|
| REW | FWD | PAUSE | REW FWD | PAUSE | |
MENU | SAVE | ESC |
| SOURCE | REC |
| SOURCE | REC | |
|
|
|
|
|
|
| TV |
|
|
|
|
|
| DECK 1 | DECK 2 | VIEW | TUNER | AV•IN | |
|
|
|
|
| |||||
åPress 4 to choose Timer Recording. You’ll see the Timer Recording Summary.
▲From this point, you will not be able to change channels until you return to the Main Menu. ▲
MAIN MENU
1:VIDEO MENU
2:AUDIO MENU
3:SET DATE AND TIME
4:TIMER RECORDING
5:CHANNEL/TUNER MENU
WHEN OK PUSH SAVE
The Summary allows you to review the current timer settings. Four events are displayed on the screen at one time. Use the Up/Down buttons to review any event from 1 to 16.
ÕUse the Numeric buttons to choose the event number you wish to program (or use the Up/Down buttons to highlight your selection and press Next to choose it). You’ll see the Timer Recording Menu.
pUse Previous and Next to move from one selection to another. Use the Numeric buttons (or the Up/Down buttons) to change the settings for each selection. Use a preceding zero (0) before single digit entries or press Next after the first digit.
Set the Month the event will be recorded. January is 01, October is 10, etc.
Set the Year the event will be recorded. Enter only the last two digits: 91, 92, 93, etc.
Set the Day the event will be recorded. (Continued on page 20)
SELECT EVENT #01
EVENT |
| D AT E |
| T I M E | ||
1 : MON J A N | 1 12:03PM | |||||
| [ 2 ] C H 0 2 - - N R M S P | |||||
2 : - - - | - - - - - - | |||||
| [ - ] - - - - | - - | - - - | - - | ||
3 | : - - - | - - - - - - | ||||
| [ - ] - - - - | - - | - - - | - - | ||
4 : - - - | - - - - - - | |||||
| [ - ] - - - - | - - | - - - | - - | ||
|
| SET MONTH : |
|
| ||
J U N E 1991 |
|
| 1:00 PM | |||
S U M O T U W E T H F R S A | ||||||
|
|
|
|
|
| 1 |
2 | 3 | 4 | 5 | 6 | 7 | 8 |
9 | 1 0 | 1 1 | 1 2 | 1 3 | 1 4 | 1 5 |
1 6 | 1 7 | 1 8 | 1 9 | 2 0 | 2 1 | 2 2 |
2 3 | 2 4 | 2 5 | 2 6 | 2 7 | 2 8 | 2 9 |
3 0 |
|
|
|
| DECK 2 | |
0 H R 3 0 M I N C H 1 0 - - N R M S P
WHEN OK PUSH SAVE
19