NOTICE
Do not overtighten the fluid seat housing (24). Overtightening may damage the housing and the gun barrel, resulting in improper fluid shutoff.
6.Trigger the gun and install the fluid seat housing (24). Tighten until snug, then 1/4 turn more.
7.Check that the spray tip gasket (27a) is in place. Align the spray tip tab with the groove in the air cap (25). Install the spray tip (27) in the air cap.
8.Make sure that the electrode (25a) is installed correctly in the air cap.
9.Check that the air cap
10.Check that the
NOTICE
To avoid damaging the tip guard, orient the air cap assembly (25) before tightening the retaining ring (22). Do not turn the air cap when the retaining ring is tight.
11.Orientate the air cap and tighten the retaining ring securely.
12.See Test Gun Resistance, page 32.
Repair
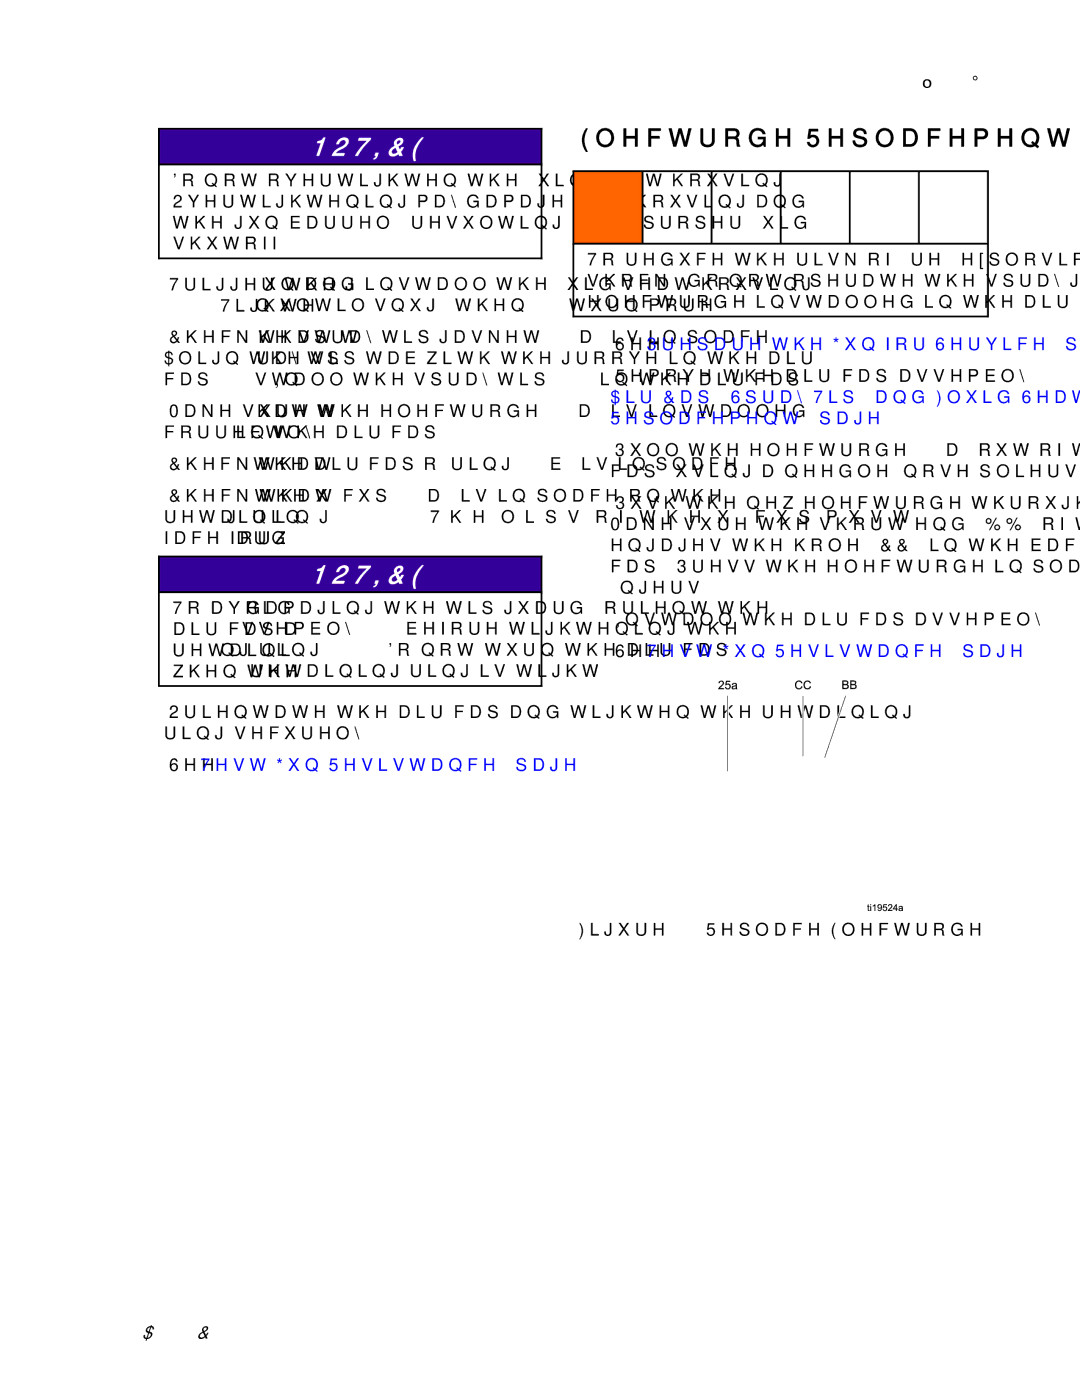
Electrode Replacement
To reduce the risk of fire, explosion, or electric shock, do not operate the spray gun without the electrode installed in the air cap.
1.See Prepare the Gun for Service, page 39.
2.Remove the air cap assembly (25). See Air Cap, Spray Tip, and Fluid Seat Housing Replacement, page 40.
3.Pull the electrode (25a) out of the back of the air cap, using a
4.Push the new electrode through the air cap hole. Make sure the short end (BB) of the electrode engages the hole (CC) in the back of the air cap. Press the electrode in place firmly with your fingers.
5.Install the air cap assembly.
6.See Test Gun Resistance, page 32.
Figure 24 Replace Electrode
3A2495C | 41 |