Maintenance
Maintenance
Flushing
•Flush before changing fluids, before fluid can dry in the equipment, at the end of the day, before storing, and before repairing equipment.
•Flush at the lowest pressure possible. Check connectors for leaks and tighten as necessary.
•Flush with a fluid that is compatible with the fluid being dispensed and the equipment wetted parts.
To reduce the risk of fire, explosion, or electric shock, turn OFF (O) the ES
NOTICE
Do not use methylene chloride as a flushing or cleaning solvent with this gun as it will damage nylon components.
1.Turn OFF (O) the ES
2.Follow the Pressure Relief Procedure, page 27.
3.Remove and clean the air cap and spray tip.
4.Change the fluid source to solvent, or disconnect the fluid line and connect a solvent supply line to the gun.
5.Point the gun into a grounded metal pail. Flush until clean solvent flows from the gun.
6.Follow the Pressure Relief Procedure, page 27. Engage the trigger lock.
7.Shut off or disconnect the solvent line.
8.Align the spray tip tab with the groove in the air cap. Install the tip.
9.Reinstall the air cap, tip guard, and retaining ring.
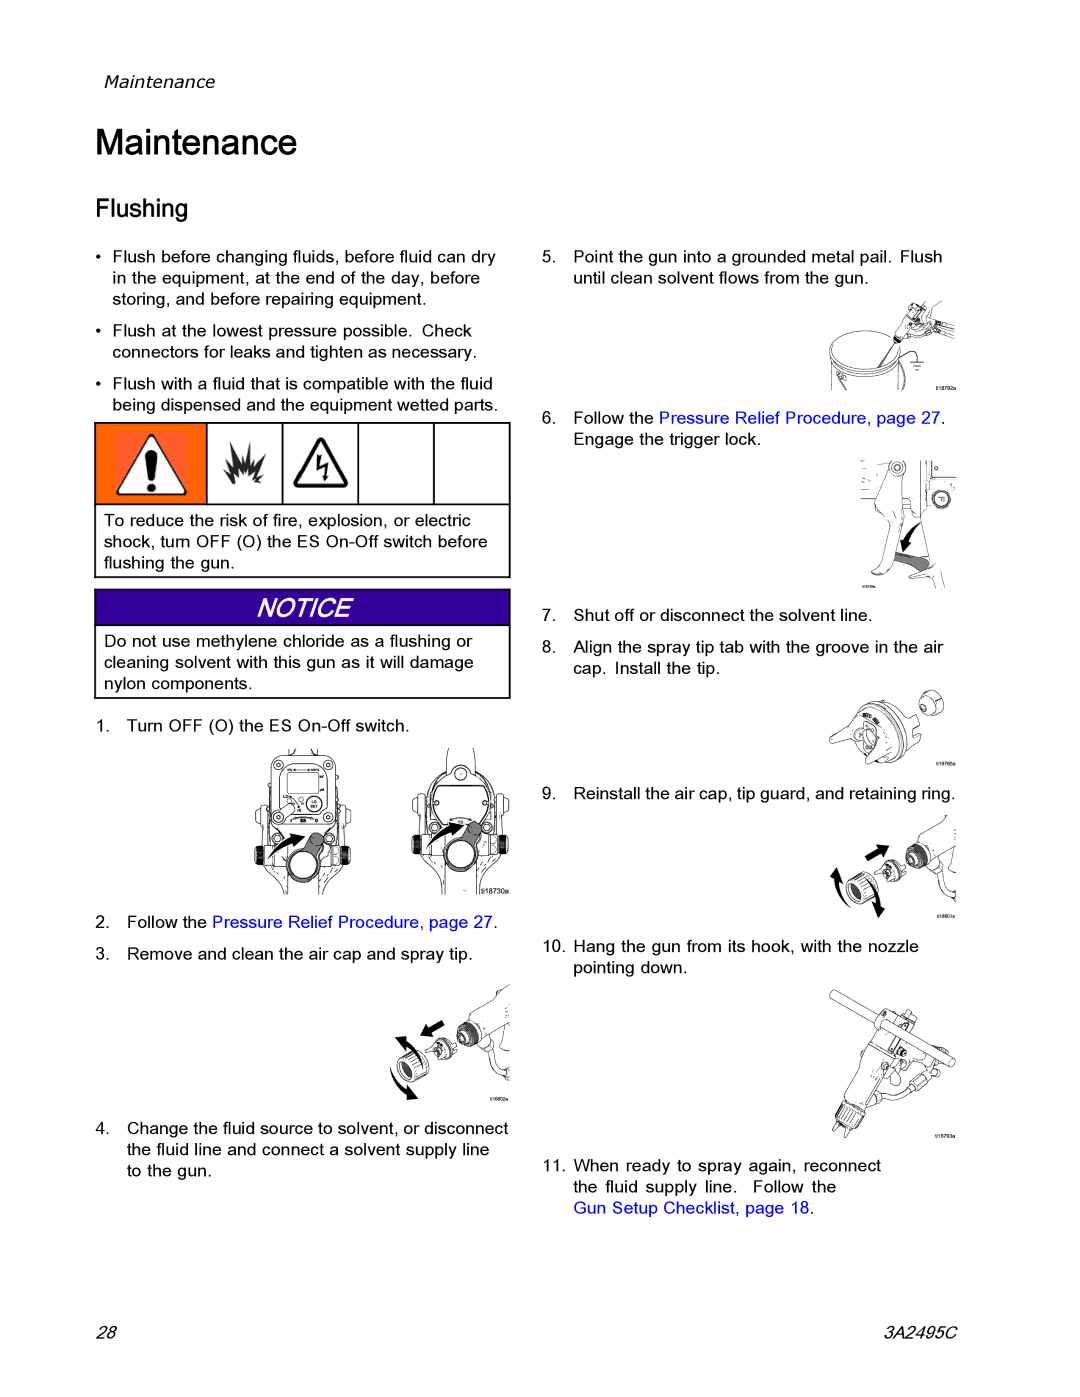
10.Hang the gun from its hook, with the nozzle pointing down.
11.When ready to spray again, reconnect the fluid supply line. Follow the Gun Setup Checklist, page 18.
28 | 3A2495C |