Diagnostic Mode
Diagnostic Mode includes four screens which display gun data:
•Voltage (kiloVolts) Screen
•Current (microAmperes) Screen
•Alternator Speed (Hertz) Screen
•Low Voltage Lock Screen
NOTE: You must be in Operating Mode to adjust the low voltage setting; the setting is not adjustable in Diagnostic Mode. However, the voltage adjustment switch (VA) can be set to HI or LO in Operating Mode and in Diagnostic Mode.
To enter Diagnostic Mode, press and hold the LO SET (LS) button for approximately 5 seconds. The display will go to the Voltage (kiloVolts) Screen, page 13.
To advance to the next screen, press the LO SET button again.
To exit Diagnostic Mode, press and hold the LO SET button for approximately 5 seconds. The screen will return to Operating Mode.
NOTE: If the gun is detriggered while in Diagnostic Mode, the last screen viewed will be displayed when the gun is retriggered.
NOTE: Diagnostic Mode cannot be exited from the Low Voltage Lock Screen. See Low Voltage Lock Screen, page 14 for details.
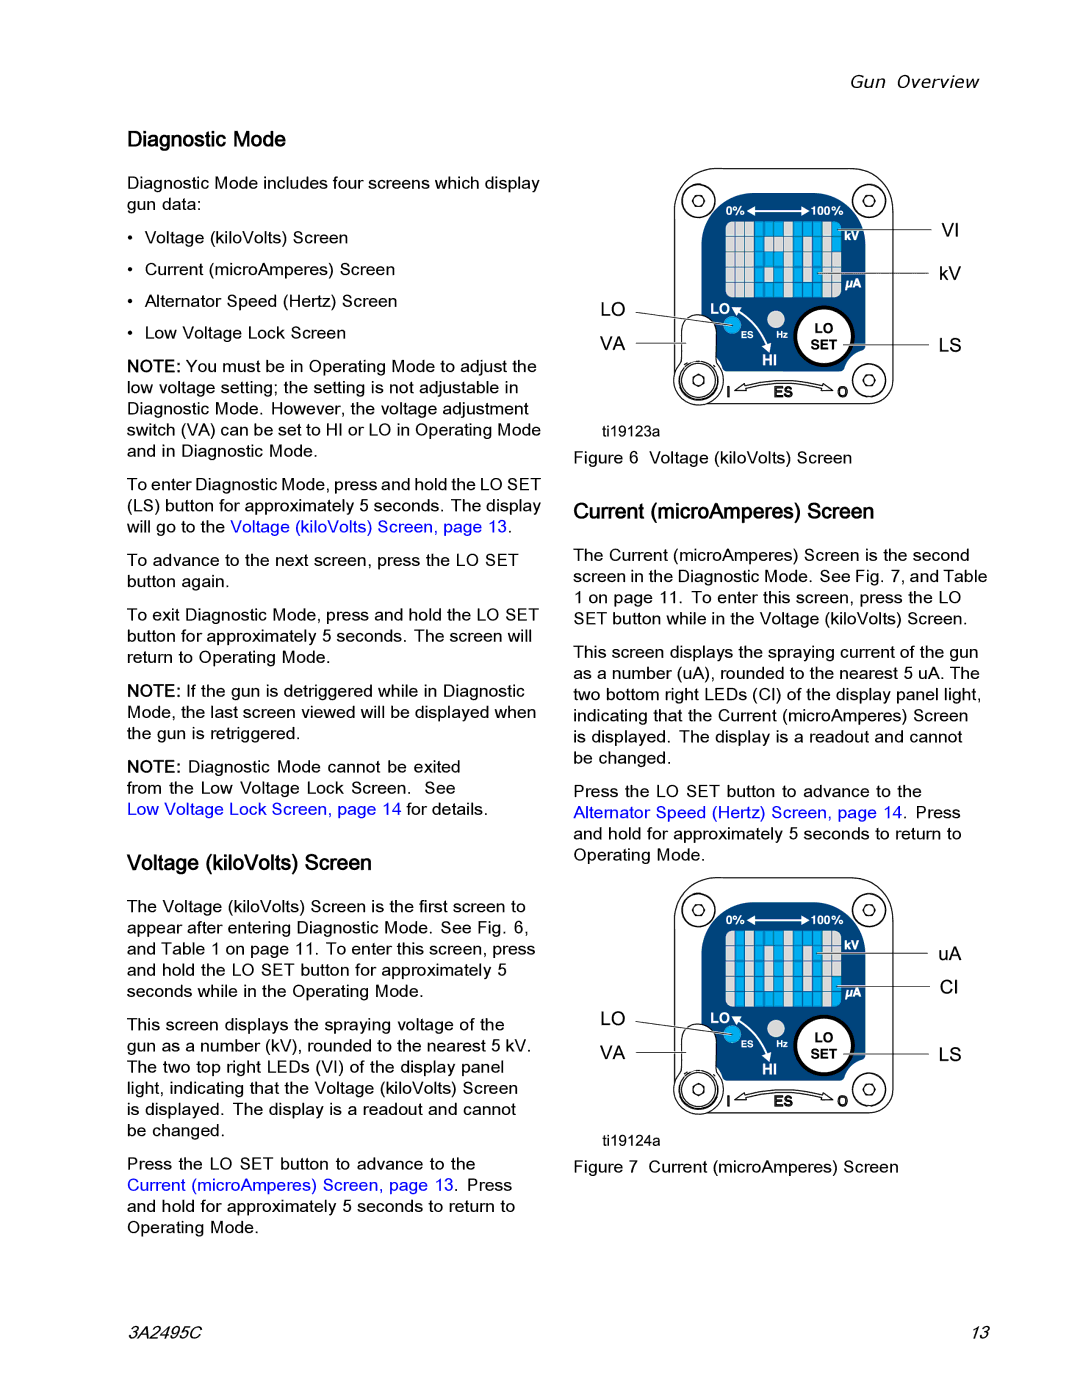
Voltage (kiloVolts) Screen
The Voltage (kiloVolts) Screen is the first screen to appear after entering Diagnostic Mode. See Fig. 6, and Table 1 on page 11. To enter this screen, press and hold the LO SET button for approximately 5 seconds while in the Operating Mode.
This screen displays the spraying voltage of the gun as a number (kV), rounded to the nearest 5 kV. The two top right LEDs (VI) of the display panel light, indicating that the Voltage (kiloVolts) Screen is displayed. The display is a readout and cannot be changed.
Press the LO SET button to advance to the Current (microAmperes) Screen, page 13. Press and hold for approximately 5 seconds to return to Operating Mode.
Gun Overview
Figure 6 Voltage (kiloVolts) Screen
Current (microAmperes) Screen
The Current (microAmperes) Screen is the second screen in the Diagnostic Mode. See Fig. 7, and Table 1 on page 11. To enter this screen, press the LO SET button while in the Voltage (kiloVolts) Screen.
This screen displays the spraying current of the gun as a number (uA), rounded to the nearest 5 uA. The two bottom right LEDs (CI) of the display panel light, indicating that the Current (microAmperes) Screen is displayed. The display is a readout and cannot be changed.
Press the LO SET button to advance to the Alternator Speed (Hertz) Screen, page 14. Press and hold for approximately 5 seconds to return to Operating Mode.
Figure 7 Current (microAmperes) Screen
3A2495C | 13 |