Repair
Fluid Needle Replacement
1.See Prepare the Gun for Service, page 39.
2.Remove the air cap assembly and fluid seat housing. See Air Cap, Spray Tip, and Fluid Seat Housing Replacement, page 40.
3.Remove the gun barrel. See Gun Barrel Removal, page 43.
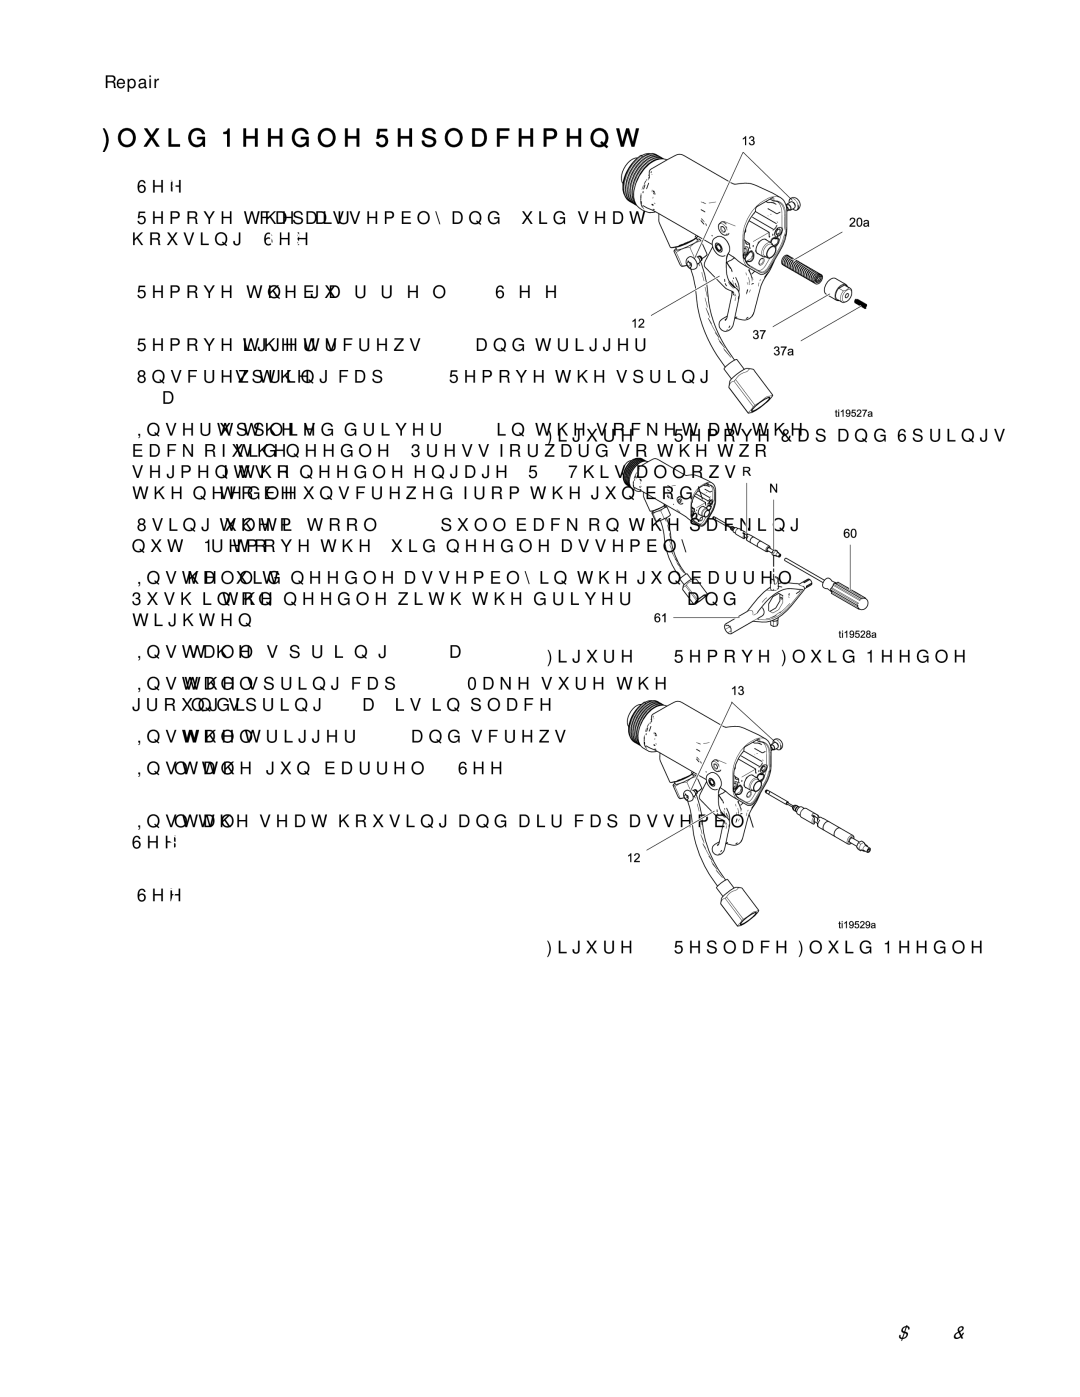
4.Remove the trigger screws (13) and trigger (12).
5.Unscrew the spring cap (37). Remove the spring (20a).
6.Insert the supplied driver (60) in the socket at the back of the fluid needle. Press forward so the two segments of the needle engage (R). This allows the needle to be unscrewed from the gun body.
7.Using the
8.Install the fluid needle assembly in the gun barrel. Push in on the needle with the driver (60) and tighten.
9.Install the spring (20a).
10.Install the spring cap (37). Make sure the grounding spring (37a) is in place.
11.Install the trigger (12) and screws (13).
12.Install the gun barrel. See Gun Barrel Installation, page 43.
13.Install the seat housing and air cap assembly. See Air Cap, Spray Tip, and Fluid Seat Housing Replacement, page 40.
14.See Test Gun Resistance, page 32.
Figure 29 Remove Cap and Springs
Figure 30 Remove Fluid Needle
Figure 31 Replace Fluid Needle
44 | 3A2495C |