Repair
Fluid Tube Removal and Replacement
1.See Prepare the Gun for Service, page 39.
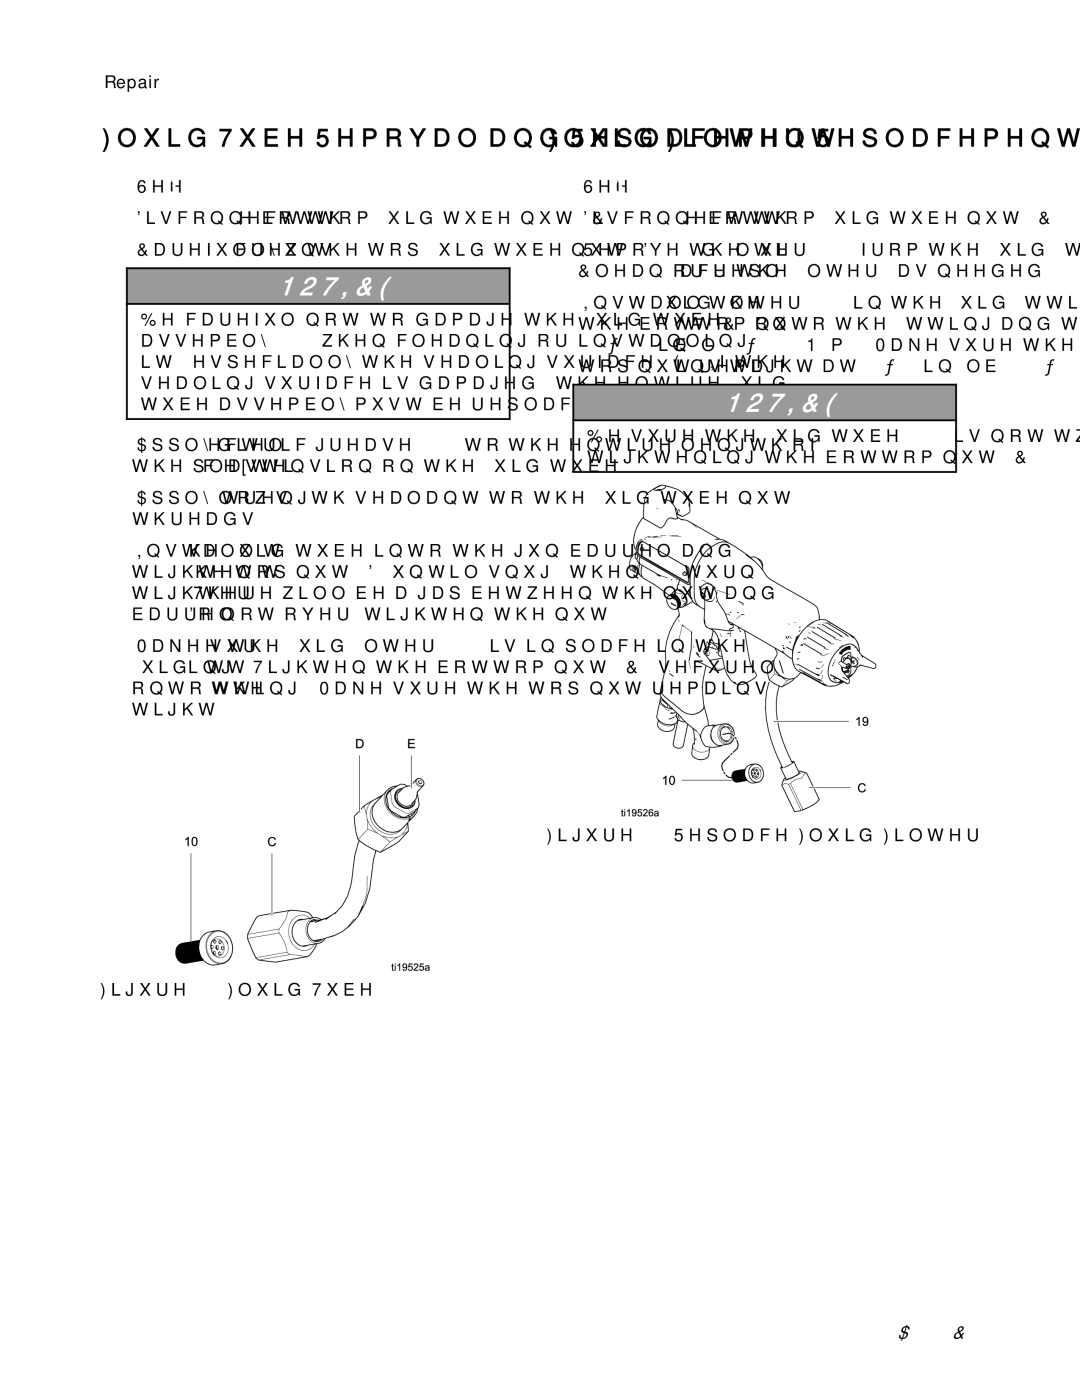
2.Disconnect the bottom fluid tube nut (C).
3.Carefully unscrew the top fluid tube nut (D).
NOTICE
Be careful not to damage the fluid tube assembly (19) when cleaning or installing it, especially the sealing surface (E). If the sealing surface is damaged, the entire fluid tube assembly must be replaced.
4.Apply dielectric grease (57) to the entire length of the plastic extension on the fluid tube.
5.Apply low strength sealant to the fluid tube nut threads.
6.Install the fluid tube into the gun barrel and tighten the top nut (D) until snug, then 1/2 turn tighter. There will be a gap between the nut and barrel. Do not
7.Make sure the fluid filter (10) is in place in the fluid fitting. Tighten the bottom nut (C) securely onto the fitting. Make sure the top nut remains tight.
Fluid Filter Replacement
1.See Prepare the Gun for Service, page 39.
2.Disconnect the bottom fluid tube nut (C).
3.Remove the fluid filter (10) from the fluid fitting. Clean or replace the filter, as needed.
4.Install the fluid filter (10) in the fluid fitting. Tighten the bottom nut (C) onto the fitting and torque to
NOTICE
Be sure the fluid tube (19) is not twisted after tightening the bottom nut (C).
Figure 26 Replace Fluid Filter
Figure 25 Fluid Tube
42 | 3A2495C |
