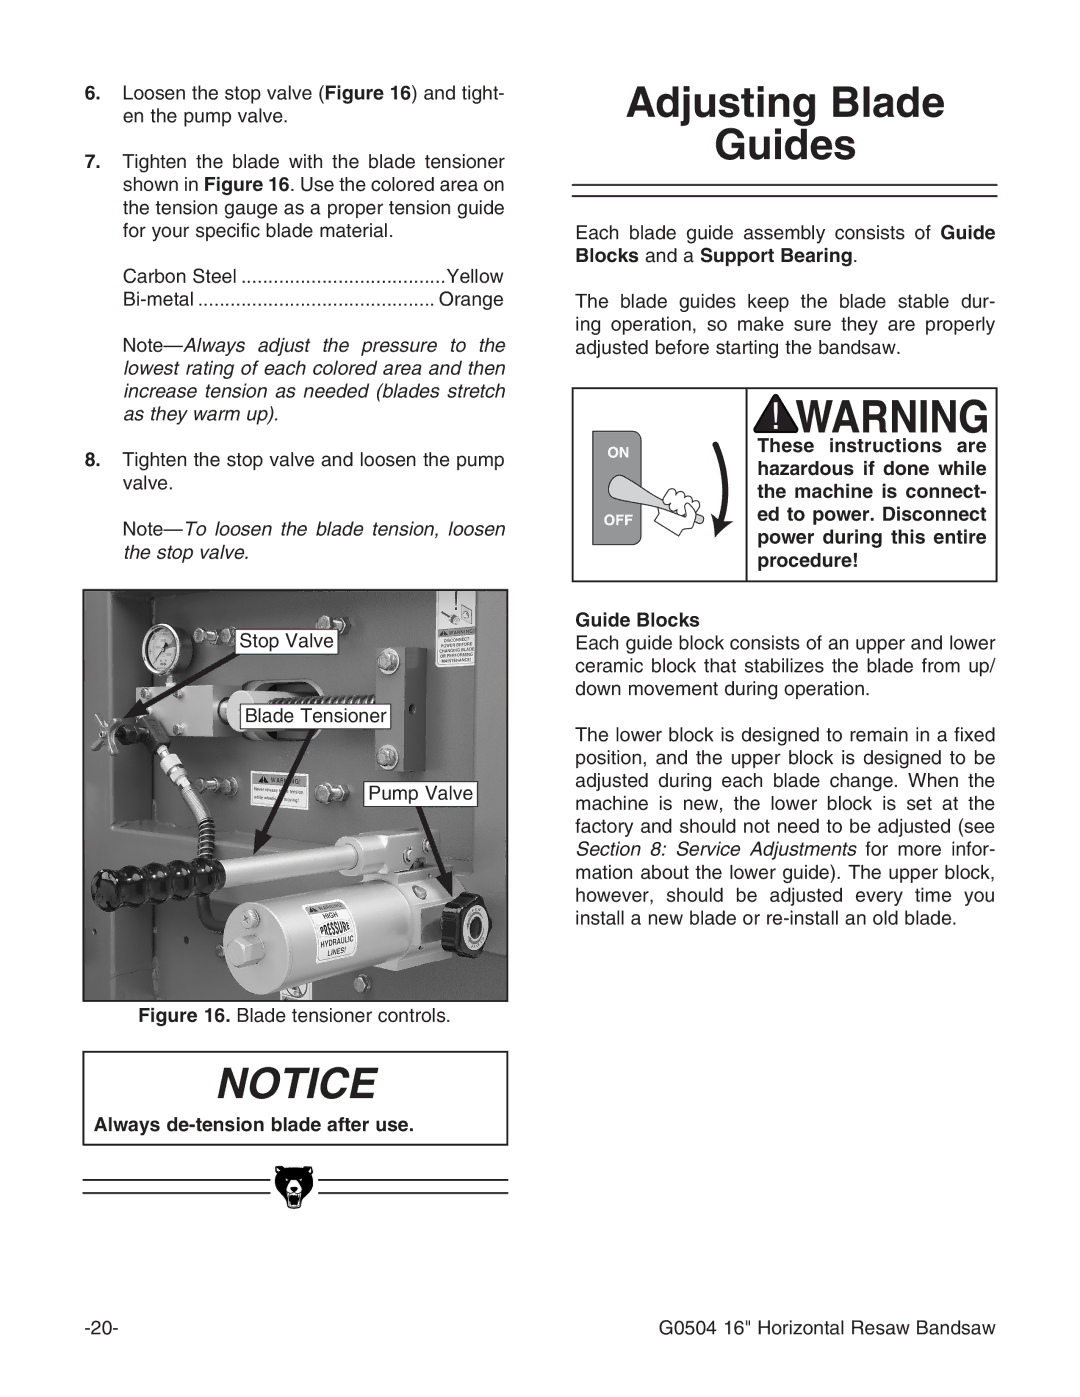
6.Loosen the stop valve (Figure 16) and tight- en the pump valve.
7.Tighten the blade with the blade tensioner shown in Figure 16. Use the colored area on the tension gauge as a proper tension guide for your specific blade material.
Carbon Steel | ......................................Yellow |
Orange |
8.Tighten the stop valve and loosen the pump valve.
Stop Valve
Blade Tensioner
Pump Valve
Figure 16. Blade tensioner controls.
NOTICE
Always de-tension blade after use.
Adjusting Blade
Guides
Each blade guide assembly consists of Guide Blocks and a Support Bearing.
The blade guides keep the blade stable dur- ing operation, so make sure they are properly adjusted before starting the bandsaw.
These instructions are hazardous if done while the machine is connect- ed to power. Disconnect power during this entire procedure!
Guide Blocks
Each guide block consists of an upper and lower ceramic block that stabilizes the blade from up/ down movement during operation.
The lower block is designed to remain in a fixed position, and the upper block is designed to be adjusted during each blade change. When the machine is new, the lower block is set at the factory and should not need to be adjusted (see Section 8: Service Adjustments for more infor- mation about the lower guide). The upper block, however, should be adjusted every time you install a new blade or
G0504 16" Horizontal Resaw Bandsaw |
