C. Vertical Penetration Framing
A ceiling firestop MUST be used between floors and attics.
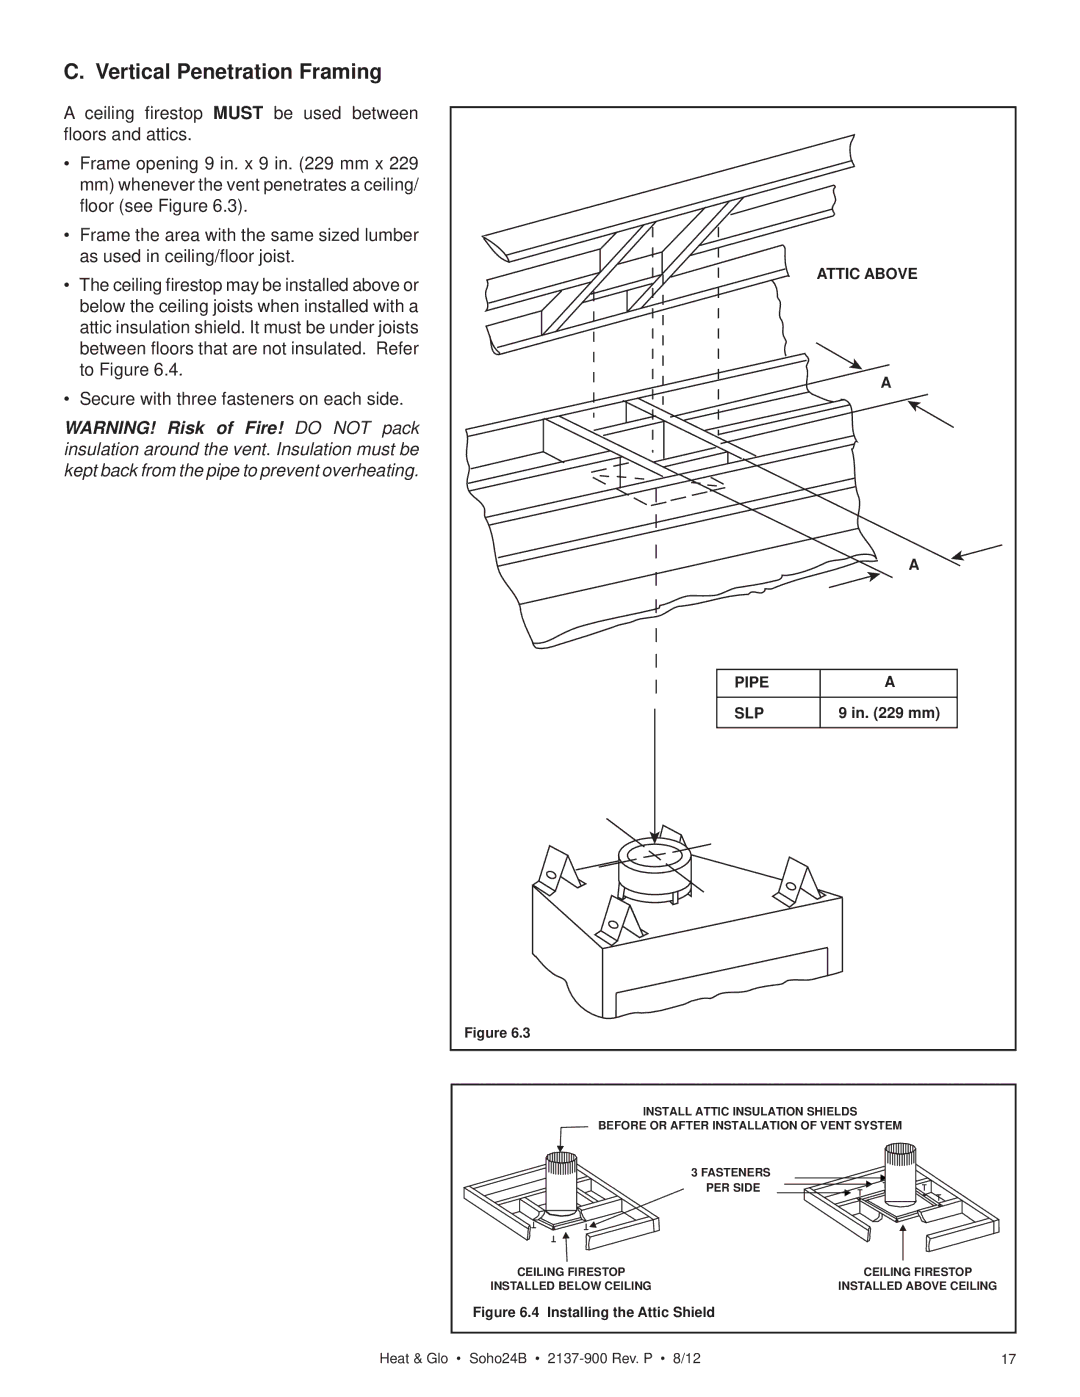
•Frame opening 9 in. x 9 in. (229 mm x 229 mm) whenever the vent penetrates a ceiling/ floor (see Figure 6.3).
•Frame the area with the same sized lumber as used in ceiling/floor joist.
•The ceiling firestop may be installed above or below the ceiling joists when installed with a attic insulation shield. It must be under joists between floors that are not insulated. Refer to Figure 6.4.
•Secure with three fasteners on each side.
WARNING! Risk of Fire! DO NOT pack insulation around the vent. Insulation must be kept back from the pipe to prevent overheating.
| ATTIC ABOVE |
| A |
| A |
PIPE | A |
SLP | 9 in. (229 mm) |
Figure 6.3 |
|
INSTALL ATTIC INSULATION SHIELDS | |
BEFORE OR AFTER INSTALLATION OF VENT SYSTEM | |
3 FASTENERS |
|
PER SIDE |
|
CEILING FIRESTOP | CEILING FIRESTOP |
INSTALLED BELOW CEILING | INSTALLED ABOVE CEILING |
Figure 6.4 Installing the Attic Shield |
|
Heat & Glo • Soho24B • | 17 |