Manuals
/
HP
/
Computer Equipment
/
Network Router
HP
2100 ER
manual
Fibre Bridge, Back View
Models:
2100 ER
1
40
95
95
Download
95 pages
27.29 Kb
37
38
39
40
41
42
43
44
Troubleshooting
Specs
Install
Changing the Default Settings
Connecting the Serial Cable
Warranty
Fibre Channel Configurations
Problems with Fibre Channel
Supplies and Accessories
Setting Up the Fibre Bridge
Page 40
Image 40
Operating the Fibre Bridge
Powering on the System
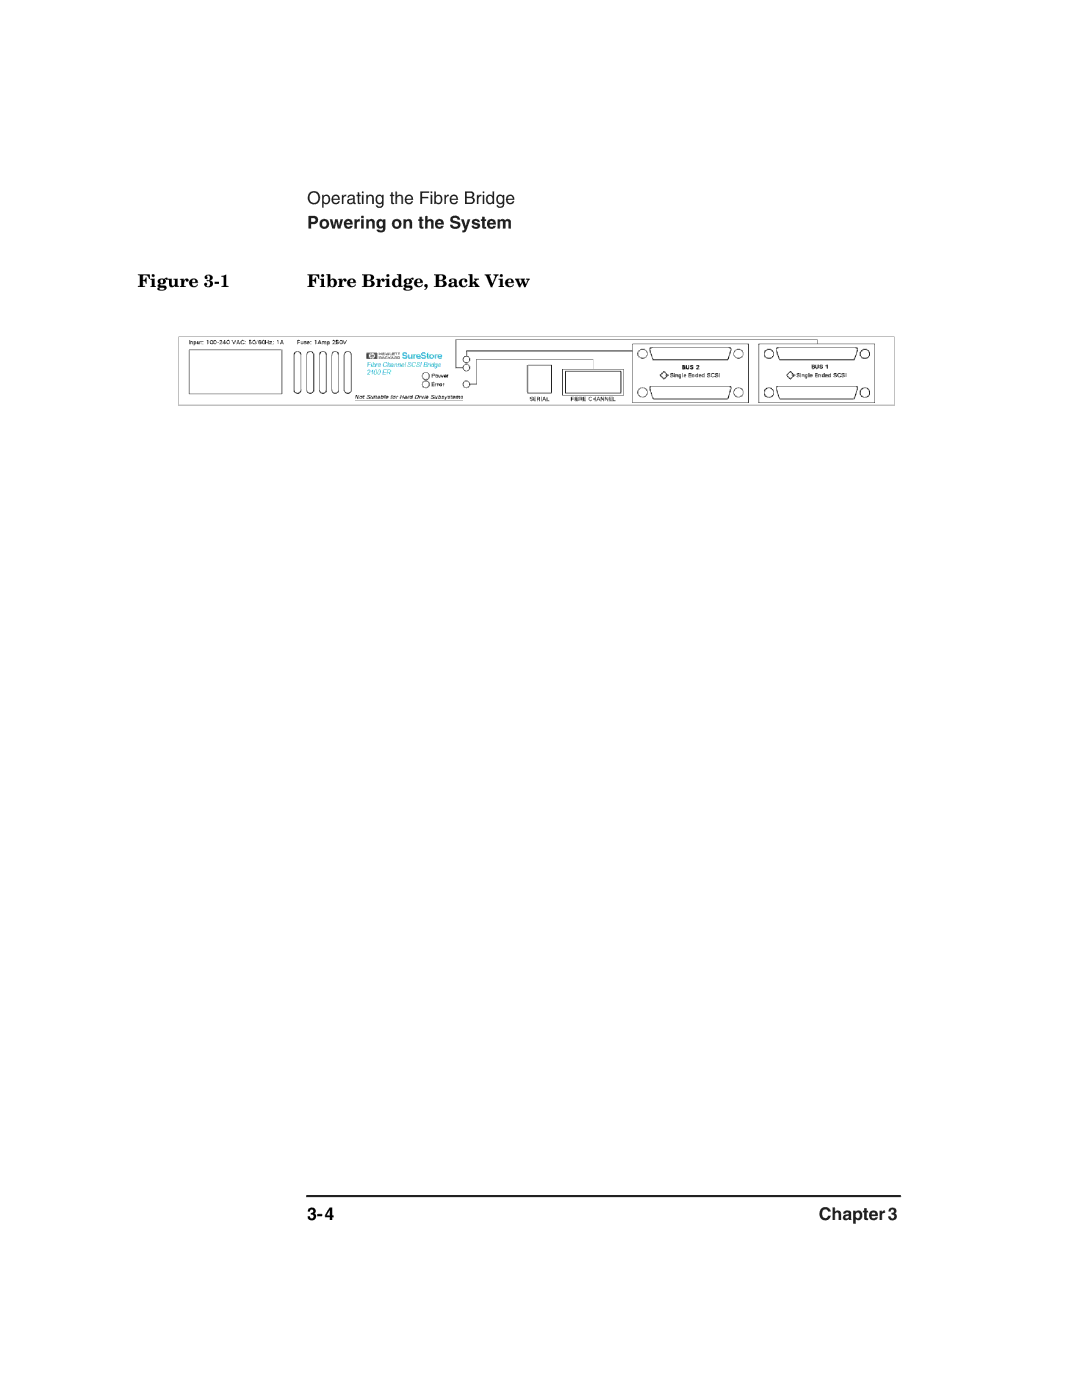
Figure
3-1
Fibre Bridge, Back View
3-4
Chapter 3
Page 39
Page 41
Page 40
Image 40
Page 39
Page 41
Contents
Edition
User Guide
Part Number C6340-90003 February
Warranty
Iii
Printing History
Typographical Conventions
This Guide
Contents
Support and Customer Service
Troubleshooting Guide
Fibre Channel Overview
Safety and Regulatory Information
Glossary Index
Contents
Tables
Xii
Figures
Xiv
Introduction
Chapter Overview
Product Components
Fibre Bridge Components Supported Products
Supplied Components Quantity Description
Quantity Description
Supported Products
Supported Products Description
Physical Specifications
Environmental Specifications
Physical Specifications of the Fibre Bridge
Choosing a Location
Basic Configuration
Fibre Channel Configurations
Sample Fibre Channel Configuration-Basic
Expanded Configuration DLT libraries only
Sample Fibre Channel Configuration- Minimum Expansion
Sample Fibre Channel Configuration-Maximum Expansion
Fibre Channel Configurations
Setting Up the Fibre Bridge
Setting Up the Fibre Bridge
Assembly Components
Mounting the Fibre Bridge in a Rack
Assemble the L-brackets to the Fibre Bridge
Assembling L-brackets to the Fibre Bridge
Install the Fibre Bridge in the Rack
Mount the Fibre Bridge in the Rack
Installing Cables
Fibre Bridge Connection, Basic Configuration
DLT and MO Libraries
-4 for examples of expanded configurations
Fibre Bridge Connection, Expanded Configuration Minimum
DLT Only
Fibre Bridge Connection, Expanded Configuration Maximum
Fiber-Optic Cable Options
Optical Fibre Channel Cable Options
Product Number Length
Installing Cables
Operating the Fibre Bridge
Operating the Fibre Bridge
Powering on the System
Fibre Bridge, Back View
Changing the Default Settings
Connecting the Serial Cable
Connecting the Serial Cable
Serial Port Setup
Serial Port Operation
Fibre Bridge Default Configuration Settings
Scsi
Making Configuration Changes
Fibre Bridge Configuration, Main Menu
Fibre Bridge Configuration Menu
Reconfigure the Fibre Channel Address
Fibre Channel Configuration Menu
Fibre Channel Addresses
Change the Trace Settings
Trace Settings Menu
Fibre Channel to Scsi Mapping Configuration
Troubleshooting Guide
Troubleshooting Guide
Problem Cannot Turn On the DLT Library
Troubleshooting
Problem Cannot Turn On the MO Library
Problem Cannot Turn On the Hub DLT Only
Problem Cannot Turn On the Fibre Bridge
Problem Cannot Confirm the Library
Connection
Make sure the libraries, Fibre Bridge, and hubs DLT only are
Recheck for the appearance of the library Scsi devices
Troubleshooting
Troubleshooting
Fibre Channel Overview
Overview
Defining Fibre Channel
FC-AL
Distributed Devices
Implementing Fibre Channel
Cabling Advantages
Working With Fibre Channel
Working With Fibre Channel
Working With Fibre Channel
Problems with Fibre Channel
Physical Connections
Additional optical cable considerations are as follows
Laser Power Control Systems
Device Addressing
Problems with Fibre Channel
Support and Customer Service
Support and Customer Service
Supplies and Accessories
Hewlett-Packard Customer Support
Support Pack Service Contract
HP FIRST/QUICK FAX Faxback Services
Asia-Pacific
North and South America includes Canada
Europe
Other Countries
Electronic Support Services
On-line Service Providers
Service Description Address Provider
Hewlett-Packard Web Site
Customer Care Centers
European Customer Care Centers
Elsewhere
Telephone Support After Warranty
Before Calling
US and Canada
HP Reseller Locator Numbers
Hewlett-Packard Customer Support
Safety and Regulatory
Safety and Regulatory Information
Cdrh Regulations USA Only
United Kingdom Telecommunications Act
Chapter Overview
Herstellerbescheinigung
English Translation of German Sound Emission Directive
Turvallisuusyhteenveto
Laserturvallisuus
Laser Safety
English Translation of Finland Regulatory Information
Japanese Vcci Statement
Glossary
Glossary
SW Optical FC Cable Short
Glos-4
Index
Top
Page
Image
Contents