Verifying HP FTAM/9000
Verification Overview
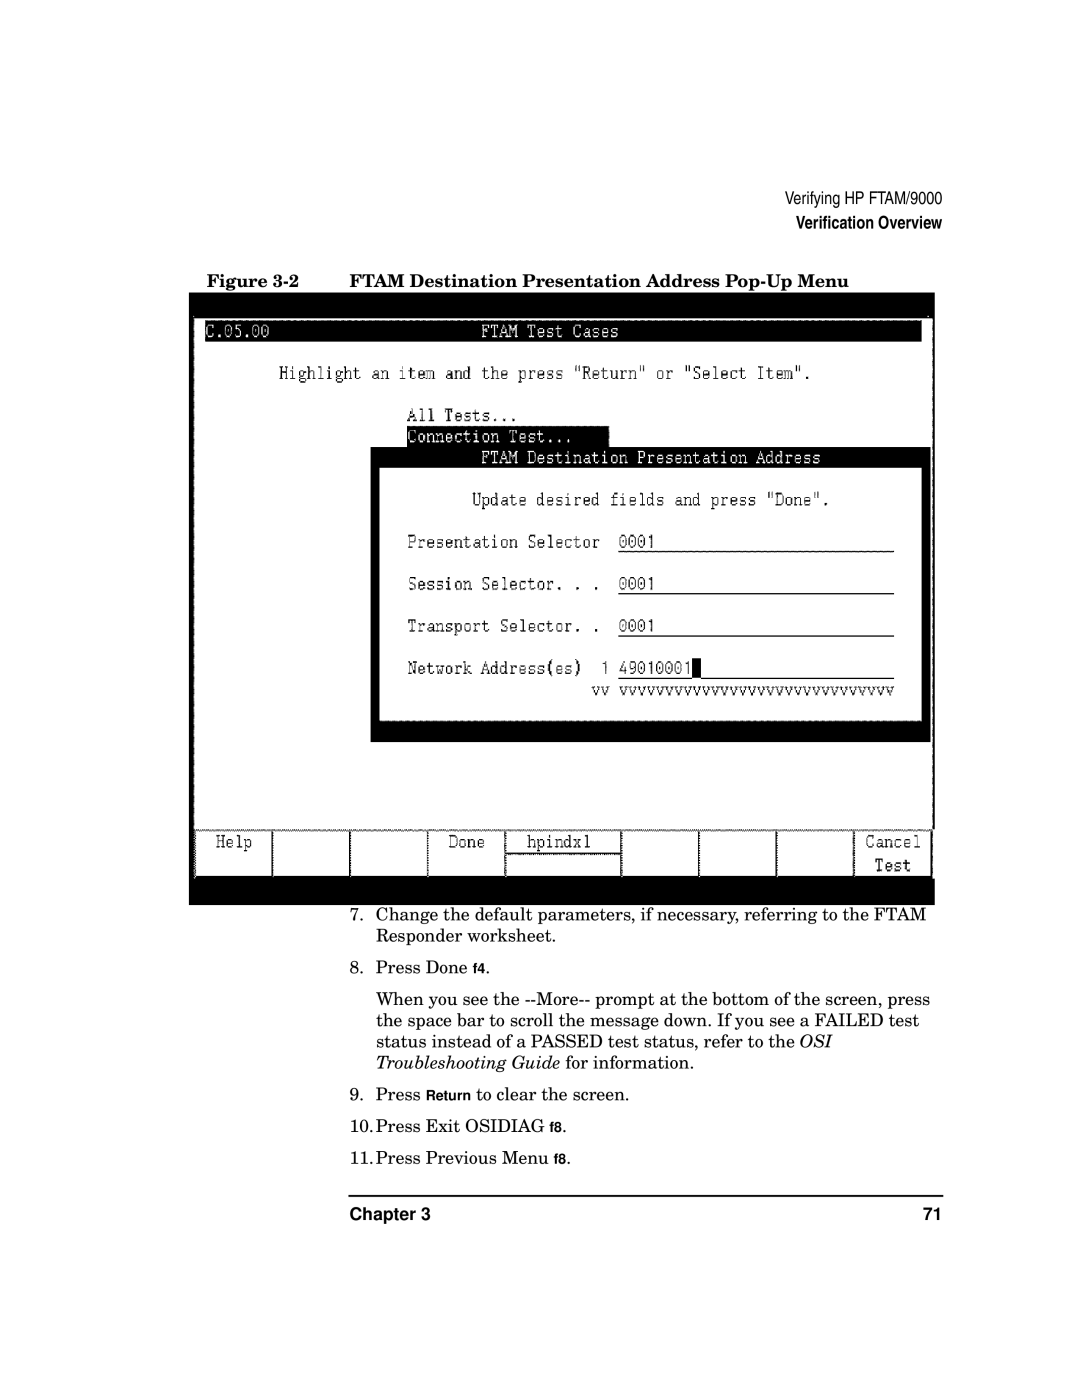
Figure 3-2 FTAM Destination Presentation Address Pop-Up Menu
7.Change the default parameters, if necessary, referring to the FTAM Responder worksheet.
8.Press Done f4.
When you see the
9.Press Return to clear the screen.
10.Press Exit OSIDIAG f8.
11.Press Previous Menu f8.
Chapter 3 | 71 |
