Print Server Administration User’s Guide
7.Windows may ask you whether or not you wish to print a test page to make sure that the printer will work correctly. When the test page is done printing, you will be asked whether or not the test page printed.
Windows NT 4.0 (and later) Client Workstations
To enable your Windows NT 4.0 or later workstation to print to a NetWare print queue,
1.From the Start menu, choose the Settings submenu, then the Printers item within it. Windows will display the Printers folder.
2.
Windows will start the Add Printer Wizard.
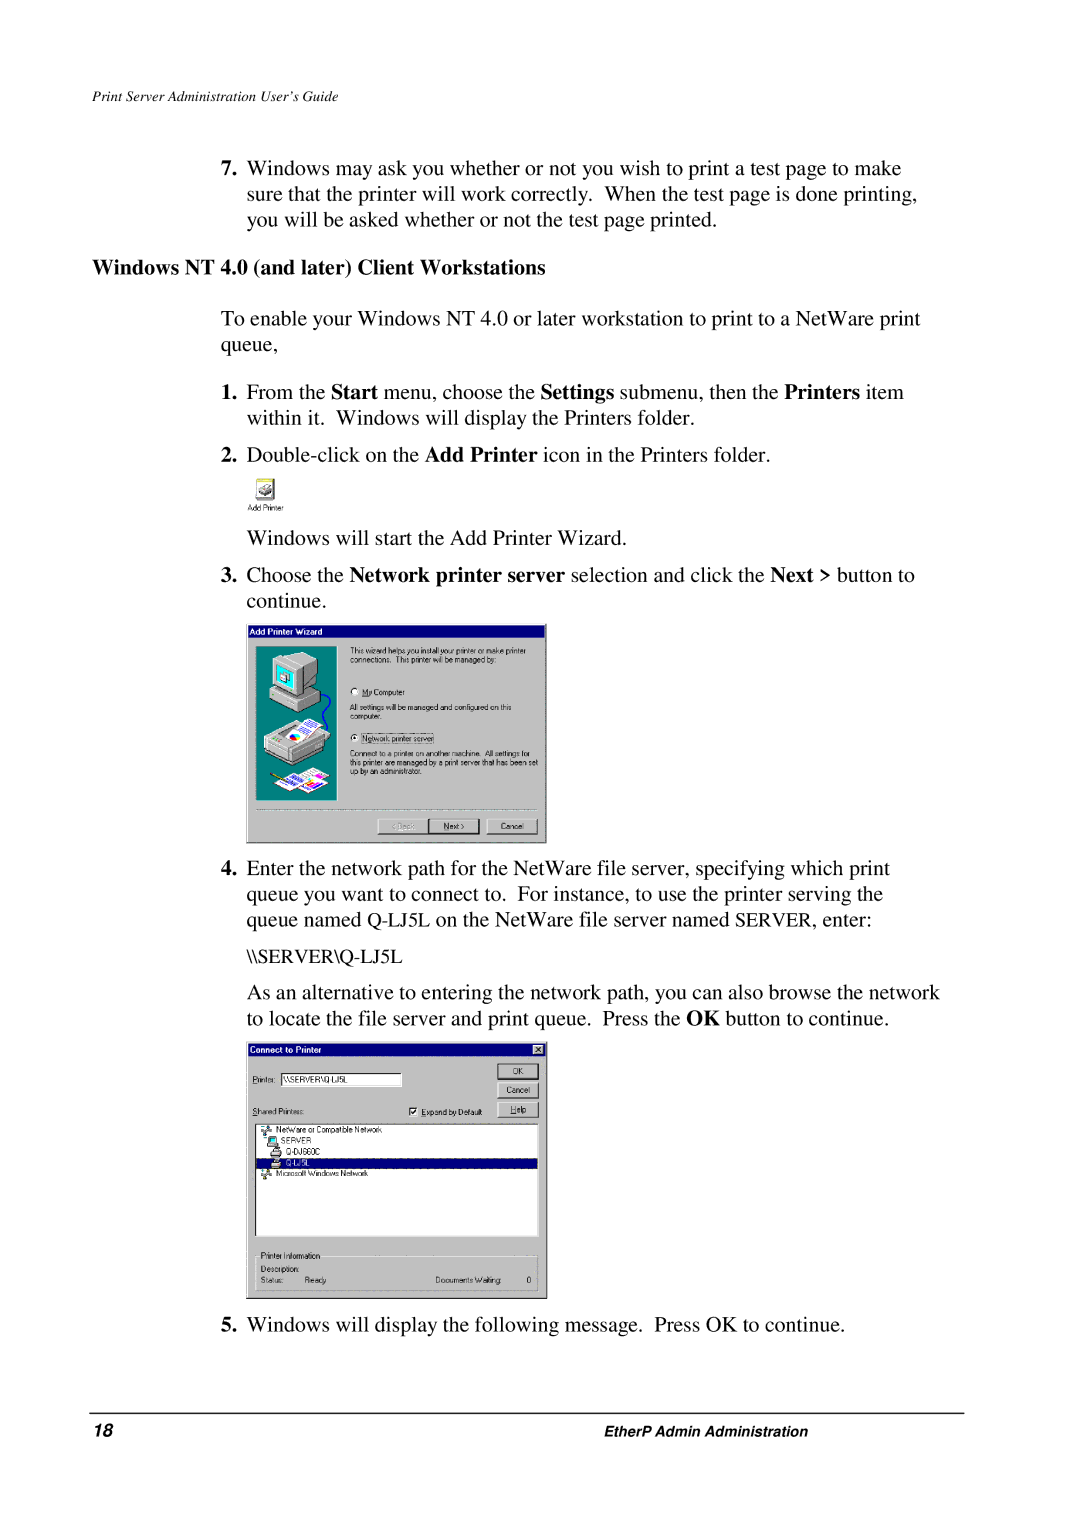
3.Choose the Network printer server selection and click the Next > button to continue.
4.Enter the network path for the NetWare file server, specifying which print queue you want to connect to. For instance, to use the printer serving the queue named
\\SERVER\Q-LJ5L
As an alternative to entering the network path, you can also browse the network to locate the file server and print queue. Press the OK button to continue.
5.Windows will display the following message. Press OK to continue.
18 | EtherP Admin Administration |