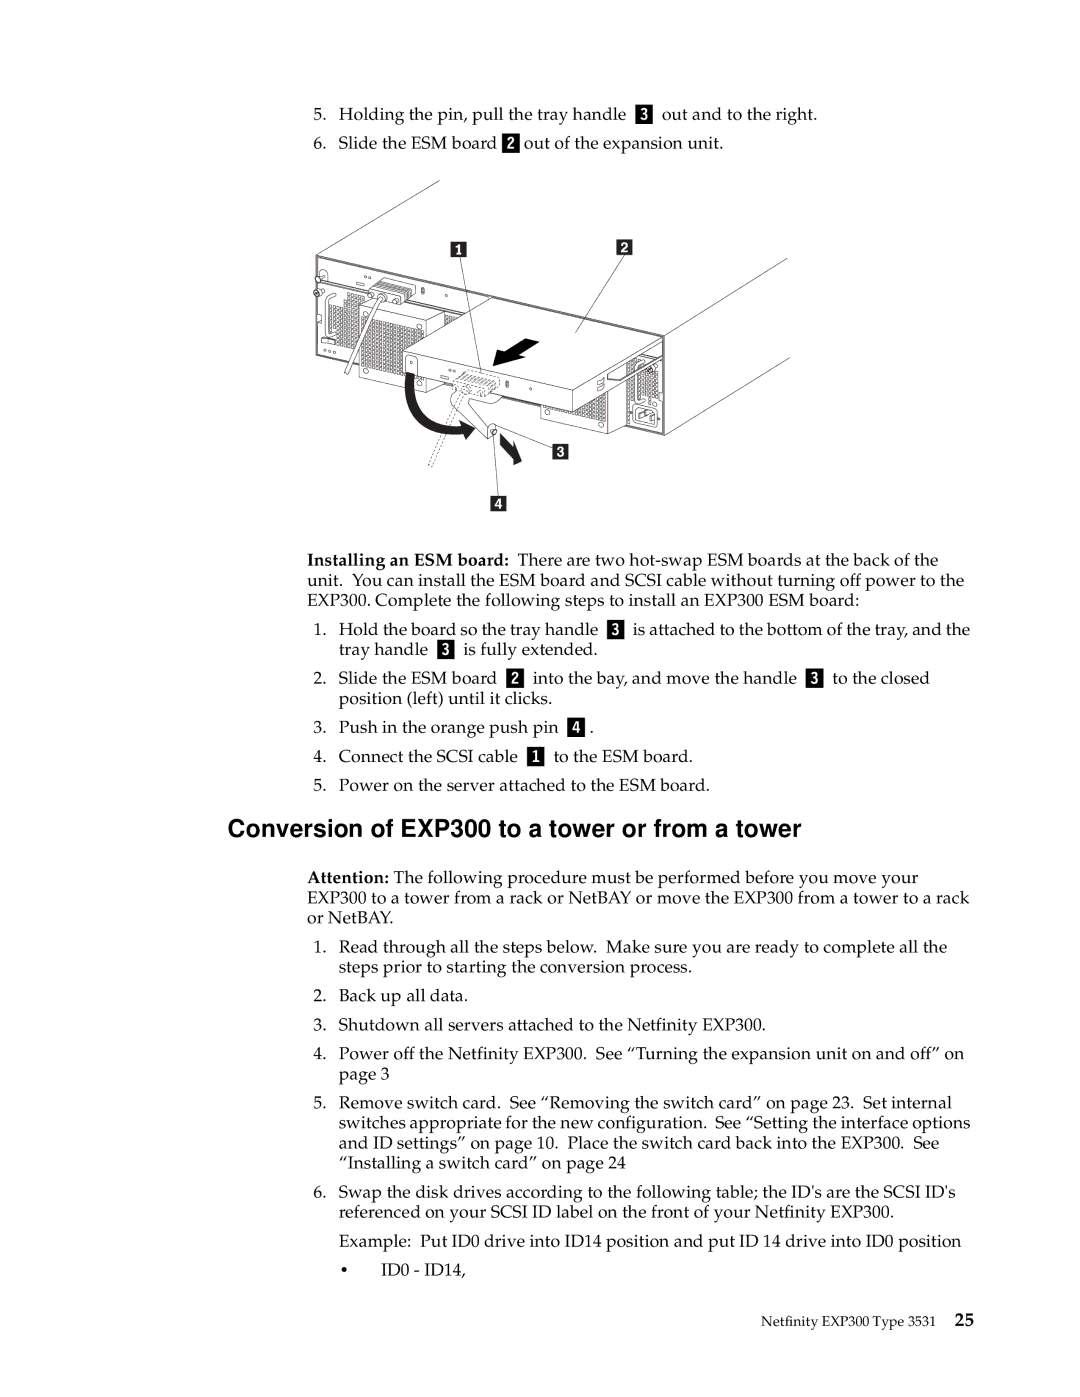
5.Holding the pin, pull the tray handle Þ Ý out and to the right.
6.Slide the ESM boardÞ Ýout of the expansion unit.
Installing an ESM board: There are two
1.Hold the board so the tray handle Þ Ý is attached to the bottom of the tray, and the tray handle Þ Ý is fully extended.
2.Slide the ESM board Þ Ý into the bay, and move the handle Þ Ý to the closed position (left) until it clicks.
3.Push in the orange push pin Þ Ý.
4.Connect the SCSI cable Þ Ý to the ESM board.
5.Power on the server attached to the ESM board.
Conversion of EXP300 to a tower or from a tower
Attention: The following procedure must be performed before you move your EXP300 to a tower from a rack or NetBAY or move the EXP300 from a tower to a rack or NetBAY.
1.Read through all the steps below. Make sure you are ready to complete all the steps prior to starting the conversion process.
2.Back up all data.
3.Shutdown all servers attached to the Netfinity EXP300.
4.Power off the Netfinity EXP300. See “Turning the expansion unit on and off” on page 3
5.Remove switch card. See “Removing the switch card” on page 23. Set internal switches appropriate for the new configuration. See “Setting the interface options and ID settings” on page 10. Place the switch card back into the EXP300. See “Installing a switch card” on page 24
6.Swap the disk drives according to the following table; the ID's are the SCSI ID's referenced on your SCSI ID label on the front of your Netfinity EXP300.
Example: Put ID0 drive into ID14 position and put ID 14 drive into ID0 position
• ID0 - ID14,
Netfinity EXP300 Type 3531 25