a.Verify the setting of the unit ID switch (sometimes referred to as a box ID or a tray ID).
b.Locate the expansion unit ID labels that come with this kit; then, apply the label that matches the setting for the unit ID in the blank label area directly below the SCSI ID label.
3.Refer to “Turning the expansion unit on and off” on page 3 for information about turning on the expansion unit.
Note: Important information for IBM ServeRAID users:
If you are using a ServeRAID software version earlier than Version 3.50, the View Configuration screens might show SCSI IDs or bay numbers. If the data shown on the View Configuration screen begins with '0', it denotes SCSI IDs. If the data shown on the View Configuration screen begins with '1', it denotes bay numbers.
Installing the EXP300 in a NetBAY enclosure
NetBAY enclosures are stackable and each can store a different device, such as the EXP300 expansion unit. You also can attach a server to the top of the enclosure. Refer to the NetBAY documentation for details on installing other devices.
Note: Because of the depth of the NetBAY3 enclosure, it might be difficult to set the expansion unit option switches once installed. Verify that internal option switches 1 and 2 are set to Off, and that internal option switch 3 and the Unit ID dial ID switch are set properly for your environment (see “Setting the interface options and ID settings” on page 10 for more information).
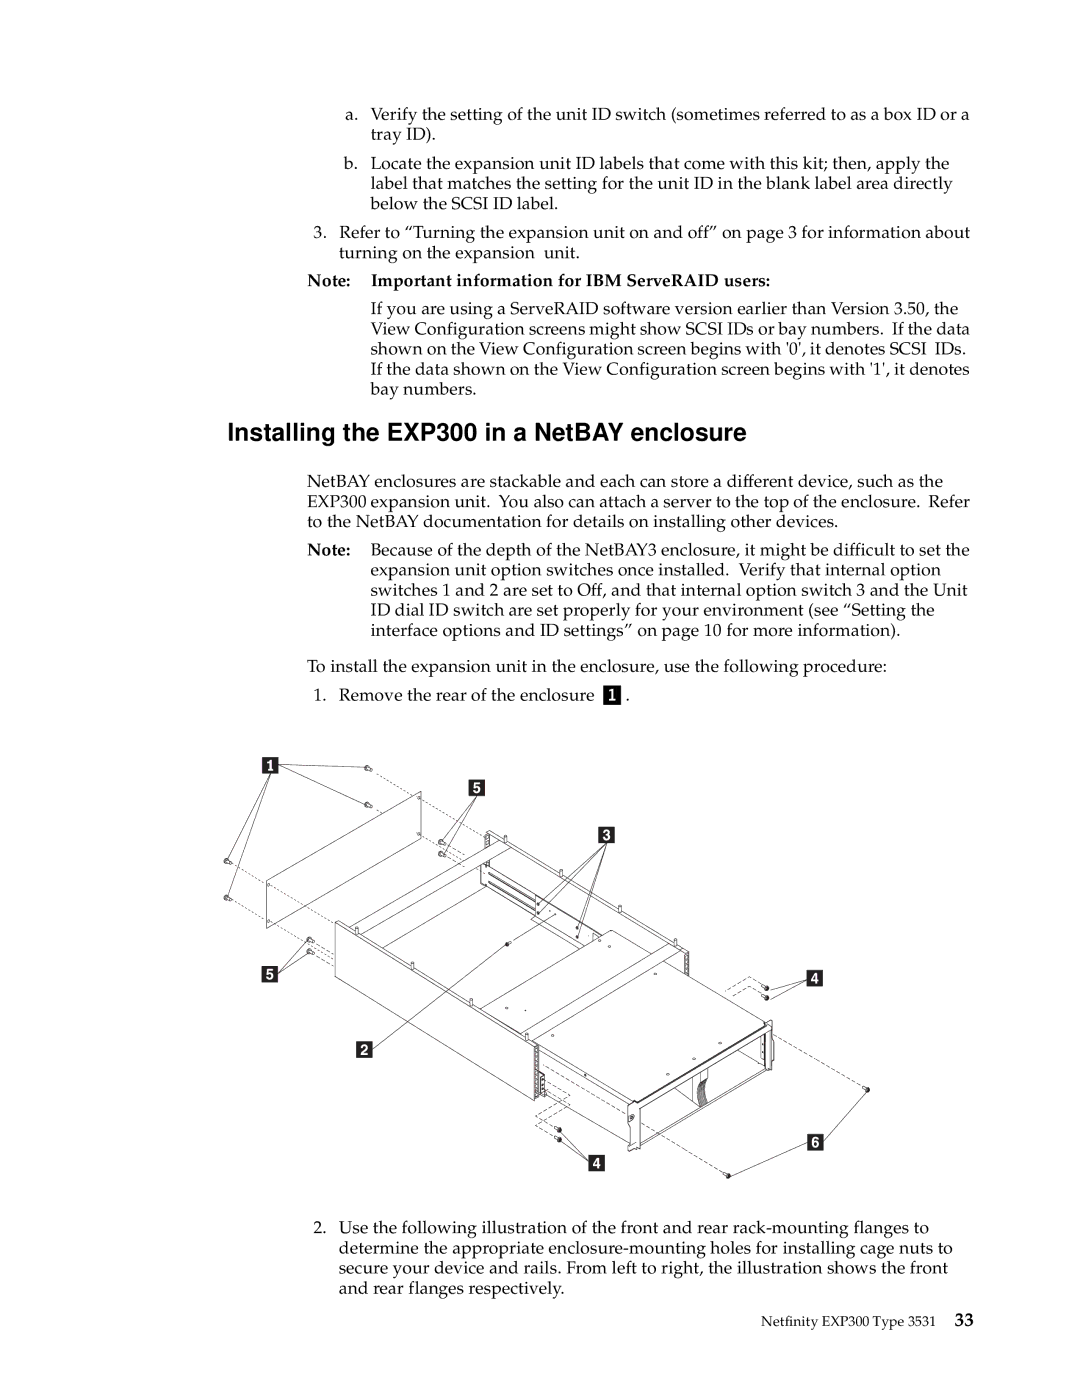
To install the expansion unit in the enclosure, use the following procedure:
1. Remove the rear of the enclosure Þ Ý.
2.Use the following illustration of the front and rear
