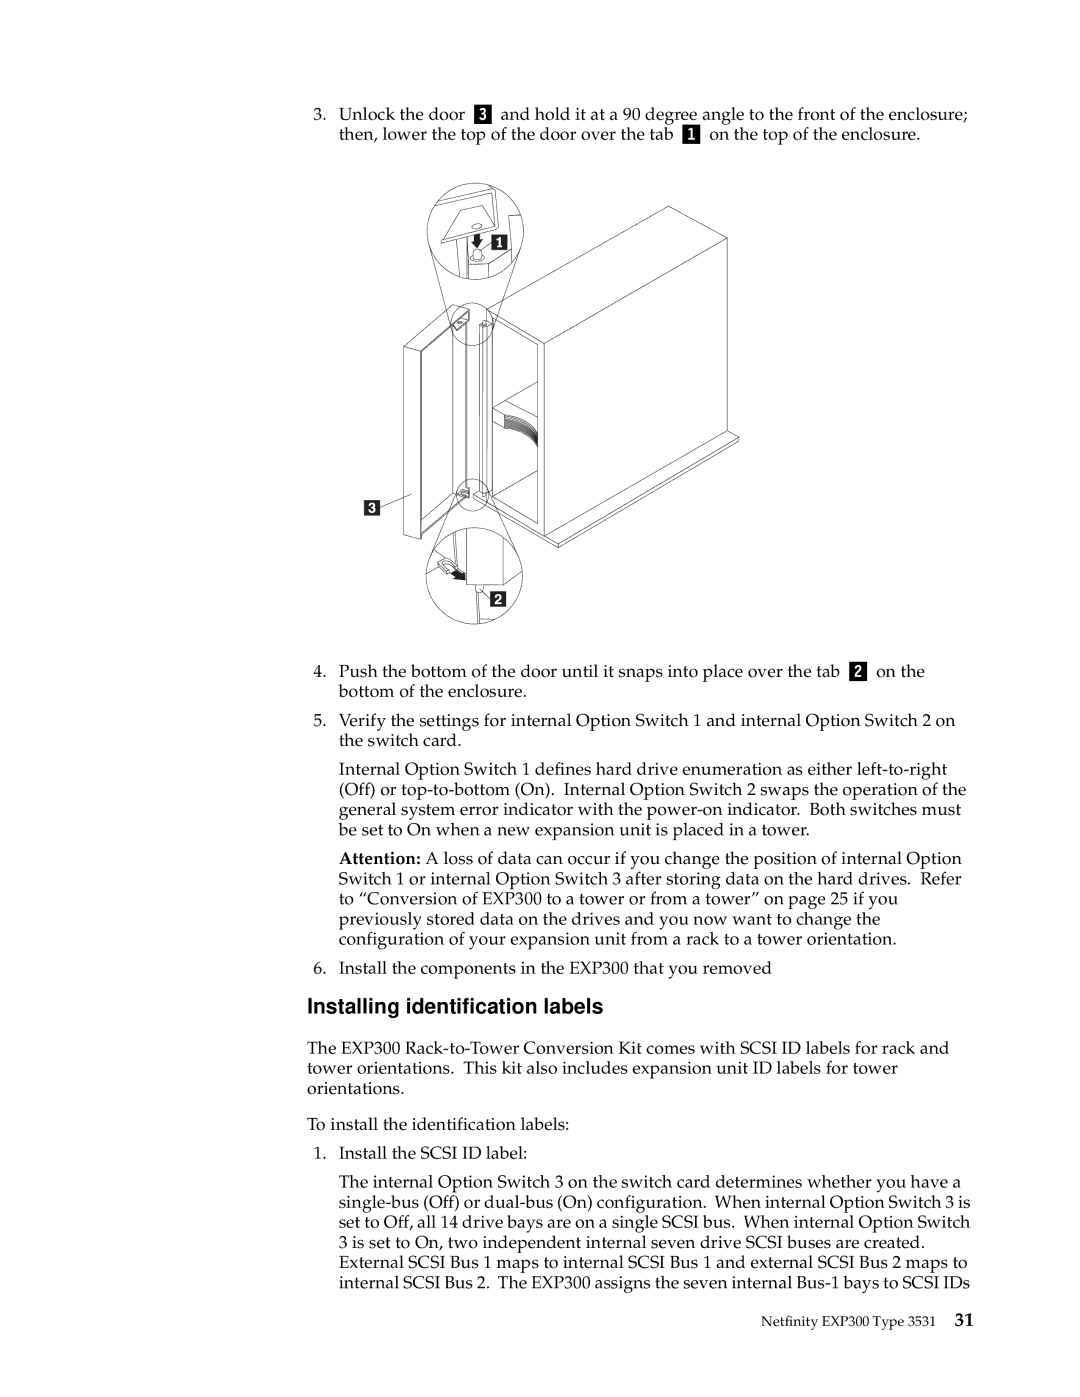
3.Unlock the door Þ Ý and hold it at a 90 degree angle to the front of the enclosure; then, lower the top of the door over the tab Þ Ý on the top of the enclosure.
4.Push the bottom of the door until it snaps into place over the tab Þ Ý on the bottom of the enclosure.
5.Verify the settings for internal Option Switch 1 and internal Option Switch 2 on the switch card.
Internal Option Switch 1 defines hard drive enumeration as either
Attention: A loss of data can occur if you change the position of internal Option Switch 1 or internal Option Switch 3 after storing data on the hard drives. Refer to “Conversion of EXP300 to a tower or from a tower” on page 25 if you previously stored data on the drives and you now want to change the configuration of your expansion unit from a rack to a tower orientation.
6.Install the components in the EXP300 that you removed
Installing identification labels
The EXP300
To install the identification labels:
1.Install the SCSI ID label:
The internal Option Switch 3 on the switch card determines whether you have a
External SCSI Bus 1 maps to internal SCSI Bus 1 and external SCSI Bus 2 maps to internal SCSI Bus 2. The EXP300 assigns the seven internal