Completing the installation
After you install the hard disk drives and power supplies, follow the instructions in this section to complete the installation. Instructions for installing the identification labels and cabling the expansion unit are included.
Installing identification labels
Your expansion unit comes with one sheet of 10 labels
Note: If you are installing the EXP300 expansion unit in a tower, refer to the information provided with the
Complete the following steps to install the SCSI identification labels:
To install the label:
1.Locate the SCSI ID label for your configuration.
Note: For a
a.Orient the label so that the printed numbers are legible from
b.Peel the backing away from the adhesive side of the label.
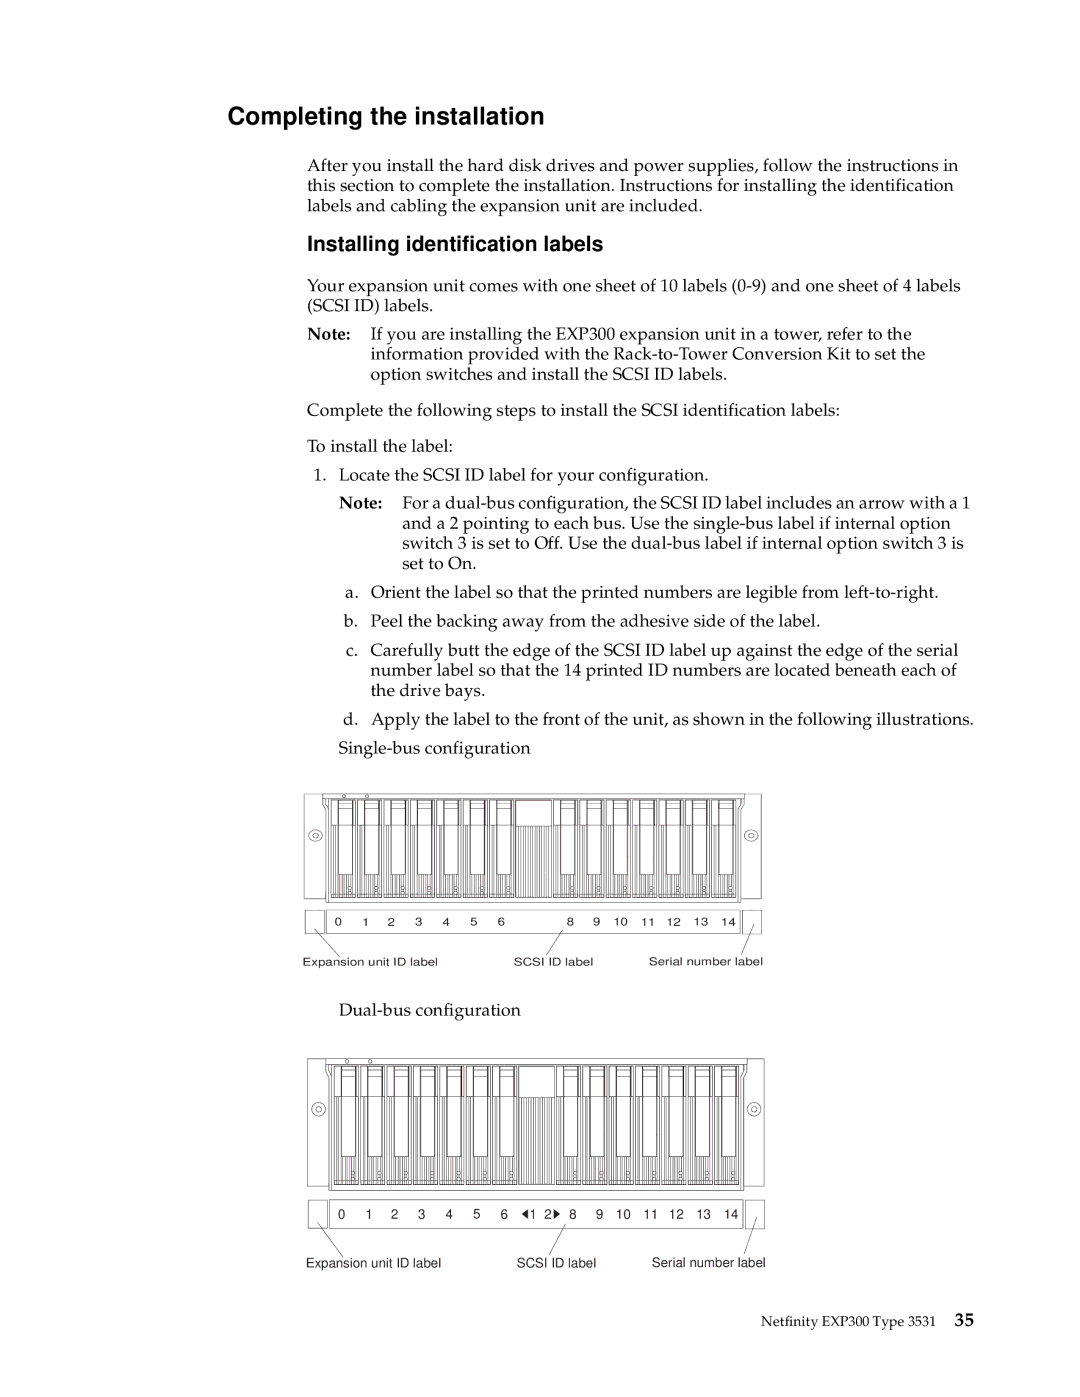
c.Carefully butt the edge of the SCSI ID label up against the edge of the serial number label so that the 14 printed ID numbers are located beneath each of the drive bays.
d.Apply the label to the front of the unit, as shown in the following illustrations.
0 | 1 | 2 | 3 | 4 | 5 | 6 | 8 | 9 | 10 | 11 | 12 | 13 | 14 |
Expansion unit ID label | SCSI ID label | Serial number label |
0 | 1 | 2 | 3 | 4 | 5 | 6 | 1 2 | 8 | 9 | 10 | 11 | 12 | 13 | 14 |
Expansion unit ID label | SCSI ID label | Serial number label |
