3.Determine the bay into which you want to install the drive.
4.Remove the filler panel.
a.Insert a finger into the square hole at the top of the filler panel to grip and pull the panel out of the drive bay.
b.Save the filler panel for later use.
5.Install the drive CRU:
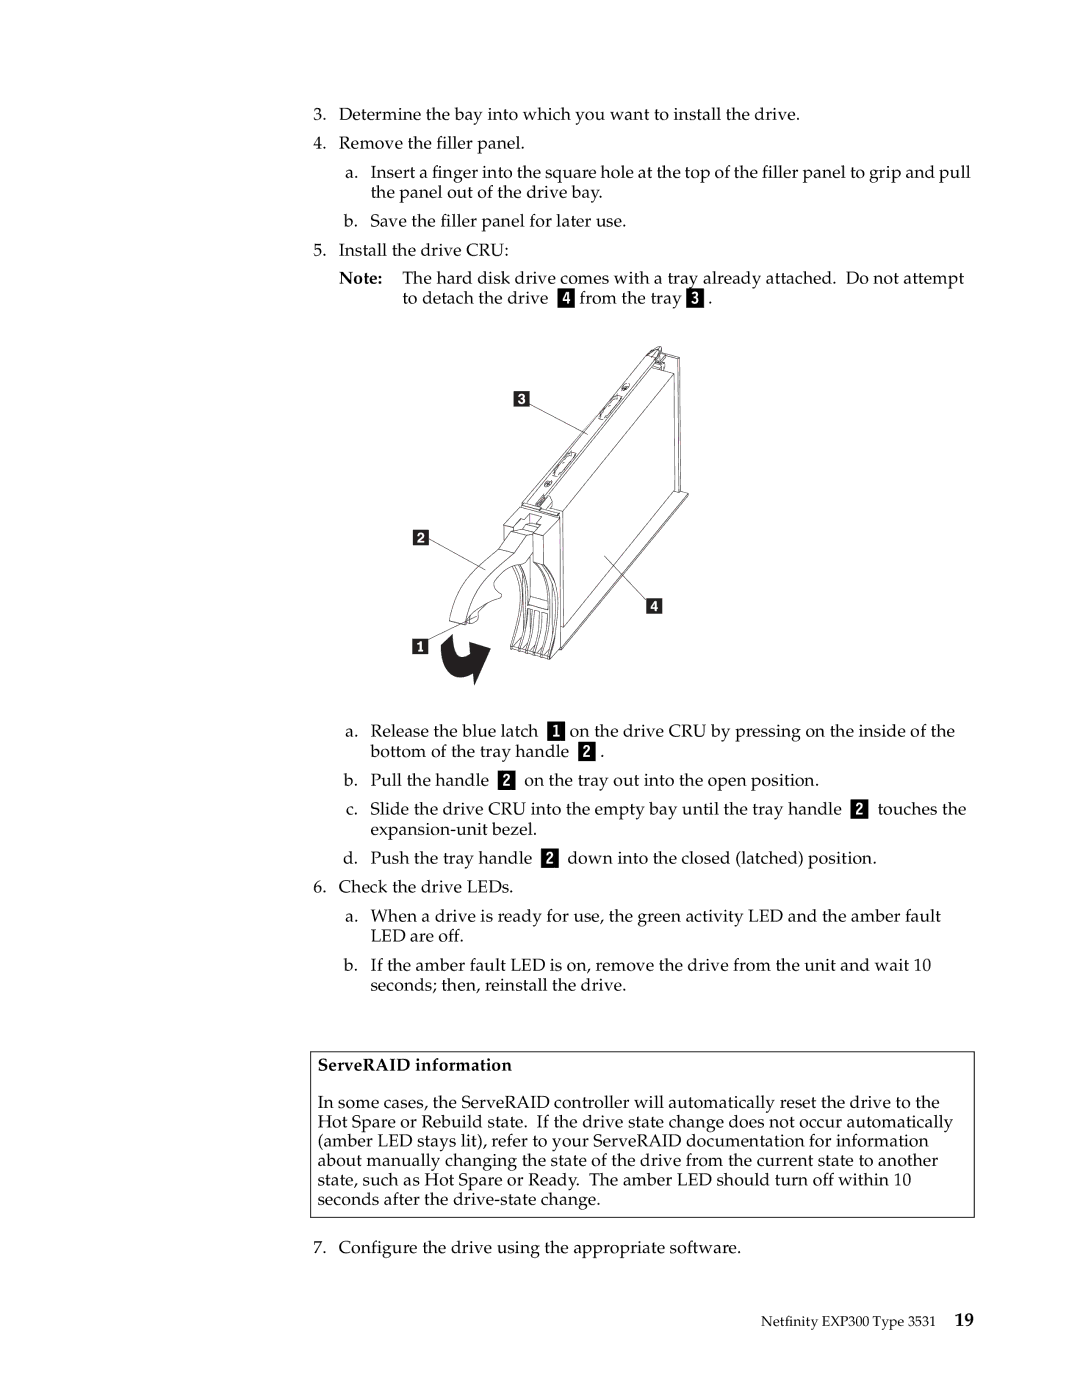
Note: The hard disk drive comes with a tray already attached. Do not attempt to detach the drive Þ Ýfrom the trayÞ Ý.
a.Release the blue latch Þ Ýon the drive CRU by pressing on the inside of the bottom of the tray handle Þ Ý.
b.Pull the handle Þ Ý on the tray out into the open position.
c.Slide the drive CRU into the empty bay until the tray handle Þ Ý touches the
d.Push the tray handle Þ Ý down into the closed (latched) position.
6.Check the drive LEDs.
a.When a drive is ready for use, the green activity LED and the amber fault LED are off.
b.If the amber fault LED is on, remove the drive from the unit and wait 10 seconds; then, reinstall the drive.
ServeRAID information
In some cases, the ServeRAID controller will automatically reset the drive to the Hot Spare or Rebuild state. If the drive state change does not occur automatically (amber LED stays lit), refer to your ServeRAID documentation for information about manually changing the state of the drive from the current state to another state, such as Hot Spare or Ready. The amber LED should turn off within 10 seconds after the
7. Configure the drive using the appropriate software.
Netfinity EXP300 Type 3531 19