Getting Started | 1 |
|
|
Preparing the Printer for Installation
Before connecting your printer to your data collection system, you need to
•Plug in the printer.
•Open the printer and load media.
•Print a configuration test label.
Plugging In the Printer
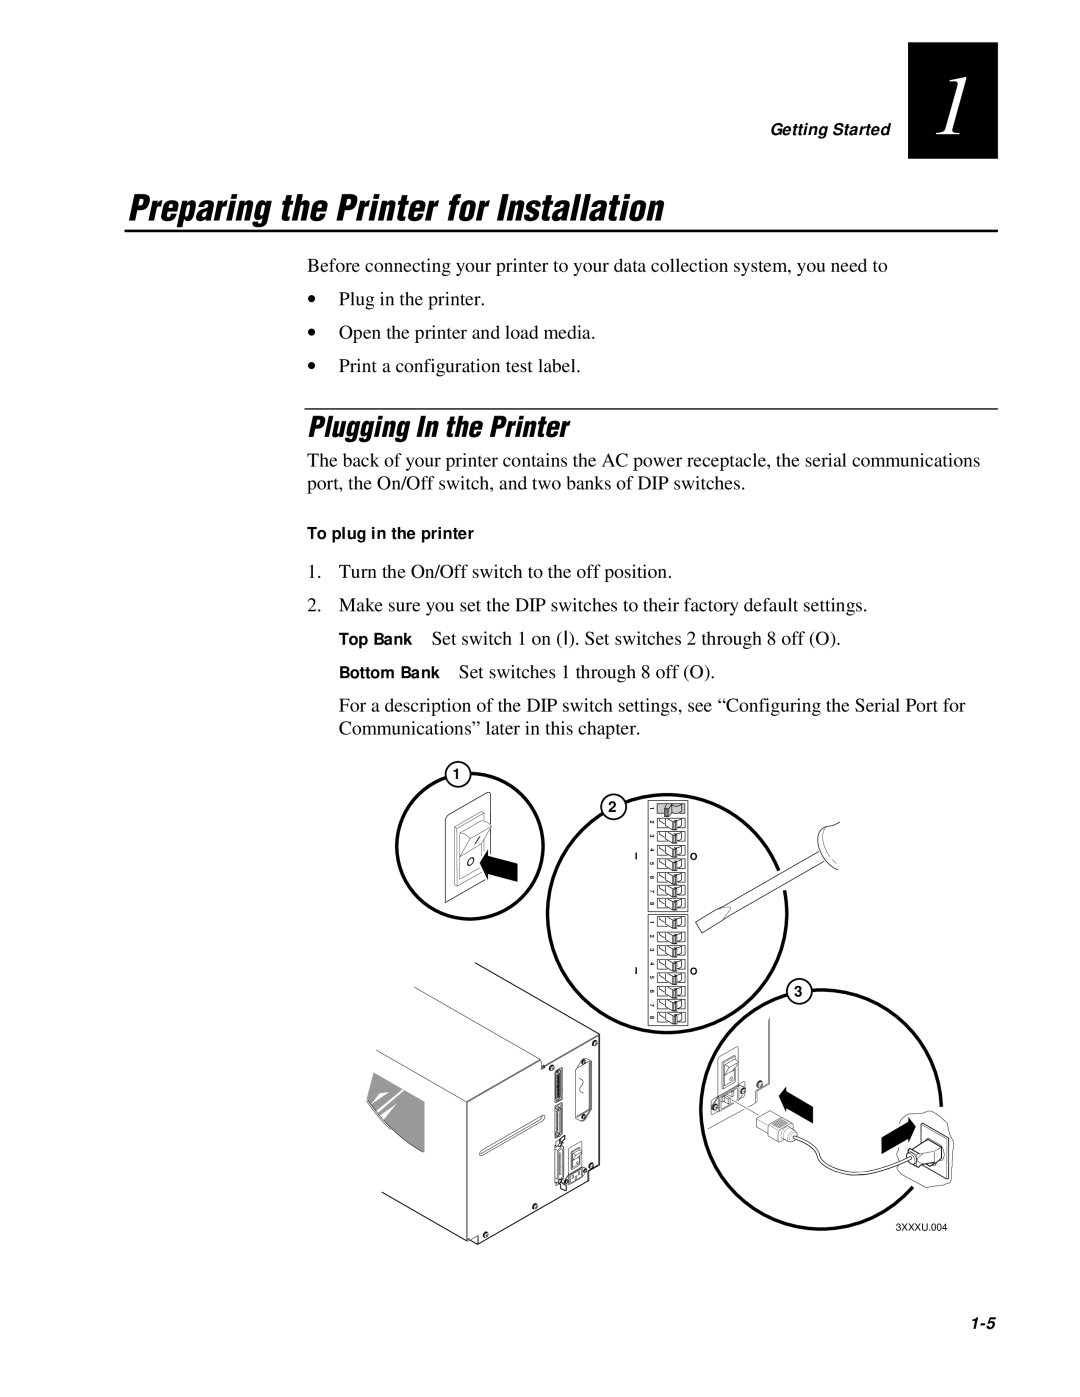
The back of your printer contains the AC power receptacle, the serial communications port, the On/Off switch, and two banks of DIP switches.
To plug in the printer
1.Turn the On/Off switch to the off position.
2.Make sure you set the DIP switches to their factory default settings.
Top Bank Set switch 1 on (I). Set switches 2 through 8 off (O).
Bottom Bank Set switches 1 through 8 off (O).
For a description of the DIP switch settings, see “Configuring the Serial Port for Communications” later in this chapter.
1
I ![]()
O
1 2 |
3 4 |
5 6 |
7 8 |
1 2 3 4 5 6 7 8
2 | 1 |
| 2 |
| 3 |
| 4 |
IO
| 5 |
| 6 |
| 7 |
| 8 |
| 1 |
| 2 |
| 3 |
I | 4 |
O | |
| 5 |
| 6 |
| 7 |
| 8 |
I
O
3
I
O
3XXXU.004
