Operating the Printer | 2 |
|
|
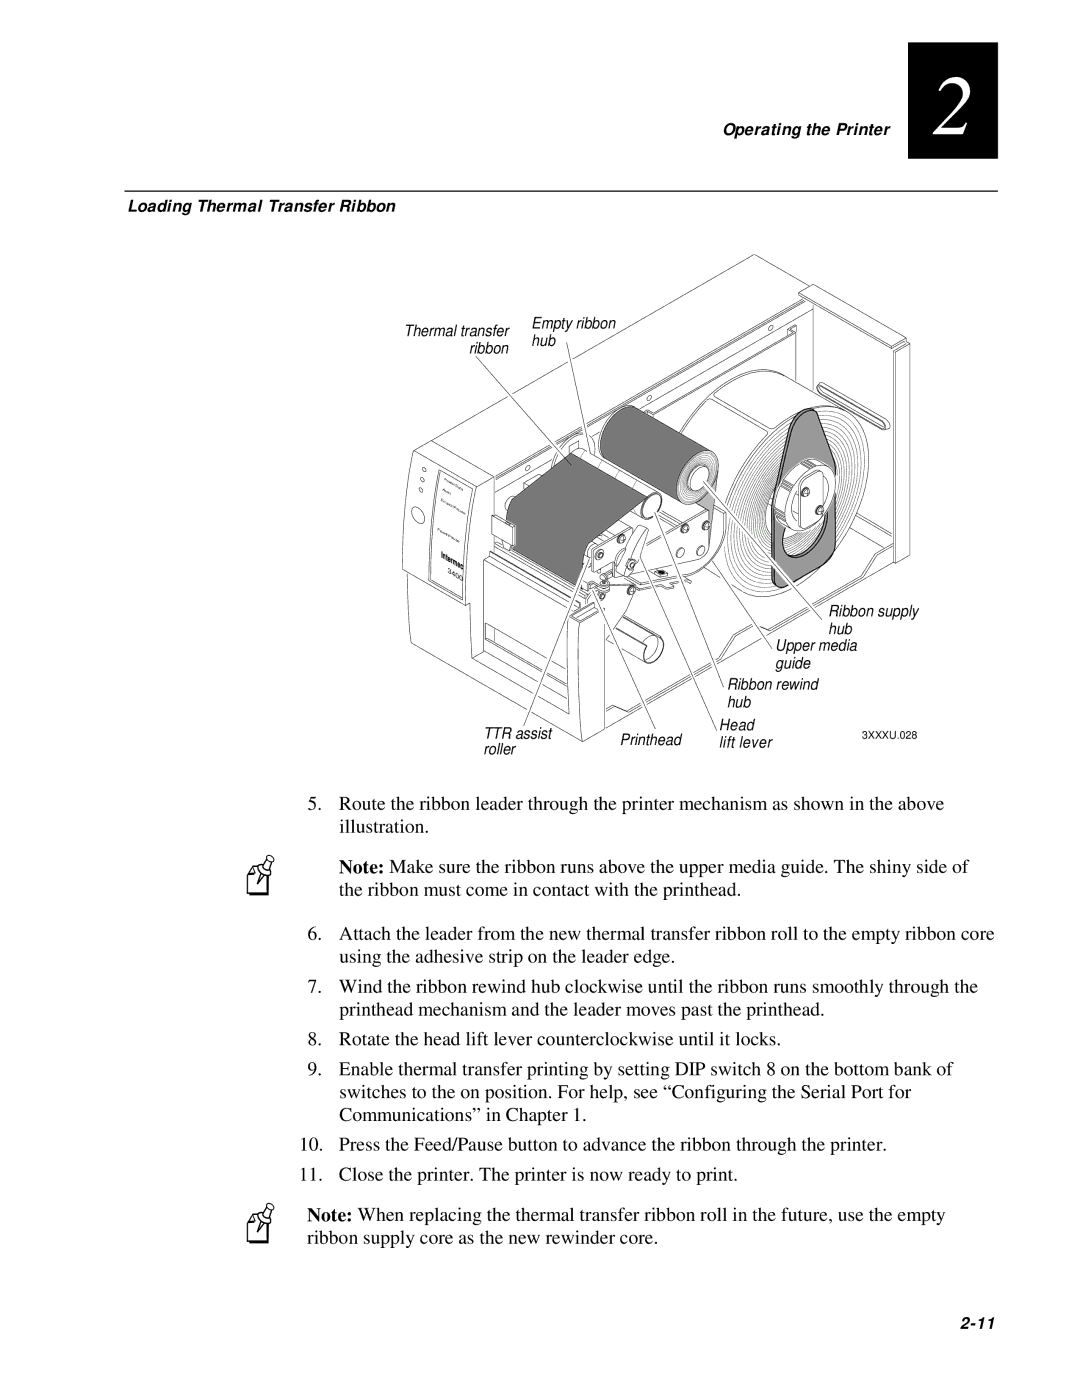
Loading Thermal Transfer Ribbon
Thermal transfer | Empty ribbon | |
hub | ||
ribbon | ||
|
P |
|
| |
| owe | r/Data | |
A | lert | ||
|
|
| |
E |
|
|
|
mpt |
|
| |
| y/ |
| |
|
| P | |
|
|
| au |
|
|
| se |
Fe |
|
|
|
ed/ |
|
| |
| P |
|
|
| au | ||
nter | se | ||
| |||
I |
| mec | |
|
| ||
| 3400 | ||
Ribbon supply hub
Upper media guide
Ribbon rewind hub
TTR assist | Printhead | Head | 3XXXU.028 | |
lift lever | ||||
roller |
| |||
|
|
|
5.Route the ribbon leader through the printer mechanism as shown in the above illustration.
Note: Make sure the ribbon runs above the upper media guide. The shiny side of the ribbon must come in contact with the printhead.
6.Attach the leader from the new thermal transfer ribbon roll to the empty ribbon core using the adhesive strip on the leader edge.
7.Wind the ribbon rewind hub clockwise until the ribbon runs smoothly through the printhead mechanism and the leader moves past the printhead.
8.Rotate the head lift lever counterclockwise until it locks.
9.Enable thermal transfer printing by setting DIP switch 8 on the bottom bank of switches to the on position. For help, see “Configuring the Serial Port for Communications” in Chapter 1.
10.Press the Feed/Pause button to advance the ribbon through the printer.
11.Close the printer. The printer is now ready to print.
Note: When replacing the thermal transfer ribbon roll in the future, use the empty ribbon supply core as the new rewinder core.