Operating the Printer | 2 |
|
|
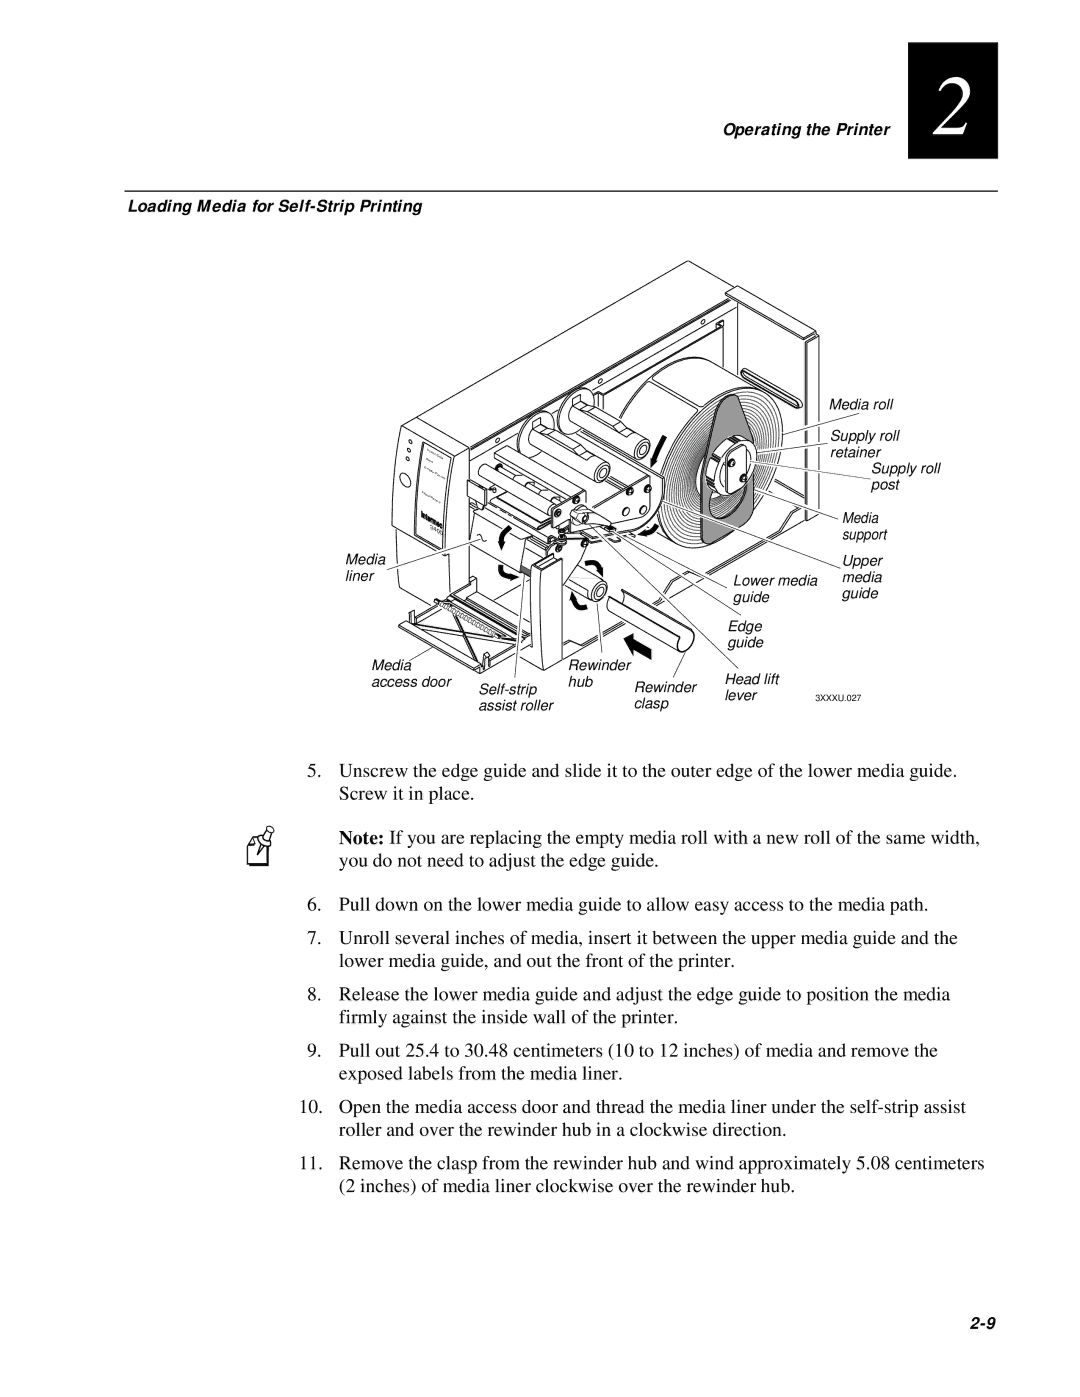
Loading Media for Self-Strip Printing
P |
|
| ||
| ow | er/Da |
| |
A | lert | ta | ||
| ||||
Em |
|
| ||
| pty |
| ||
|
| /P |
| |
|
| au | ||
|
|
| se | |
F |
|
|
| |
ee |
|
|
| |
d/P |
|
| ||
| au |
| ||
|
| se |
| |
ntermec | ||||
I |
|
|
| |
| 3400 | |||
Media liner
Media access door
➤
➤![]()
|
| Media roll |
|
| Supply roll |
| ➤ | retainer |
| Supply roll | |
|
| |
|
| post |
|
| Media |
| ➤ | support |
|
| Upper |
| ➤ | media |
| Lower media | |
➤ | guide | guide |
Edge guide
Rewinder
hubHead lift Rewinder
clasp lever 3XXXU.027
5.Unscrew the edge guide and slide it to the outer edge of the lower media guide. Screw it in place.
Note: If you are replacing the empty media roll with a new roll of the same width, you do not need to adjust the edge guide.
6.Pull down on the lower media guide to allow easy access to the media path.
7.Unroll several inches of media, insert it between the upper media guide and the lower media guide, and out the front of the printer.
8.Release the lower media guide and adjust the edge guide to position the media firmly against the inside wall of the printer.
9.Pull out 25.4 to 30.48 centimeters (10 to 12 inches) of media and remove the exposed labels from the media liner.
10.Open the media access door and thread the media liner under the
11.Remove the clasp from the rewinder hub and wind approximately 5.08 centimeters (2 inches) of media liner clockwise over the rewinder hub.