Checking | the | Operational | Charging: |
| To | |
check operational charging, | use a discharged ba | |||||
or a | Battery | that | has less | than 50% of the to | ||
remaining | when | installed in | the | computer. | ||
Perform operational charging. If the battery st does not turn on, remove the Battery and let i room temperature. Reinstall the Battery.
If the charge indicator still does not turn on, Battery. If the charge indicator still does no replace the
Checking | the | Battery: | Battery charging will not |
start | until | the | |
total power remains; with this condition, the Bat charge to 100% of its capacity. This protects from being overcharged or having a shortened
Do the following:
1.Power off the computer.
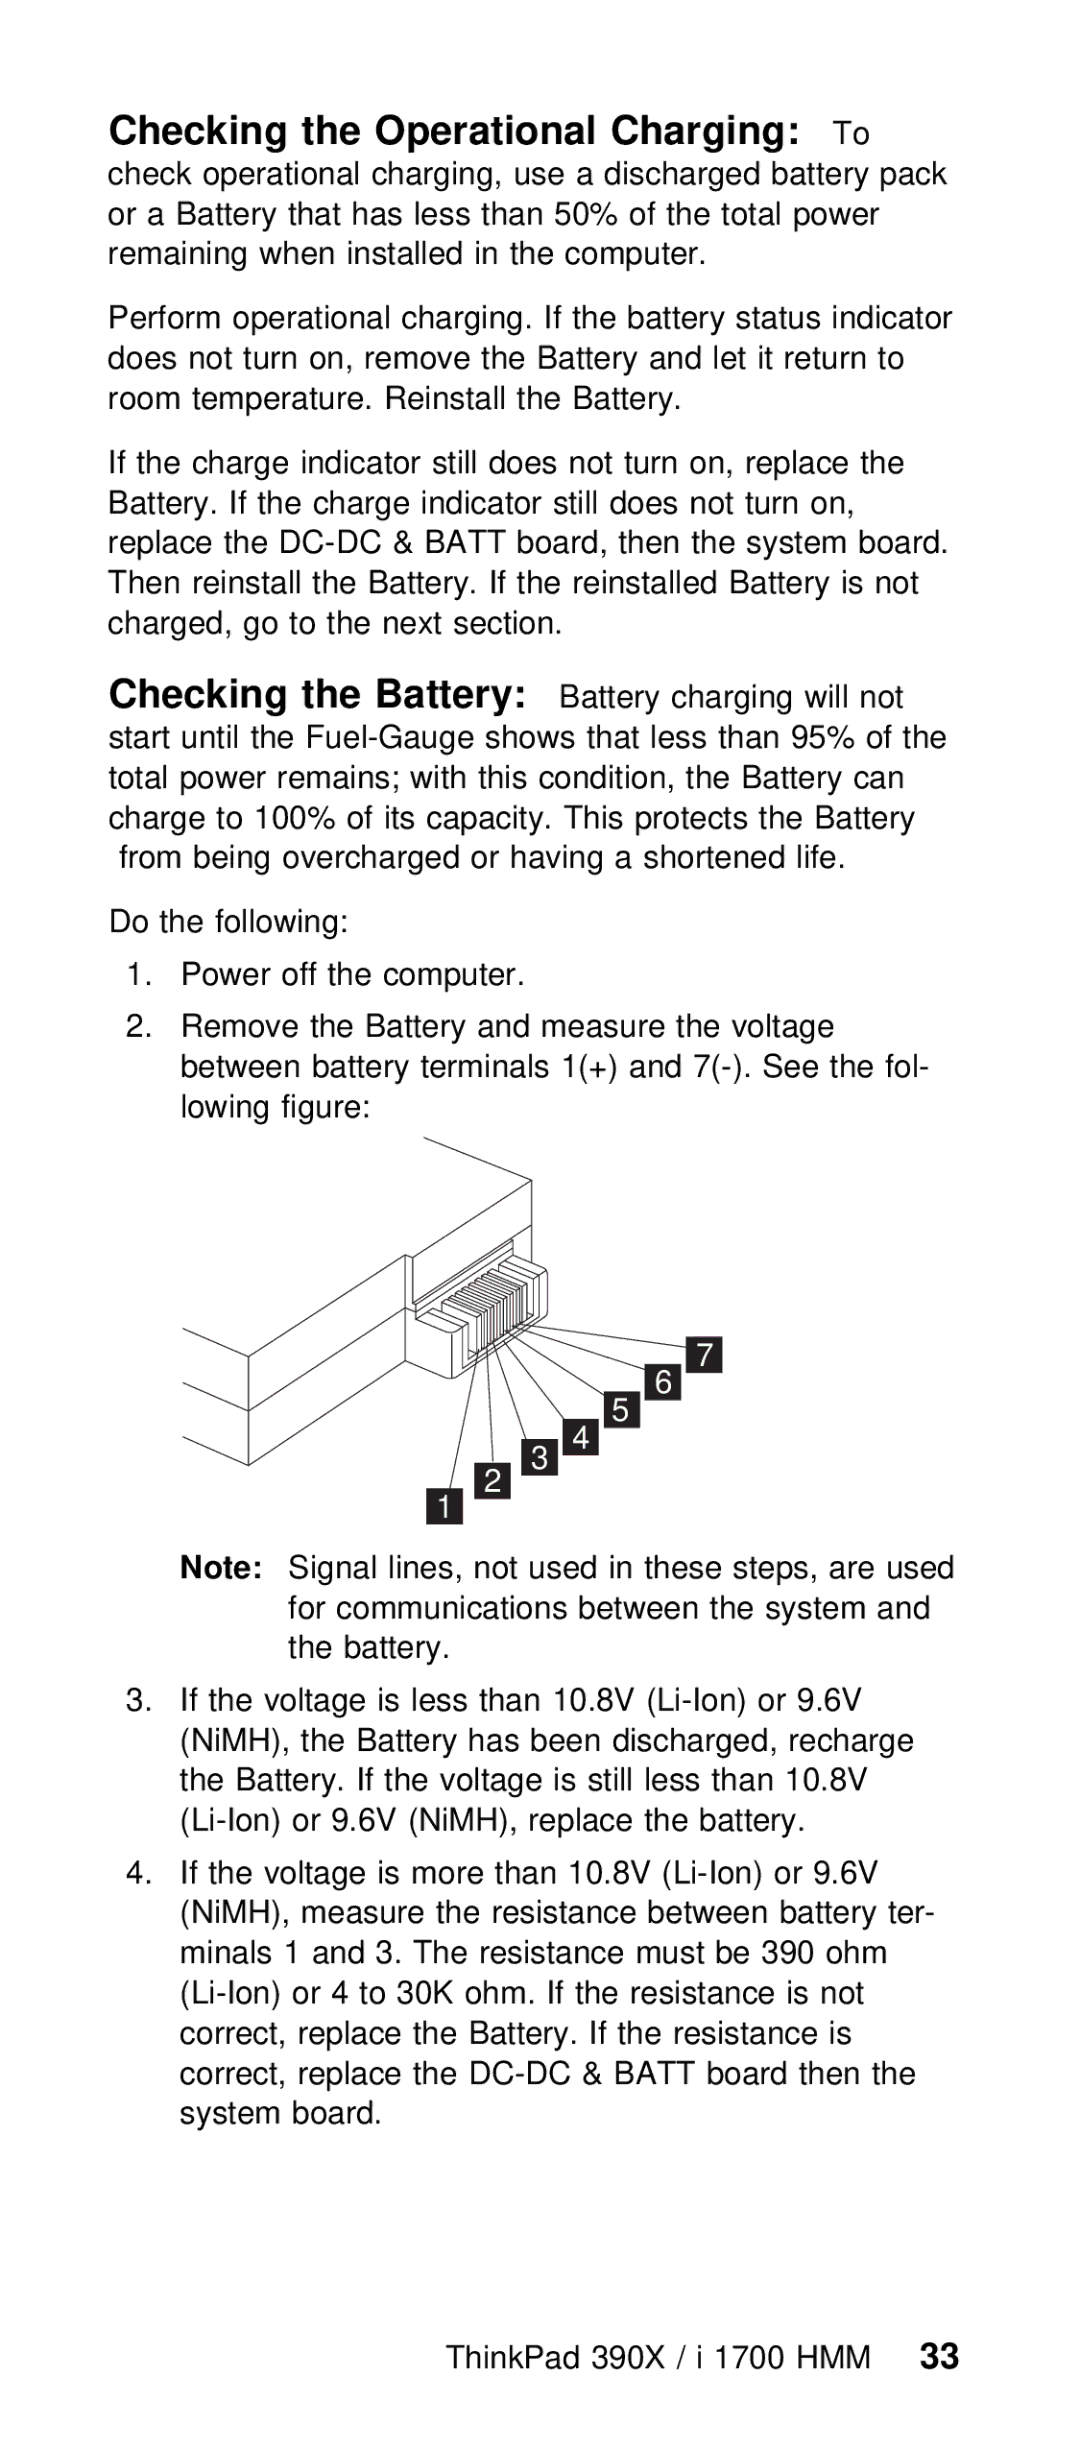
2.Remove the Battery and measure the voltage between battery terminals 1(+) and
|
|
|
|
|
|
|
|
|
|
|
|
|
|
|
|
|
|
|
|
|
|
|
|
|
| 6 |
|
|
| ||
|
|
|
|
|
|
| 5 | ||||||||
|
|
|
|
|
|
|
|
|
|
|
|
|
|
| |
|
|
|
|
|
|
| 4 | ||||||||
|
|
|
|
|
|
|
|
|
|
|
|
|
|
| |
|
|
| 3 | ||||||||||||
|
|
|
|
|
|
|
|
|
|
|
| ||||
Note: Signal | 2 |
|
|
|
|
|
|
|
|
| |||||
|
|
|
|
|
|
|
|
|
|
|
|
|
| ||
|
|
|
|
|
|
|
|
|
|
|
|
|
|
| |
lines, not used in these steps, a | |||||||||||||||
for | communications between the system an | ||||||||||||||
the | battery. |
|
|
|
|
|
|
|
|
| |||||
3.If the voltage is less than 10.8V
4.If the voltage is more than 10.8V
ThinkPad 390X / i 1700 33HMM