PCMCIA Slots
Ÿ“Battery” on page 61
Ÿ “Hard Disk Drive” on page 62
Ÿ“Keyboard” on page 70
Ÿ“Upper Heatsink” on page 73
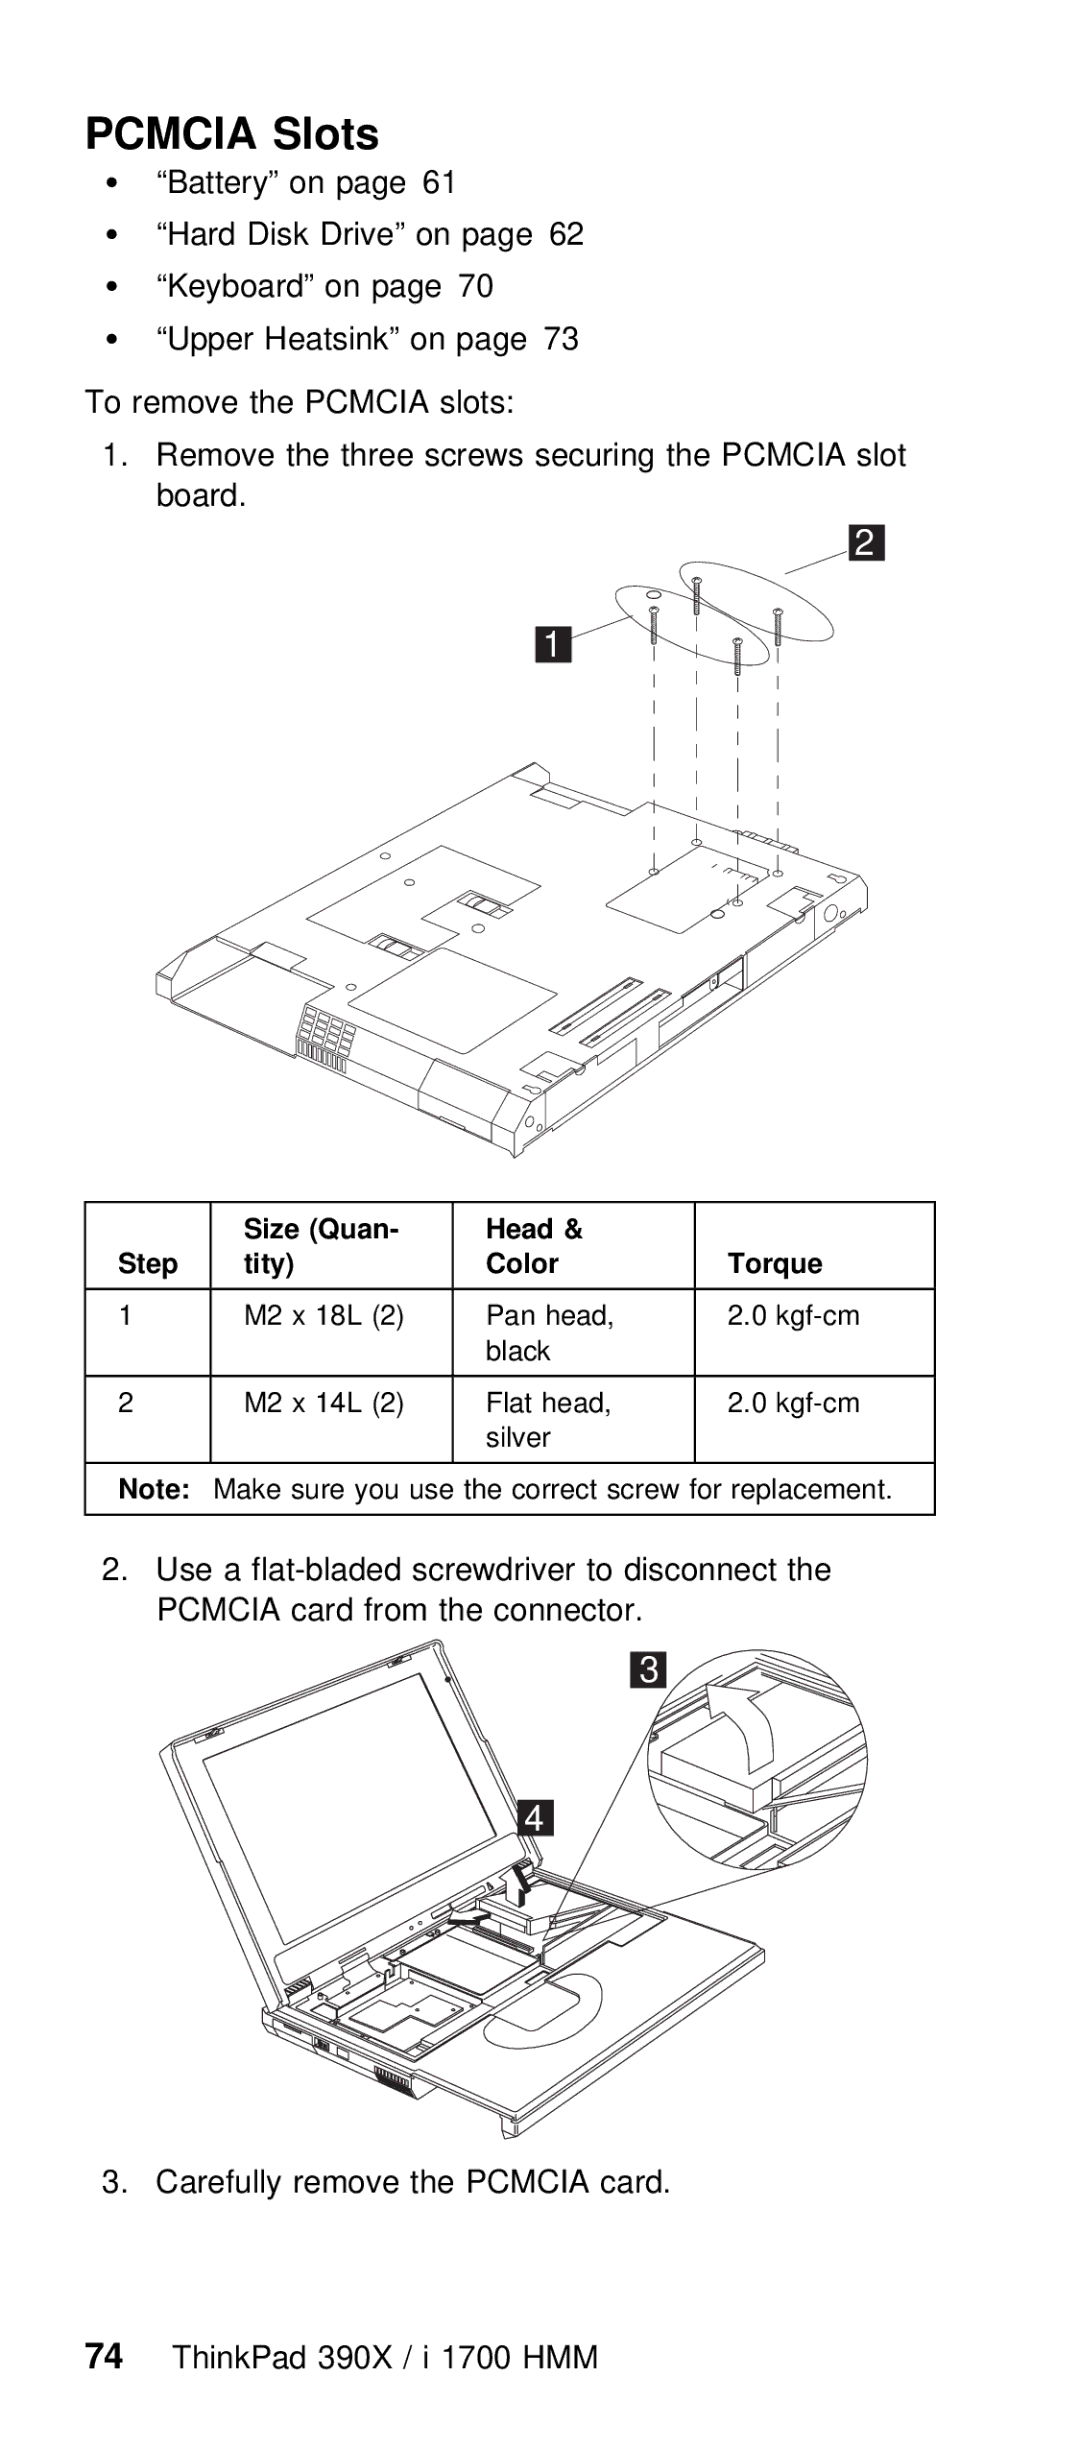
To remove the PCMCIA slots:
1.Remove the three screws securing the PCMCIA board.
1 ![]()
| Size | (Quan- |
| Head | & |
|
|
| |
Step | tity) |
|
| Color |
| Torque |
|
| |
|
|
|
|
|
|
|
|
|
|
1 | M2 | x | 18L | (2) | Pan | head, | 2.0 |
| |
|
|
|
|
| black |
|
|
| |
|
|
|
|
|
|
|
|
| |
2 | M2 | x | 14L | (2) Flat | head, | 2.0 |
| ||
|
|
|
|
| silver |
|
|
| |
|
|
|
|
|
|
|
|
| |
Note: | Make | sure you | use | the correct | screw for replac | ||||
|
|
|
|
|
|
|
|
|
|
2. Use a
3
4
3. Carefully remove the PCMCIA card.
74 ThinkPad 390X / i 1700 HMM